A
CCESSING
THE
C
YBER
SWITCH
O
VERVIEW
This chapter describes accessing your CyberSWITCH, which includes:
•
making proper connections
•
establishing an administration session
•
accessing Release Notes
M
AKING
C
ONNECTIONS
There are a number of ways to make a connection to the system, which include:
•
direct connection using a keyboard and monitor
•
null-modem connection using a null-modem cable and a PC with Carbon Copy
•
remote connection using Telnet
•
remote connection using a modem, a remote PC, and one of the following:
a.
Carbon Copy software
b.
PPP Dial-Up Networking software
D
IRECT
C
ONNECTION
If you only need to configure or manage the CyberSWITCH in a local environment, the simplest
access is through a direct connection. The CyberSWITCH is configured to support a PS/2 or AT-
style keyboard and a VGA 15-pin monitor.
Physical Connections:
1.
Attach keyboard plug to the keyboard connector located on the back of the CyberSWITCH.
2.
Attach monitor cable to the local monitor port located on the back of the CyberSWITCH.
Note:
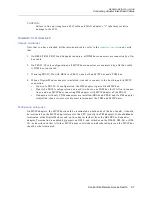
The CSX7000 uses a breakout box for these connections. Refer to the Local Console
Connection description in the CSX7000 Guide. For the location of the keyboard connector
and local monitor port for other platforms, refer to the
Hardware Overview
chapter.
Powering On:
1.
The rear panel on the system provides an AC input power socket. Plug the standard power
cord (supplied with the system) into this power socket.
CAUTION:
Some platforms may have a line voltage select switch on the rear panel. If you are using such a
platform, make sure that this switch is set for the correct AC input power source. When
changing the line voltage select switch, make sure the AC power cord is unplugged.
2.
Ensure that the POWER-ON button on the CyberSWITCH is in the OFF position.
3.
Ensure that the monitor and keyboard are connected to the proper connectors at the rear panel.
4.
Plug the power cord into a grounded electrical outlet.
5.
Plug the monitor power cord into a proper electrical outlet.

