background image


7-9 PnP/PCI 

Configurations 

This section describes configuring the PCI bus system.    PCI, or 

P

ersonal 

C

omputer 

I

nterconnect, is a system, which allows I/O devices to operate at 

speeds nearing the speed the CPU itself uses when communicating with its 
own special components.    This section covers some very technical items 
and it is strongly recommended that only experienced users should make any 
changes to the default settings. 

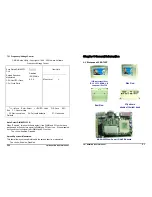
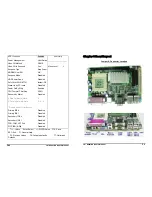
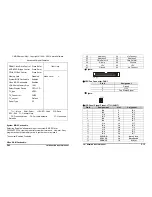
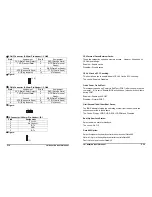
CMOS Setup Utility – Copyright © 1984 - 2001 Award Software 

PnP/PCI Configurations 

PNP OS Installed 

Reset Configuration Data 


Resources Controlled By 

X   IRQ Resources 

X   DMA Resources 


PCI/VGA Palette Snoop 

PCI Latency Timer (CLK)


No 

Disabled 


Auto (ESCD) 

Press Enter 

Press Enter


Disabled               

32


            Item Help 

______________________ 


Menu Level      

¾


Default is Disabled.  Select 

Enabled to reset Extended 

System Configuration Data 

(ESCD) when you exit 
Setup if 

you have installed a new 
add-on 

and the system 
reconfiguration 

has caused such a serious 

conflict that the OS cannot 
boot 


↑↓←→

Move   Enter: Select   +/-/PU/PD: Value   F10: Save ESC: Exit   

F1: General Help   

  F5: Previous Values  F6: Fail-safe defaults   F7: Optimized Defaults 


15” Panel PC User’s Manual 

P5 


Chapter 2


Hardware Installation Process 


2-1 CPU 

Installation 

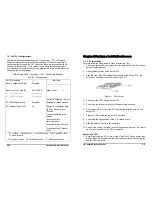
Carefully follow the steps below in order to install the CPU: 
1.  Check and confirm that the jumpers are correctly set for the CPU you are 

going to install (figure 3). 

 
2.  Lift the releasing lever of the Socket 370. 
 
3.  Align the pins of the CPU against the pinholes of the Socket 370.    Be 

sure to pay attention to the orientation of the CPU.     


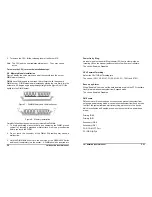
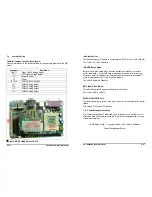
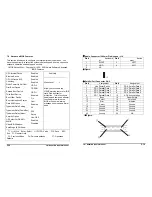
Figure 3:  CPU Socket 

 
4.  Push down the CPU into the Socket 370. 
 
5.  Push down the release lever and lock it against the key hook. 
 
6.  Hook the hole in ZIF clip for the CPU cooling fan onto the notch on the 

socket 370. 

 
7.  Place the CPU cooling fan atop the CPU surface. 
 
8.  Push down the opposite side of the ZIF clip and hook it. 
 
9.  Slide the head of the clip to left and lock it. 
 
10. Connect the cooling fan cable to the socket as shown below.    Be careful 

not to place the cable on the CPU cooling fan. 


Removing a CPU: 

1.  Before removing the CPU, turn off the NASA-6822 Series power; then 

wait for about 20 minutes until the heat radiation plate of the cooling fan 
and the CPU cool down. 

P52 

15” Panel PC User’s Manual


Summary of Contents for PPC-712T

Page 1: ...User s Manual INSTALLATION GUIDE PPC 712T 7 TFT Low Power 1GHz Panel PC...

Page 2: ...mation Save to CMOS and EXIT Y N Y Pressing Y stores the selections made in the menus in CMOS a special section of memory that stays on after you turn your system off The next time you boot your compu...

Page 3: ...entium and MMX are registered trademarks of Intel Corporation ENTER PASSWORD Installation Guide Revision 00 Microsoft and Windows are registered trademarks of Microsoft Corporation Type the password u...

Page 4: ...7 11 Frequency Voltage Control 56 7 12 Load Fail Safe Defaults 57 7 13 Load Optimized Defaults 57 7 14 Supervisor User Password Setting 58 7 15 Exit Selecting 59 15 Panel PC User s Manual P57 CPU Hos...

Page 5: ...O ports are shown at the right hand NASA 6822 Low Power 1GHz EBX board 15 Panel PC User s Manual P1 Chapter 1 General Information 1 1 Pictures of PPC 712T F5 Previous Values F6 Fail safe defaults F7 O...

Page 6: ...l sheet 1 3 Embedded Board Features Socket 370 for Intel Celeron Pentium VIA C3 processor VIA VT8623 VT8235 AGPset CLE266 Support 512MB DDR SDRAM Max Memory Front Side Bus Frequency 100 133 MHz VIA VT...

Page 7: ...13RPM 1 48V 1 72V 3 28V 4 97V 12 03V 12 36V 4 99V 3 07V 4 63V Item Help _______________________ Menu Level Move Enter Select PU PD Value F10 Save ESC Exit F1 General Help F5 Previous Values F6 Fail sa...

Page 8: ...the capacity to automatically configure all of the boot and Plug and Play compatible devices However this capability means absolutely nothing unless you are using a Plug and Play operating system suc...

Page 9: ...ave ESC Exit F1 General Help F5 Previous Values F6 Fail safe defaults F7 Optimized Defaults 15 Panel PC User s Manual P5 Chapter 2 Hardware Installation Process 2 1 CPU Installation Carefully follow t...

Page 10: ...rm When Enabled your can set the date and time at which the RTC real time clock alarm awakens the system from Suspend mode The choice Enabled Disabled PM Events PM events are I O events whose occurren...

Page 11: ...ch end of the DIMM over the retaining post at each end of the DIMM socket 4 If you install two DIMMs install the second DIMM using the same procedure as above 5 If DIMM does not go in smoothly do not...

Page 12: ...t Doze Mode 1 hr Standby Mode 1 hr Suspend Mode 1 hr and HDD Power Down 15 min Max Power Saving Maximum power management ONLY AVAILABLE FOR SL CPU s Doze Mode 1 min Standby Mode 1 min Suspend Mode 1 m...

Page 13: ...y IDE 1 Secondary IDE 0 Secondary IDE 1 FDD COM LPT Port PCI PIRQ A D Enabled User Define DPMS Yes Stop Grant NA Disabled Disabled Instant Off Disabled Enabled 50 0 Disabled 0 0 0 0 Disabled Disabled...

Page 14: ...multiple sector read write If your IDE hard drive supports block mode most new drives do select Enabled for automatic detection of the optimal number of block read writes per sector the drive can supp...

Page 15: ...formance In Auto mode the system automatically determines the best mode for each device COM2 RS232 422 485 Setting Select JP2 J6 J7 J8 Function 1 2 2 3 1 2 2 3 1 2 3 4 RS 232 On Off Off On Off Off RS...

Page 16: ...imary Slave PIO IDE Secondary Master PIO IDE Secondary Slave PIO IDE Primary Master UDMA IDE Primary Slave UDMA IDE Secondary Master UDMA IDE Secondary Slave UDMA OnChip PCI Device USB Controller USB...

Page 17: ...S Panel Signal Connectorr JVGA VGA Signal Pin Header Connector JCOM1 COM1 Pin Header Connector COM3 COM3 Pin Header Connector COM4 COM4 Pin Header Connector IR1 IR Pin Header Connector J10 Audio Pin H...

Page 18: ...Ground 31 IRQ 15 32 No Connect 15 Panel PC User s Manual P43 Select Enabled allows caching of the video BIOS resulting in better system performance However if any program writes to this memory area a...

Page 19: ...Level Move Enter Select PU PD Value F10 Save ESC Exit F1 General Help F5 Previous Values F6 Fail safe defaults F7 Optimized Defaults y Figure ID E 2 CPU Fan Connector FAN1 Pin Assignment 1 Ground 2 1...

Page 20: ...The choice Non OS2 OS2 Video BIOS Shadow Set Video BIOS Shadow to memory The choice Enabled Disabled Small Logo EPA Show Set the Logo EPA show or not The choice Enabled Disabled 7 6 Advanced Chipset...

Page 21: ...ect whether the password is required every time the system boots or only when you enter setup JCOM1 Connector 2 00mm Pin Header JCOM1 System The system will not boot and access to Setup will be denied...

Page 22: ...se two categories speed up memory access However it depends on CPU chipset design Enabled Enable cache Disabled Disable cache CPU L2 Cache ECC Checking This item allows you to enable disable CPU L2 Ca...

Page 23: ...Enabled Enabled HDD 0 CDROM HDD 1 Enabled On Fast Enabled 30 250 Setup Non OS2 Enabled Disabled Item Help _______________________ Menu Level Allow you to choose the VIRUS warning feature for IDE Hard...

Page 24: ...et you select the number of cylinders heads etc Note PRECOMP 65535 means NONE Capacity Options Auto Display your disk drive size Disk drive capacity Approximated Note that this size is usually slightl...

Page 25: ...eneral Help F5 Previous Values F6 Fail safe defaults F7 Optimized Defaults COM1 RS 232 Serial Port Connector D SUB 9 pin Male COM1 2 Pin Assignment Pin Assignment 1 DCD Data Carrier Detect 2 RXD Recei...

Page 26: ...ive Data 7 NC 4 NC 8 NC USB 1 VCC 2 USB Data 3 USB Data 4 Ground y Figure LAN1 USB3 4 Connector U13 LAN Pin Assignment Pin Assignment 1 Transmit Data 5 NC 2 Transmit Data 6 Receive Data 3 Receive Data...

Page 27: ...r Signal 2 Green Color Signal 3 Blue Color Signal 4 NC 5 Ground 6 Ground 7 Ground 8 Ground 9 NC 10 Ground 11 NC 12 VGA DDA 13 H Sync 14 V Sync 15 SPCLK IDE Secondary Master Options are in its sub menu...

Page 28: ...ndard CMOS Features Date mm dd yy Time hh mm ss IDE Primary Master IDE Primary Slave IDE Secondary Master IDE Secondary Slave Video Halt On Based Memory Extended Memory Total Memory Mon Aug 6 2003 16...

Page 29: ...details 4 1 Usable Temperature Range 4 2 Storage Temperature Range 4 3 Input Method 5 Electrical Specifications 5 1 Linearity Supervisor User Password 5 2 Insulation Resistance Use this menu to set U...

Page 30: ...0 Humidity 90 RH or lower no dew condition shall be acceptable Use this menu to change the values in the chipset registers and optimize your system s performance See section 4 for the details 4 3 Inpu...

Page 31: ...7 Optical Specifications 7 1 Light Transmittance Total Transmittance More than 78 Measuring apparatus Haze meter made by BYK Gardner Type Haze Gard plus 4726 Illuminant CIE A Standard ASTM D 1003 8 Re...

Page 32: ...ce on the Touch Panel 10 2 Criterion The followings are applied to viewing area The item 10 2 1 2 3 4 should apply to the VA view area unless none VA affect electrical performance 7 Do not give unnece...

Reviews: