background image

Items

Descriptions

Label

Enter a name for the backup or replication destination. When you 
search for backup devices on the network, this name will appear.

Folder

Specify a shared folder where backup data will be stored. Do not 
select the root directory where the shared folder is created.

Backup Device Access Key

Enter the desired characters for a backup device access key. The 
backup device access key may contain up to 8 alphanumeric 
characters, hyphens (-), and underscores (_). The first character should 
not be a symbol.
You may leave this field blank if you do not want a backup device 
access key, but for security reasons we highly recommend entering 
one for the shared folder. If a backup device access key is configured 
for the shared folder, that folder will not show up as a target for 
the replication destination or backup source or destination when 
configuring a backup job on another Buffalo device unless it’s 
entered.
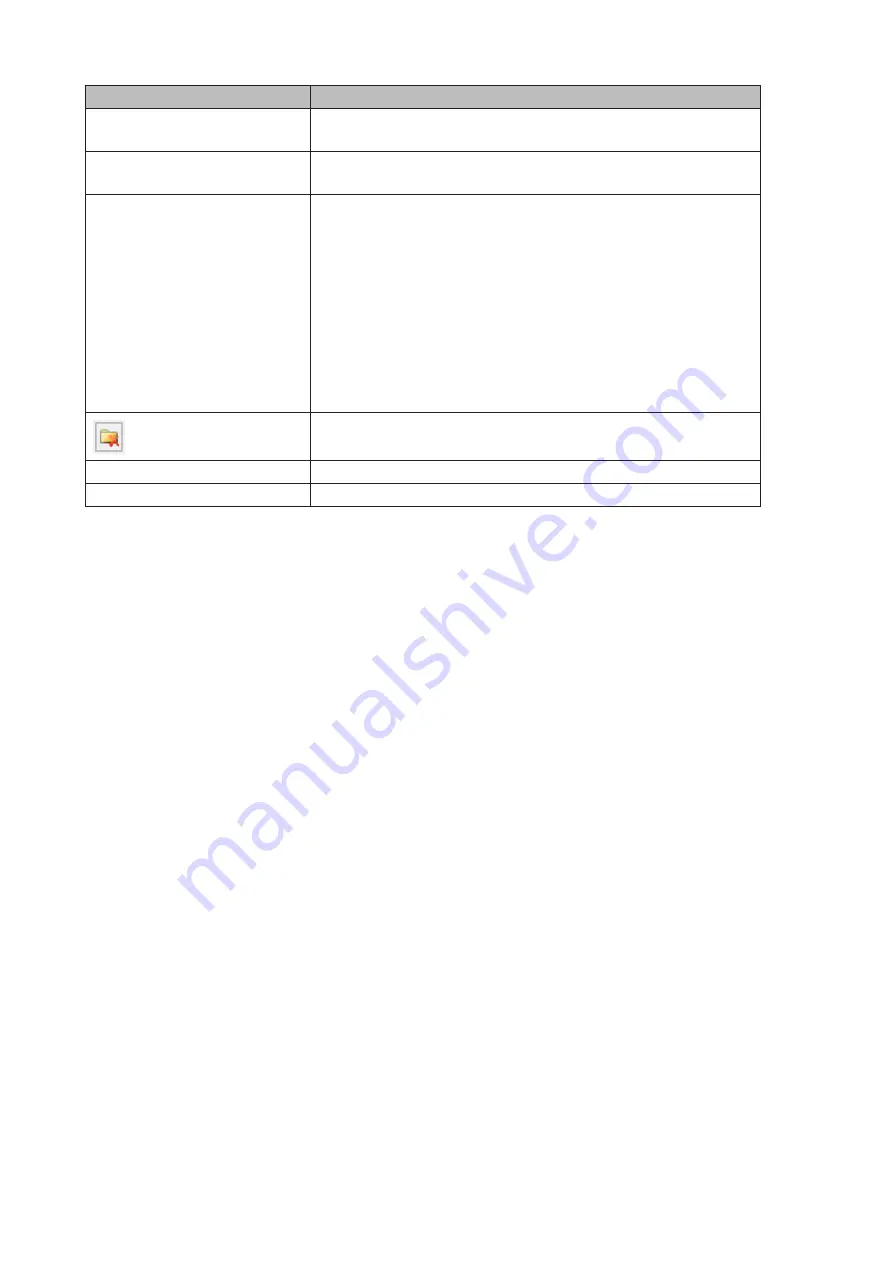
To remove a folder from the list of available backup targets, select the 
folder and click this button.

Save

Saves the settings.

Close

Exits TeraStation Backup & Replication Folder Settings.

19

Summary of Contents for TeraStation WSS WSH5010N6

Page 1: ...llow the procedures If you have any inquiries about the product contact the number on the warranty statement or the packing box Do not discard this manual the warranty statement or the packing box Ame...

Page 2: ...and Off 13 Installing Antivirus Software 13 Chapter 2 Preinstalled Software 14 RAID Builder 14 Buffalo Dashboard 15 Errors and Statuses on Buffalo Dashboard 16 Email Notification 17 Buffalo Replicati...

Page 3: ...Replication 35 Chapter 5 Additional Settings 61 Changing Server Name Workgroups and Domains 61 Changing the Password 63 Administrator s Password 63 Passwords for Other Users 64 Adding a User 65 Conne...

Page 4: ...or2 for macOS 93 Changing the IP Address 95 NovaBACKUP 95 Chapter 8 Troubleshooting 96 The TeraStation Becomes Unaccessible 96 Shared Folders Suddenly Do Not Open 97 Unable to Access the Shared Folder...

Page 5: ...Chapter 9 Appendix 99 Default Settings 99 Errors on the LCD Panel 99 Error Messages 99 Characters Added When ONE DRIVE DOWN or SYSTEM DOWN Occurs 101 Specifications 101 4...

Page 6: ...er is on 3 Access LED Shows network activity This LED blinks green when hard drives are being accessed 4 Fail LED If there is an error on the drives this LED glows amber Open Buffalo Dashboard to see...

Page 7: ...ly supported for monitoring the progress of Windows Update 15eSATA Port eSATA compatible hard drives are available with this port Turn the TeraStation off before connecting the drives 16UPS Port Conne...

Page 8: ...avigator2 2 Right click your TeraStation s icon and select Open Remote Desktop For macOS select the TeraStation s icon while holding down the control key then select Open Remote Desktop If the message...

Page 9: ...net time server The date and time can be obtained automatically Creating a Shared Folder No shared folders are configured by default Before using the TeraStation follow the procedure below to create o...

Page 10: ...r the path of an existing folder or a new folder then click Next Notes Enter D Share into the folder path to create the shared folder for the first time If the message The system cannot find the speci...

Page 11: ...6 Enter a name for the share and a description optional then click Next 7 Select Customize permissions then click Custom 10...

Page 12: ...8 Choose Everyone and select the Allow checkbox for Change 9 From the Security tab click Edit Add 11...

Page 13: ...e Allow checkbox for Modify 12Click OK OK Finish Finish Notes Enable a guest account 1 From Server Manager click Tools Computer Management 2 Click Local Users and Groups 3 Double click Users Guest 4 F...

Page 14: ...button on the TeraStation to turn it on and off Or you can turn off your TeraStation by following the procedure below 1 Click the Start button 2 Click the icon then Shut down 3 Select the reason why y...

Page 15: ...ion Folder Settings RAID Builder RAID Builder is used to create RAID volumes See the Storage Management chapter for more details To launch RAID Builder you must be logged in as a member of the Adminis...

Page 16: ...l name of the TeraStation Computer Name Displays the hostname of the TeraStation Domain Name Displays the type of domain that the TeraStation is a member of OS Displays the type of Windows installed o...

Page 17: ...erature may have exceeded the allowable safety value Do not place objects in the area around the TeraStation Also move the TeraStation to a cool location Make sure that the TeraStation s fan is workin...

Page 18: ...k the backup log to see if any errors were recorded Email Notification Your TeraStation can send you email reports when settings are changed or an error occurs See the Enabling Email Notification sect...

Page 19: ...he same time Before launching it make sure that it is not being used by another user TeraStation Backup Replication Folder Settings Before using it as a backup device on the network configure your Ter...

Page 20: ...nd underscores _ The first character should not be a symbol You may leave this field blank if you do not want a backup device access key but for security reasons we highly recommend entering one for t...

Page 21: ...pace is equal to the sum of the capacity of the five drives If one drive in a RAID 5 volume fails data on the volume can be recovered after the failed drive is replaced However if two or more drives f...

Page 22: ...n the TeraStation to turn it on 6 Connect Windows Storage Server via the remote desktop 7 Click the Start button and click RAID Builder 8 Click Format RAID and click OK After creating the volume is co...

Page 23: ...p your data regularly You can back up data using the following functions Windows Server Backup Buffalo Replication DFS Replication Backing Up in Windows Storage Server Preparing a Backup Destination F...

Page 24: ...Local Backup If Reading data please wait is displayed please wait until any messages disappear 3 Right click on Local Backup and select Backup Schedule The Backup Schedule Wizard will start 4 Click N...

Page 25: ...5 Select Custom and click Next 6 Click Add Items 24...

Page 26: ...7 Select the backup source folders or drives and click OK 8 Click Next 25...

Page 27: ...9 Specify the schedule to run the backup and click Next 26...

Page 28: ...ep through the wizard to finish Recovering Backup Data Follow the procedure below to recover the backup data to the TeraStation Note Bare metal recovery is not supported for the backup data stored usi...

Page 29: ...rom Server Manager click Tools Windows Server Backup The Windows Server Backup wizard will start 2 Click Local Backup If Reading data please wait is displayed please wait until any messages disappear...

Page 30: ...Backup and click Recover The recovery wizard will start 4 Select where the backup data is saved and click Next When A backup stored on another location is selected specify the folder of the backup da...

Page 31: ...5 Select the date when a data backup occurred and click Next 30...

Page 32: ...ation operation may not proceed properly if a large number of files or a large capacity file have been replicated continually for a long time causing too large of a data load Before starting replicati...

Page 33: ...that are longer than 170 characters may not be copied correctly Buffalo Replication If using Buffalo Windows Storage Server installed TeraStations as both the replication source and destination start...

Page 34: ...ccess key to the replication destination folder click Set Backup Device Access Key If you didn t skip to step 7 6 Enter the configured backup device access key of the replication destination folder an...

Page 35: ...is located on another network click Add and enter the IP address of the device then click Save After the IP address is added to the list click Refresh again to add the folder to the list of folders 8...

Page 36: ...g the Ethernet cable and reconnecting it to another LAN port or changing the IP address of the replication source or destination TeraStation If the network settings are changed refresh the list of Ter...

Page 37: ...Joining an Active Directory 1 From Server Manager click Local Server 2 Click the hostname of your TeraStation 36...

Page 38: ...3 From the Computer Name tab click Change 4 Select Domain enter a domain name and click OK 37...

Page 39: ...d for the Active Directory domain controller 6 Click OK then click OK again 7 Click Close 8 Click Restart Now and restart your computer to apply settings Installing DFS 1 From Server Manager click Das...

Page 40: ...3 Select Role based or feature based installation and click Next 4 Click Next 5 Select DFS Namespaces under File and Storage Services File and iSCSI Services 39...

Page 41: ...6 Select Include management tools if applicable and click Add Features 7 Select and DFS Replication 8 Click Next twice then click Install 40...

Page 42: ...9 Click Close to finish Creating Namespaces 1 From Server Manager click Tools DFS Management 2 Right click Namespaces then click New Namespace 41...

Page 43: ...3 Enter a hostname for the namespace server and click Next 42...

Page 44: ...4 Enter a name for the namespace and click Next 43...

Page 45: ...5 Select Domain based namespace and click Next 6 Click Create 7 Click Close when the New Namespace Wizard finishes 44...

Page 46: ...8 From DFS Management right click the name you created through the wizard and click New Folder 9 Enter a folder name and click Add 45...

Page 47: ...from the list by clicking Browse Click OK You may be asked to create a new folder if the selected path doesn t exist In such a case click Yes 11Click OK again Configuring DFS Replication 1 From Server...

Page 48: ...2 Right click Replication then click New Replication Group 3 Select the group replication type and click Next 47...

Page 49: ...4 Enter a name for the replication group and click Next 48...

Page 50: ...5 Click Add 6 Enter more than two servers hostnames to join the replication group and click OK 49...

Page 51: ...7 Click Next 50...

Page 52: ...8 Select Full mesh and click Next 51...

Page 53: ...To configure bandwidth select Replicate continuously using the specified bandwidth and the bit rate from the drop down list To configure the schedule time select Replicate during the specified days an...

Page 54: ...10Select the device as the primary member and click Next 53...

Page 55: ...11Click Add 12Select the folder as the replication source and click OK 54...

Page 56: ...13Click Next 55...

Page 57: ...14Click Edit 56...

Page 58: ...15Select Enabled and select the folder as the replication destination then click OK 57...

Page 59: ...16Click Next 58...

Page 60: ...17Click Create 59...

Page 61: ...18Click Close when completed Note It may take some time before actual replication is caught up When the following window appears click OK 60...

Page 62: ...Chapter 5 Additional Settings Changing Server Name Workgroups and Domains 1 From Server Manager click Local Server 2 Click the hostname of your TeraStation 61...

Page 63: ...ick Change 4 Enter the computer name choose domain or workgroup and click OK Note The computer name should contain 15 characters or less If 16 or more characters are entered all characters from the 16...

Page 64: ...so for security you should change it immediately Follow the procedure below to change the password Administrator s Password 1 Log on to Windows Storage Server using Administrator 2 Press Ctrl Alt End...

Page 65: ...ther Users 1 From Server Manager click Tools Computer Management 2 Click Local Users and Groups then double click Users 3 Right click the user whose password will be changed and click Set Password 4 C...

Page 66: ...5 Enter a new password twice Adding a User 1 From Server Manager click Tools Computer Management 2 Click Local Users and Groups 65...

Page 67: ...Click Close Connecting with Standard Accounts Accounts not belonging to the Administrators group cannot connect to Windows Storage Server through the remote desktop Those accounts must be added to the...

Page 68: ...1 From Server Manager click Tools Computer Management 2 Click Local Users and Groups then double click Groups 67...

Page 69: ...3 Double click Remote Desktop Users 4 Click Add 5 Click Advanced 6 Click Find Now 68...

Page 70: ...7 Select the user to be added as a group member and click OK 8 Click OK then click OK again 69...

Page 71: ...Adding a Group 1 From Server Manager click Tools Computer Management 2 Click Local Users and Groups 3 Right click Groups and choose New Group 70...

Page 72: ...4 Enter a group name and click Add 5 Click Advanced 6 Click Find Now 71...

Page 73: ...Close Enabling Email Notification Your TeraStation can send you email reports daily or when settings are changed or an error occurs Notification emails may be triggered by any of TeraStation reports o...

Page 74: ...Test Message 5 Enter the password of the user you re logged in as and click OK Items Descriptions Enable email notification If enabled email reports will be sent during specific events Send to Adds a...

Page 75: ...standard port number 110 is used Username and Password Enter the username and password of your email server SSL TLS If LOGIN SMTP AUTH LOGIN or CRAM MD5 SMTP AUTH CRAM MD5 is selected select whether t...

Page 76: ...tification emails will be categorized into the following importance levels Levels Details Daily Report Describes the status of the TeraStation in a daily report email Info Sends a notification email i...

Page 77: ...immediately Specifying Windows Event Logs A notification email will be sent when the specified event occurs This section describes notifications using Windows Update events 1 Click the Start button a...

Page 78: ...To acquire event logs of the TeraStation follow the procedure below 1 From Server Manager click Tools Event Viewer 2 Double click Windows Logs 3 Right click on either Application Security Setup or Sy...

Page 79: ...be the same size as the replacement drive The TeraStation is fragile Handle it with care Do not drop or bump the TeraStation Use caution when handling the TeraStation in order to avoid personal injur...

Page 80: ...ng drives Note The x on the LCD panel message is a number of volume type 1 Open the front cover with the included key 2 Check the status LEDs The LED for the failed drive glows amber 3 Push the unlock...

Page 81: ...4 Pull out the drive cartridge and remove it from the TeraStation 5 Remove the drive from the cartridge 6 Install a new drive into the cartridge 7 Replace the four screws 80...

Page 82: ...r 3 minutes RAID x RECOVERING 0 11When RAID x NORMAL is displayed drive replacement is finished RAID x NORMAL Drive replacement is finished TWO DRIVE DOWN or MULTIPLE DOWN Is Displayed on the LCD Pane...

Page 83: ...r the failed drive glows amber 3 Push the unlock button of the drive whose status LED is glowing amber and swing the locking mechanism out Do not unplug and remove the drives with the status LED lit g...

Page 84: ...4 Pull out the drive cartridge and remove it from the TeraStation 5 Remove the drive from the cartridge 6 Install a new drive into the cartridge 7 Replace the four screws 83...

Page 85: ...after 3 minutes RAID x RECOVERING 0 10When RAID x ONE DRIVE DOWN is displayed replacement for a defective drive is finished RAID x ONE DRIVE DOWN 11Push the rest of the failed drive s unlock button an...

Page 86: ...d to replace the defective drive immediately Back up data before replacing drives For Striped Volume 1 Turn off the TeraStation It may take some time until the shutdown process completes 2 Turn the Te...

Page 87: ...ve the drives with the status LED lit green If you do it may cause data loss or the TeraStation to malfunction 1 2 7 Pull out the drive cartridge and remove it from the TeraStation 8 Remove the drive...

Page 88: ...w drive into the cartridge 10Replace the four screws 11Insert the new drive into the empty slots slide the drive in with the locking mechanism open and swing the lock back down until it clicks into th...

Page 89: ...ug and remove the drives with the status LED lit green If you do it may cause data loss or the TeraStation to malfunction 4 Turn off the TeraStation It may take some time until the shutdown process co...

Page 90: ...t green If you do it may cause data loss or the TeraStation to malfunction 4 Turn off the TeraStation It may take some time until the shutdown process completes 5 Turn on the TeraStation while holding...

Page 91: ...drive follow the procedures below Operating in Striped Volume All data on the volume will be deleted after replacing the drive You will not be able to use the TeraStation until the drive has been rep...

Page 92: ...k the icon to open a shared folder on the TeraStation Name Description Menu Map All Remote Shares to Drive Letters Assigns all Buffalo NAS devices shared folders as network drives This is available on...

Page 93: ...s Storage Server in remote desktop Create Desktop Shortcut Creates a desktop shortcut to the Buffalo NAS device s shared folders Click on the Buffalo NAS device s icon to display these options When NA...

Page 94: ...dress 1 Double click the NAS Navigator2 icon to start NAS Navigator2 2 Right click your TeraStation s icon and select Properties IP Address 3 Clear the Use DHCP checkbox and enter the desired settings...

Page 95: ...te desktop Label Color Selects the color of the name displayed below the icon View Options Lets you choose icon size position and view mode Auto Power Mode Auto power mode can turn supported Buffalo N...

Page 96: ...ock to start NAS Navigator2 2 Click the TeraStation icon while holding down the control key then select Configure IP Address 3 Clear the Use DHCP checkbox enter the desired settings and the administra...

Page 97: ...might include a firewall Try searching again Cause 3 Wireless and wired adapters are both enabled Disable all adapters except for the Ethernet adapter connected to the TeraStation Cause 4 The Ethernet...

Page 98: ...not be detected correctly Configure the same language for these options Display language Welcome screen and system account System locale LCD Panel Displays a Different IP Address The IP address displa...

Page 99: ...luded 3 Connect a mouse keyboard and the card reader to the TeraStation using a USB 3 0 or 2 0 port 4 Connect the monitor to the TeraStation using a HDMI or VGA port 5 Press the power button to turn t...

Page 100: ...that the power options settings can be left alone as recommended The TeraStation has the following functions and roles Features NET Framework 4 7 iSNS Server Windows PowerShell 5 1 WoW64 Support etc...

Page 101: ...the failed drive with a new drive You can stop the beeping by pressing the mode button Code ROM Error System Halted Program ROM cannot be read Shut off the TeraStation wait 10 seconds then turn it bac...

Page 102: ...tact Buffalo technical support while keeping the TeraStation power on For Software Errors U The drives may be malfunctioning Replace the drive by referring to chapter 6 Drive Replacement E Specificati...

Page 103: ...cement drive The drives listed above are available from the Buffalo website Other Power Supply AC 100 240 V 3 0 A 50 60 Hz Dimensions W x H x D excluding protruding parts 170 x 260 x 230 mm 6 7 x 10 2...

Reviews: