


Preparation and Simple Use Guide
5
PREP
ARA
TION
AND SIMPLE USE
5
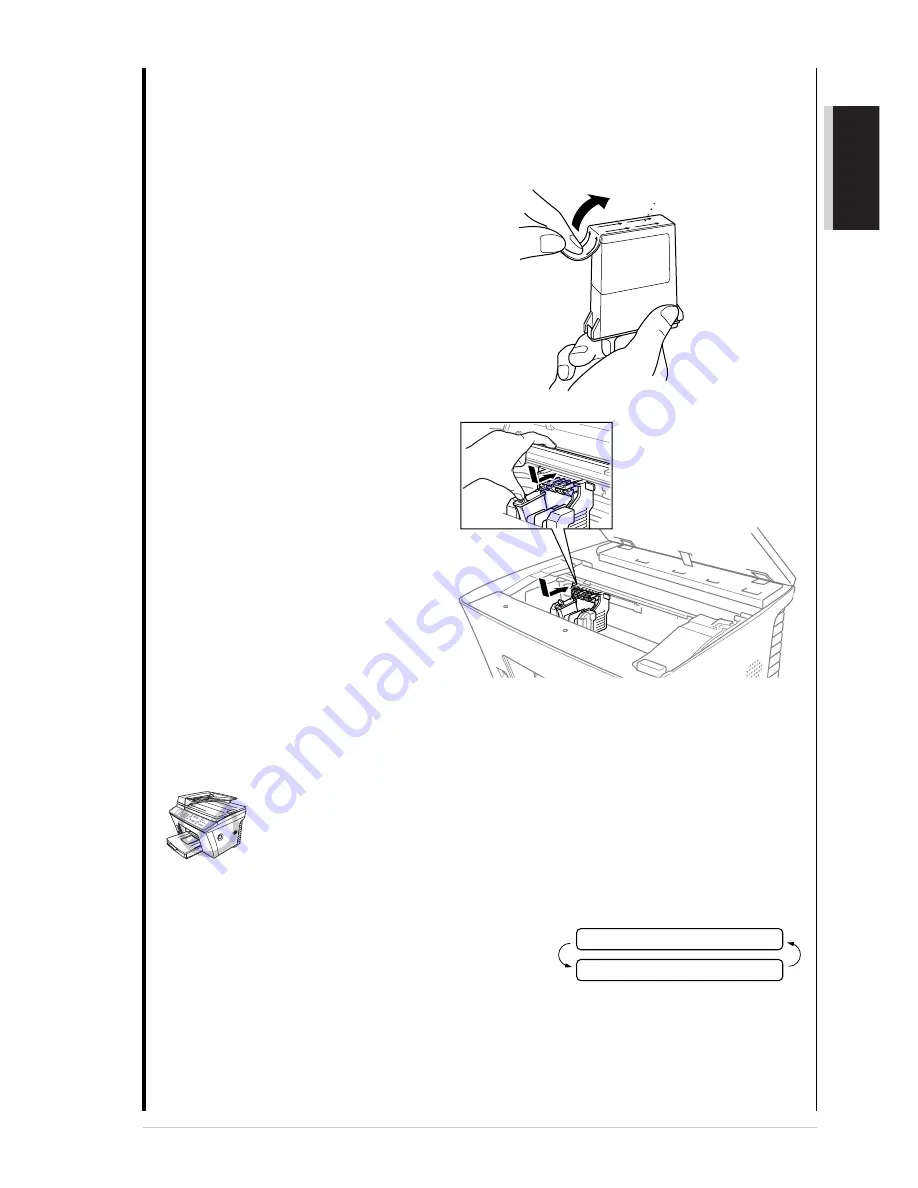
Carefully remove the sealing tape from the side of the ink cartridge. Be sure to peel the tape
in the direction away from you.
Important
To prevent spilling ink and staining your hands
and clothing, peel the sealing tape gently and
slowly. Do not touch the ink opening on the
cartridge or the removed tape.
6
Each colour has its own correct
position. Match the markings of the
colour indicators on the cartridge
holder as a guide. Then, gently insert
the Black ink cartridge by tilting it
toward you and then pressing it
backward until it clicks into place.
7
Repeat Steps 4 – 6 to install each colour ink cartridge.
8
After installing all ink cartridges, close the scanner cover. Your MFC enters a “head cleaning”
cycle for approximately 6 minutes. The dot counters for each colour are initialised and the
machine goes online ready for printing.
Make sure the paper is loaded in the paper cassette. The LCD displays CLEANING BLACK.
After the cleaning cycle is finished, the LCD shows PRESS START KEY.
9
Press
Start
within one minute. The MFC starts
printing the Test Sheet. (Only during initial ink
cartridge installation) The LCD shows:
0
Check the print quality of the test sheet. If it is not good, clean the print head again by pressing
2
. The screen will ask you if the print quality is OK for each colour. Select NO for the
colour(s) which have not printed correctly.
After cleaning is finished, press
Start
. The MFC starts printing Test Sheet No. 2.
A
Adjust the Vertical Alignment by following the instructions printed on the Test Print page.
Opening
Peel in the direction
away from you!
1.YES 2.NO
PRINT OK?
Summary of Contents for MFC-860
Page 1: ...MFC 860 OWNER S MANUAL ...


