USING THE MEMORY FUNCTION
C
h
ar
ac
te
r/D
ec
o
ra
tiv
e S
titc
he
s
117
4
e
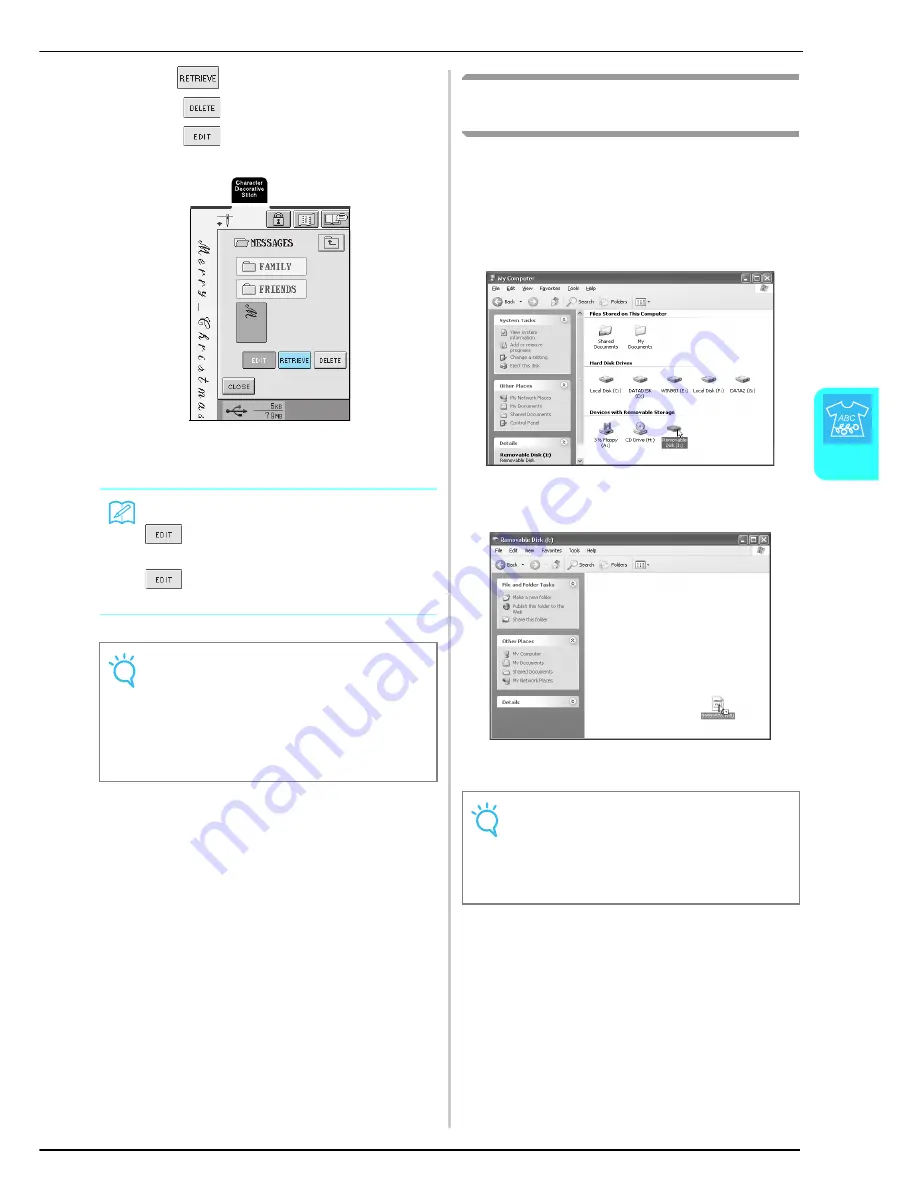
Press .
* Press
to delete the stitch pattern.
* Press
to edit the stitch pattern created using
My Custom Stitch.
→
The selected stitch pattern is retrieved and the
sewing screen appears.
Retrieving Stitch Patterns from the
Computer
a
Plug the USB cable connectors into the
corresponding USB port connectors on the
computer and on the machine (see page 114).
b
On the computer, open “My Computer”, and
then go to “Removable Disk”.
c
Move/copy the pattern data to “Removable
Disk”.
→
Stitch pattern data in “Removable Disk” is written to
the machine.
Memo
is available when a stitch pattern created
using MY CUSTOM STITCH
™
is retrieved. When
is pressed, the editing screen of MY CUSTOM
STITCH
™
appears so that the stitch can be edited.
Note
Do not unplug the USB media or eject the floppy disk
or CD while a stitch pattern is being read or deleted,
otherwise the USB media may be damaged or data
may be lost.
In addition, do not unplug the USB media or eject the
floppy disk or CD while the contents of the USB media,
floppy disk or CD are displayed.
Note
• While data is being written, do not disconnect the
USB cable.
• Do not create folders within “Removable Disk”.
Since folders are not displayed, stitch pattern data
within folders cannot be retrieved.
Summary of Contents for Innov-is 2500D
Page 1: ......
Page 9: ...8 ...
Page 39: ...CHANGING THE NEEDLE 38 ...
Page 49: ...USEFUL FUNCTIONS 48 ...
Page 93: ...SEWING THE STITCHES 92 ...
Page 165: ...EMBROIDERY APPLICATIONS 164 ...
Page 211: ...UPGRADING YOUR MACHINE S SOFTWARE 210 ...
Page 221: ......


