

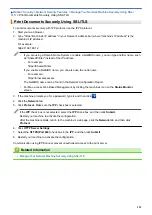


> Configure the Store Print Log
to Network Settings Using Web Based Management
Configure the Store Print Log to Network Settings Using Web Based
Management
1. Start your web browser.
2. Type "https://machine's IP address" in your browser's address bar (where "machine's IP address" is the
machine's IP address).
For example:
https://192.168.1.2
3. If the machine prompts you for a password, type it, and then click
.
4. Click the
Administrator
tab.
5. Click the
Store Print Log to Network
menu.
6. In the
Print Log
field, click
On
.
7. Configure the following settings:
Option
Description
Network Folder
Path
Type the destination folder where your log will be stored on the CIFS server (i.e., \
\ComputerName\SharedFolder).
File Name
Type the file name you want to use for the print log (up to 32 characters).
File Type
Select the
TXT
or
CSV
option for the Print Log file type.
Auth. Method
Select the authentication method required for access to the CIFS server:
Auto
,
Kerberos
, or
NTLMv2
. Kerberos is an authentication protocol which allows devices or
individuals to securely prove their identity to network servers using a single sign-on.
NTLMv2 is the authentication method used by Windows to log into servers.
•
Auto
: If you select
Auto
, NTLMv2 will be used to the authentication method.
•
Kerberos
: Select the
Kerberos
option to use Kerberos authentication only.
•
NTLMv2
: Select the
NTLMv2
option to use NTLMv2 authentication only.
•
For the
Kerberos
and
NTLMv2
authentication, you must also configure the
SNTP protocol (network time server) and DNS server.
Username
Type the user name for the authentication (up to 96 characters).
If the user name is part of a domain, enter the user name in one of the
following styles: user@domain or domain\user.
Password
Type the password for the authentication (up to 32 characters).
Kerberos
Server
Address
(if
needed)
Type the KDC host address (for example: kerberos.example.com; up to 64 characters)
or the IP address (for example: 192.168.56.189).
Error Detection
Setting
Choose what action should be taken when the Print Log cannot be stored to the server
due to a network error.
8. In the
Connection Status
field, confirm the last log status.
You can also confirm the error status on the LCD of your machine.
9. Click
Submit
to display the
Test Print Log to Network
page.
165
Summary of Contents for HL-3160CDW
Page 16: ...Related Information Introduction to Your Brother Machine 12 ...
Page 20: ...5 Press Med 6 Press Related Information Introduction to Your Brother Machine 16 ...
Page 46: ...Related Information Print from Your Computer Windows Print Settings Windows 42 ...
Page 51: ... Print a Document Windows 47 ...
Page 115: ...Home Security Security Lock the Machine Settings Network Security Features 111 ...
Page 155: ...Related Information Manage Your Network Machine Securely Using SSL TLS 151 ...
Page 197: ...5 Put the paper tray firmly back in the machine Related Information Paper Jams 193 ...
Page 202: ...Related Information Paper Jams 198 ...
Page 275: ...Related Information Routine Maintenance 271 ...
Page 316: ...Related Information Appendix Replace Supplies 312 ...
Page 319: ...Visit us on the World Wide Web www brother com CHN ENG Version 0 ...


