


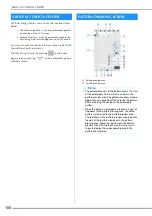


MAKING EMBROIDERY ADJUSTMENTS
148
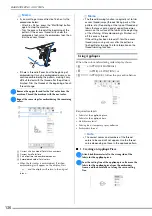
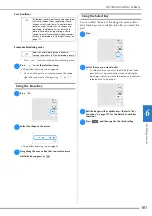
a
Mark the embroidery start position on the fabric, as
shown.
b
Press .
c
Press .
1
Start position
The needle is positioned in the lower-left corner of
the pattern. The carriage moves so that the needle is
positioned correctly.
d
Press .
e
Press
and then, press
.
f
Use
to align the needle and the mark on the
fabric, and start embroidering the pattern.
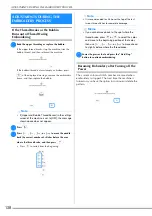
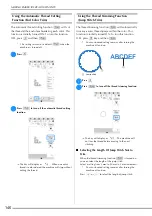
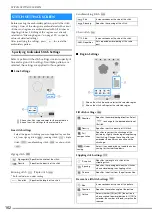
Embroidering Linked Characters
Follow the procedure described below to embroider
linked characters in a single row when the entire
pattern extends beyond the embroidery frame.
Example:
Linking “FG” to the characters “ABCDE”
a
Select the character patterns for “ABCDE”.
b
Press .
c
Press .
The needle is positioned in the lower-left corner of
the pattern. The carriage moves so that the needle is
positioned correctly. The machine is set to embroider
until the first stitch of the next character pattern (F).
d
Press .
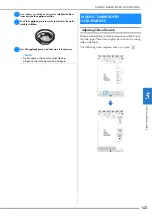
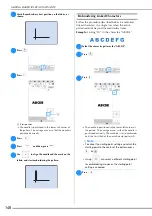
1
Note
• To cancel the starting point setting and return the
starting point to the center of the pattern, press
or
.
• Using
can select a different starting point
for embroidering. However, the starting point
setting is canceled.
Summary of Contents for 882-W70
Page 2: ......
Page 12: ...CONTENTS 10 ...
Page 56: ...CHANGING THE PRESSER FOOT 54 ...
Page 57: ...Chapter 2 Sewing Basics ...
Page 73: ...Chapter 3 Various Stitches ...
Page 106: ...MY CUSTOM STITCH 104 ...
Page 107: ...Chapter 4 Basic Embroidery ...
Page 141: ...Chapter 5 Advanced Embroidery ...
Page 156: ...EMBROIDERY APPLICATIONS 154 ...
Page 157: ...Chapter 6 My Design Center ...
Page 176: ...STIPPLING 174 ...
Page 177: ...Chapter 7 Appendix ...
Page 193: ...ERROR MESSAGES 191 Appendix 7 ...
Page 205: ......
Page 206: ......
Page 207: ......
Page 208: ......
Page 209: ......
Page 210: ......
Page 211: ......