42
Treadwall M6 Pro Owner’s Manual—2017
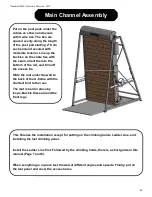
Main Channel Assembly
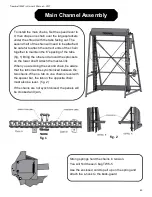
To install the main chains, Set the speed lever to
0, then drape one chain over the large sprockets
under the shroud with the tabs facing out. The
second half of the chain will need to be attached,
be careful to attach the correct ends of the chain
together to maintain the 6” spacing of the tabs.
(fig. 1) Bring the other end around the sprockets
on the lower shaft. Attach the master-link.
When you are doing the second chain, be aware
that the tabs must be synchronized between the
two chains. When a tab on one chain is level with
the spacer bar, the tab on the opposite chain
must also be level. (fig. 2)
If the chains are not synchronized, the panels will
be crooked and jam.
fig. 1
fig. 2
Strong springs hold the chains in tension.
You will find these in bag TW6-5
Use the enclosed cord to pull up on the spring and
attach the s-hook to the back-guard
Summary of Contents for Treadwall M6 Pro
Page 2: ......
Page 4: ...ii Treadwall M6 Pro Owner s Manual 2017...
Page 6: ...2 Treadwall M6 Pro Owner s Manual 2017...
Page 8: ...4 Treadwall M6 Pro Owner s Manual 2017...
Page 14: ...10 Treadwall M6 Pro Owner s Manual 2017...
Page 16: ...12 Treadwall M6 Pro Owner s Manual 2017...
Page 50: ...46 Treadwall M6 Pro Owner s Manual 2017...

