38
Treadwall M6 Pro Owner’s Manual—2017
Main Channel Assembly
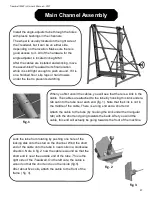
Wind the other end of the cable until it is the right
length for the turnbuckle and attach it to the rear of the
frame (fig. 4).
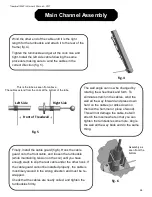
Tighten the turnbuckle and get all the coils nice and
tight. Install the left side cable following the same
procedure making sure to wind the cables in the
correct direction (fig. 5).
fig. 4
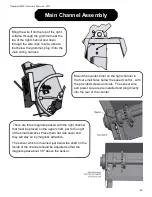
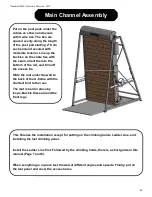
The wall angle can now be changed by
rotating the wheel back and forth. To
eliminate stretch in the cables, wind the
wall all the way forward and press down
hard on the cables (or strike down on
them with a hammer or piece of wood).
This will not damage the cable, but will
stretch them somewhat so that you can
tighten the turnbuckle some more. Angle
the wall all the way back and do the same
thing.
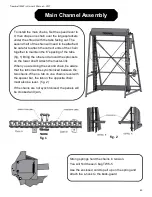
Finally, install the cable guard (fig.6). Hook the cable
guard onto the front cable, and loosen the turnbuckle
(while maintaining tension on the coil) until you have
enough slack to slip the rear cable under the other hook. If
the cable guard cannot be installed properly, the cable is
most likely wound in the wrong direction and must be re-
wrapped.
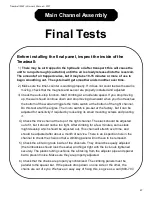
Check that the cables are neatly coiled, and tighten the
turnbuckles firmly.
fig. 6
fig. 5
↓
Front of Treadwall
↓
Le Side
Right Side
This is the tube as seen from above.
The cables extend from the coils at the
bottom
of the tube
Assembly as
seen from the
bottom
Summary of Contents for Treadwall M6 Pro
Page 2: ......
Page 4: ...ii Treadwall M6 Pro Owner s Manual 2017...
Page 6: ...2 Treadwall M6 Pro Owner s Manual 2017...
Page 8: ...4 Treadwall M6 Pro Owner s Manual 2017...
Page 14: ...10 Treadwall M6 Pro Owner s Manual 2017...
Page 16: ...12 Treadwall M6 Pro Owner s Manual 2017...
Page 50: ...46 Treadwall M6 Pro Owner s Manual 2017...

