


3-10
¡
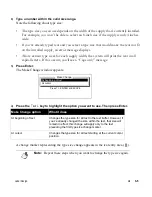
Changing the look of the text
4)
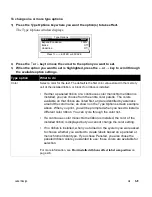
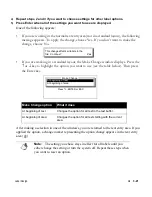
Repeat steps 2 and 3 if you want to choose settings for other type options.
5)
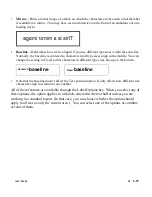
Press Enter when all of the settings you want to use are displayed.
A change marker representing the option change(s) appears in the text entry area (
).
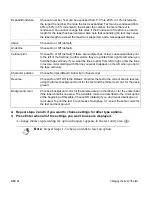
Expand/Condense
Choose a number. Text can be expanded from 110% to 200% in 10% increments;
the larger the number, the more the text is expanded. Text can be condensed from
90% to 50% in 5% increments; the smaller the number, the more the text is
condensed. You cannot change this value if the Condense to fit option is on and a
length for the label has been entered. Also note that expanding the text may cause
the label length to exceed the maximum supported, and a message will display.
Italics
Choose On or Off (default).
Underline
Choose On or Off (default).
Vertical print
Choose On or Off (default). If there are multiple lines of text, subsequent lines print
to the left of the first line; in other words, they are printed from right to left when you
hold the tape vertically. If you want the lines to print from left to right, enter the lines
in reverse order starting with the line you want to appear on the left when you hold
the tape vertically.
Character position
Choose Normal (default), Subscript or Superscript.
Reverse
Choose On or Off. Off is the Default. On prints the text in the current area in reverse,
using the former background color for the text and the former text color for the back-
ground.
Background color
Choose a background color for the selected area on the label, or for the entire label
if the label contains one area. The available colors are described in the Color option
at the beginning of this table. Choose Off (default) if you don’t want a background
color used. To print the text in reverse as shown page 3-7, select the same colors for
the text and background.
Note:
Repeat Steps 1-5 when you want to reset an option.
Summary of Contents for POWERMark
Page 1: ...User s Guide Manuel d utilisation Manual de usauario...
Page 10: ...x Specifications...
Page 56: ...2 16 Using specialty applications...
Page 90: ...3 34 Working with bar codes...
Page 124: ...7 4 Maintaining the system...
Page 125: ...1 Signs Application 0...
Page 126: ...2 Signs Application Differences from standard operating system 1 2 2 2 2 3 4 5 6 1 7 8...
Page 148: ...1 Hazardous Waste Labels Application 0 1 2...
Page 168: ...1 Pipe Markers Application 0...
Page 169: ...2 Pipe Markers Application Differences from standard operating system 1 2 3 40 5 6 7 8 9...
Page 192: ......


