


33
shown above are included in the kit. We recommend that
this kit be installed whenever the brake valve is removed
for inspection or service.
It is always a good practice to check the initial opening or
cracking pressure of the brake valve whenever the hoist is
serviced or inspected. Refer to BRADEN Service Bulletin
number 527 for complete brake valve test and adjustment
procedures.
DISASSEMBLY
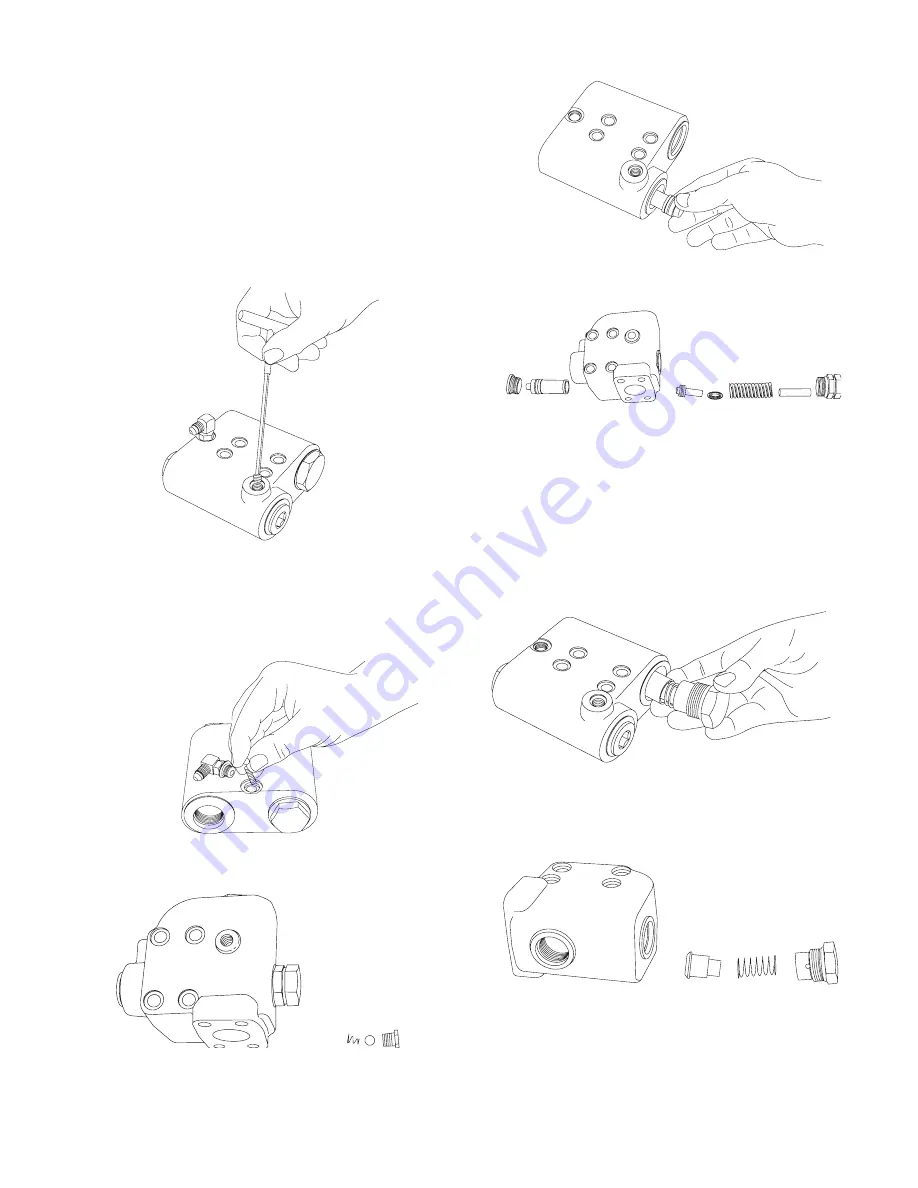
1. On the 1-1/4-inch valve only, remove the pilot orifice
from the brake release port using a 5/32-inch Allen wrench.
1-1/4-inch Valve
1-1/2-inch Valve
2. Remove the fitting, motor drain check ball and spring.
1-1/4-inch Valve
1-1/2-inch Valve
3. Remove the spool spring retainer and spool spring.
Remove the spool plug and carefully remove the spool
assembly. Remove the damper piston from the spool.
The piston will come out of the spool slowly, because of
a partial vacuum formed between the two. Use extreme
care to avoid damaging the polished surfaces of either
piece.
1-1/4-inch Valve
1-1/2-inch Valve
4. Remove the check valve spring retainer, spring and
check valve poppet.
CLEAN AND INSPECT
1. Discard all O-rings and backup rings. Clean all parts
in solvent and blow dry. Inspect polished surfaces of
spool and damper piston for damage that may cause
Summary of Contents for CH330
Page 2: ...2...