29
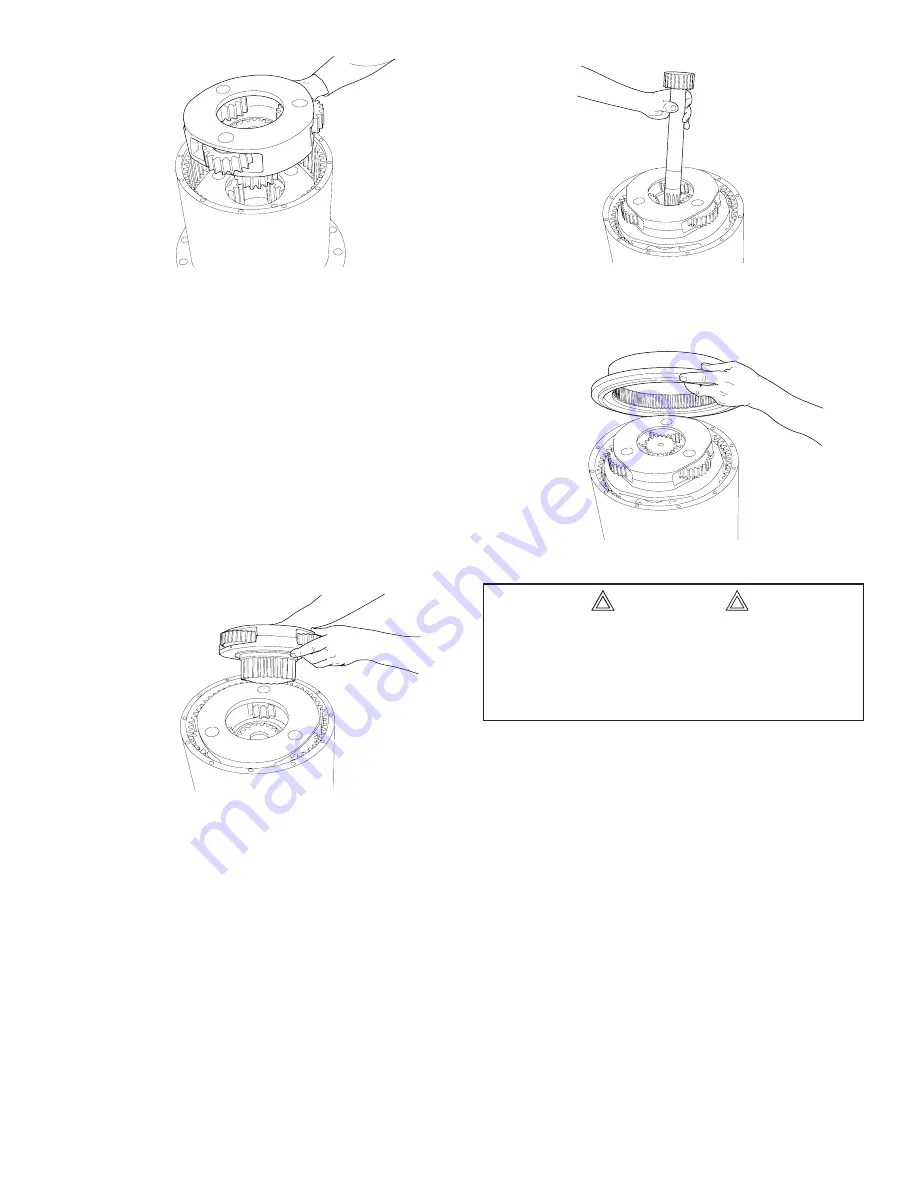
6. Install thrust washer (Item 65), onto the second stage
planet assembly (with output sun gear). A light coat
of oil soluble grease should be used to hold it in place
during assembly. Slide the planet assembly into the
ring gear and engage the output sun gear with the
output planet gears. The second stage planet gears
should now be at least 1/8 inch (3 mm) below the top
of the teeth cut into the ring gear. If they are above the
ring gear teeth, the unit is not properly assembled to
this point. Either the thrust washer (Item 65) is improp-
erly positioned, or the output planet carrier is not fully
engaged onto the motor support (possibly caused by
the split ring not being fully seated). Remove the sec-
ond stage planet assembly and/or the output planet
assembly to determine and correct the cause of the
problem before proceeding.
7. Install thrust washer (Item 57) onto the primary planet
assembly (with second stage sun gear). A light coat
of oil soluble grease should be used to hold it in place
during assembly. Install the primary planet assembly
onto the second stage planet assembly, engaging the
second stage sun gear with the second stage planet
gears. Visually check to be sure the thrust washer is
properly positioned.
8. Install the primary sun gear (Item 55) through the cen-
ter of the primary planet assembly.
9. Carefully set the cover (Item 42) onto the main ring
gear, engaging the primary planet gears with the gear
teeth machined into the cover. Turn the cover to align
the bolt holes with those in the main ring gear and in-
stall all 12 capscrews and lockwashers (Items 43 and
44).
In the following step, the primary ring/cover may sud-
denly drop on the main ring gear when all primary sun
gear teeth are aligned with those in the cover. DO NOT
work with your fingers between the cover and the main
ring gear.
CAUTION
Summary of Contents for CH330
Page 2: ...2...


