DiBos/DiBos Micro
Default Configuration | en
49
Bosch Sicherheitssysteme GmbH
Installation Guide
F.01U.033.308 | V7 | 2009.09
6.2.3
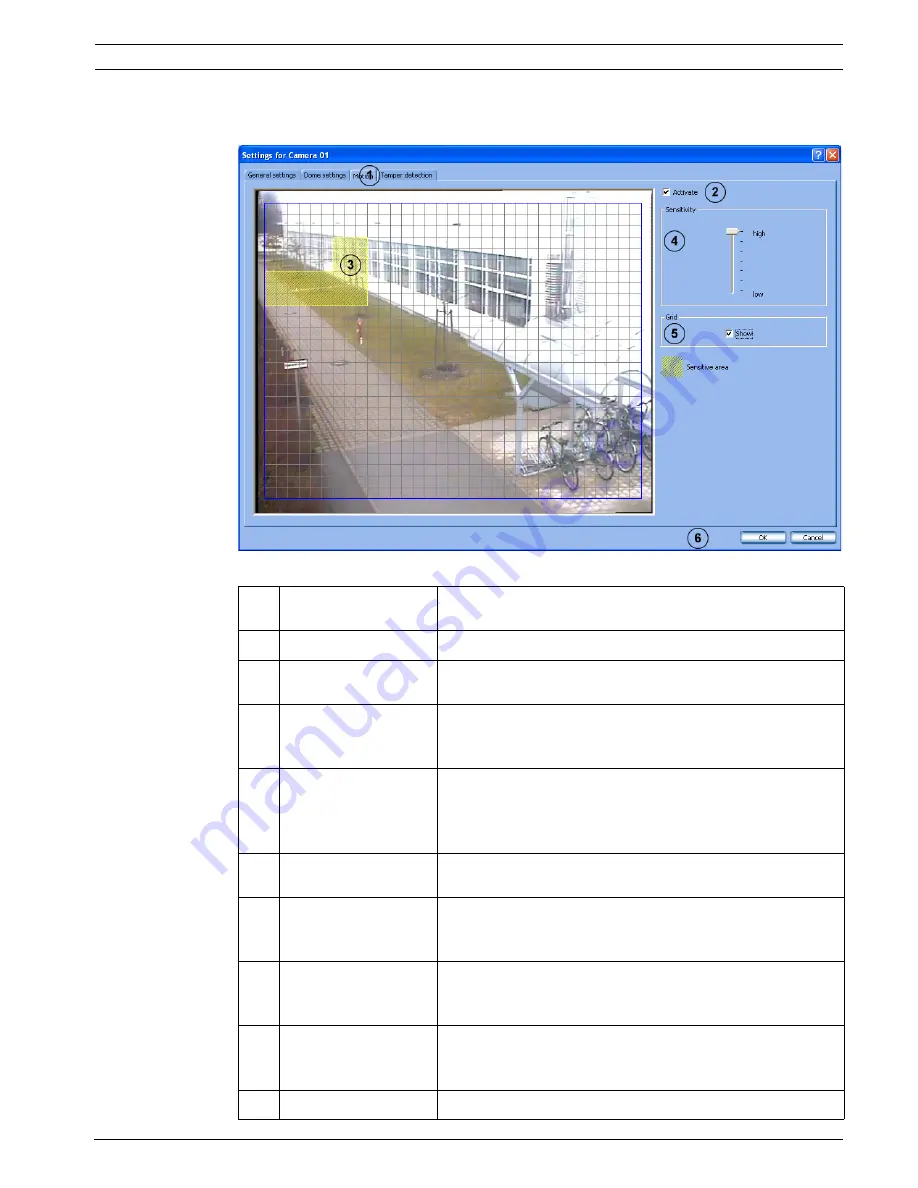
Specifying Monitoring Zone for Motion Cameras
Video and audio connections
menu >
Camera
section >
Edit
button
Make the settings for each camera as required.
1
Motion
Click the tab. The entire image content inside the blue frame
is initially sensitive, i.e. motion is monitored.
2
Activate
Select the check box to activate the motion sensor.
3
Within the blue frame
(image window)
Displays the current live image and the area being monitored.
The image is updated every second.
Left-click or hold the
left mouse button
down and drag an area
A plus sign appears beside the mouse cursor to show that the
selected area is sensitive and will be assessed during motion
detection. Sensitive areas are shown shaded in yellow.
Right-click or hold the
right mouse button
down and drag an area
A minus sign appears beside the mouse cursor to show that
the selected area is not sensitive and will not be assessed
during motion detection. Non-sensitive areas are shown
unshaded.
4
Sensitivity
Change the sensitivity when the results of motion detection
are not satisfactory.
high
The sensitivity increases i.e. to trigger an alarm, smaller
changes in the edges, the brightness and the motion are
needed.
low
The sensitivity decreases i.e. to trigger an alarm, larger
changes in the edges, the brightness and the motion are
needed.
5
Grid - Show
A grid is shown in the image when the check box is activated.
The sizes of the drawn-in sensitive/insensitive areas are
oriented around the grid.
6
OK
The entries are saved.


