ASSURANCE
GDS®
PPMX
USER
MANUAL
16
14
Select
Continue
.
15
Select
Home
to
go
to
the
main
menu
Add
Pipette
and
PickPen
Head(s)
Each
head
that
may
be
used
now,
or
in
the
future,
must
be
added
per
the
instructions
that
follow.
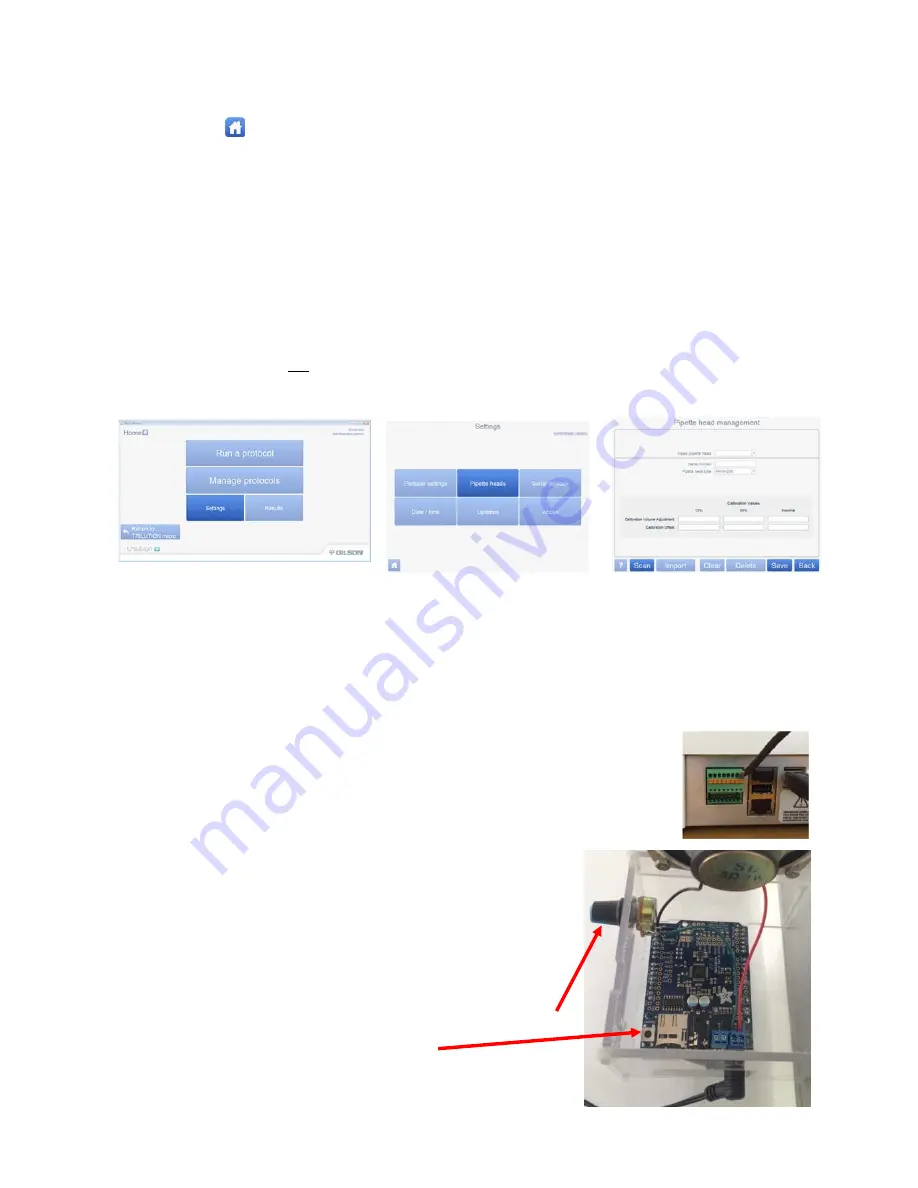
1
On
the
TRILUTION
micro
main
menu,
select
Settings
.
2
On
the
Settings
menu,
select
Pipette
heads
.
3
Enter
the
serial
number
located
on
the
pipette
head
and
the
pipette
type
(i.e.
8x200).
4
The
PickPen
head
is
added
the
same
way
using
serial
number
HN12017
.
All
PickPen
heads
use
this
same
serial
number
in
the
software
(they
are
physically
serialized
on
the
back
for
tracking
purposes).
Choose
PickPen
II
as
the
type.
5
Select
Save
.
There
will
not
be
a
message
that
the
settings
were
saved.
6
Repeat
steps
3
–
5
for
additional
heads.
When
finished
adding
heads,
select
Back
.
Set
Date
&
Time
Set
the
date
and
time
to
ensure
a
correct
date/time
stamp
on
protocol
runs.
This
should
only
have
to
be
done
once.
On
the
Settings
menu,
select
Date/time
,
and
then
set
the
date,
time,
and
time
zone.
Install
Chime
Sound
Box
To
enable
sound
on
the
PPMX,
a
separate
chime
sound
box
can
be
added
to
the
back
of
the
instrument
per
the
instructions
that
follow:
1
Plug
the
green
phoenix
connector
into
the
top
green
input/output
port
on
PPMX
rear
panel.
2
Position
the
sound
box
on
the
back
center,
above
the
shelf
portion
of
the
PPMX
and
secure
the
plastic
holder
using
the
provided
hardware
(the
shorter
screws
are
used
on
the
top
holes).
If
there
are
already
screws
in
the
locations
specified,
remove
these
first.
3
Adjust
the
volume
using
the
volume
dial.
4
There
is
also
a
reset
button
on
the
inside
of
the
speaker.
To
use,
push
and
then
reboot
the
PPMX
system.
Volume
dial
Reset
button


