52
group.
Dynamic Route:
Select the RIP version from RIP1 or RIP2.
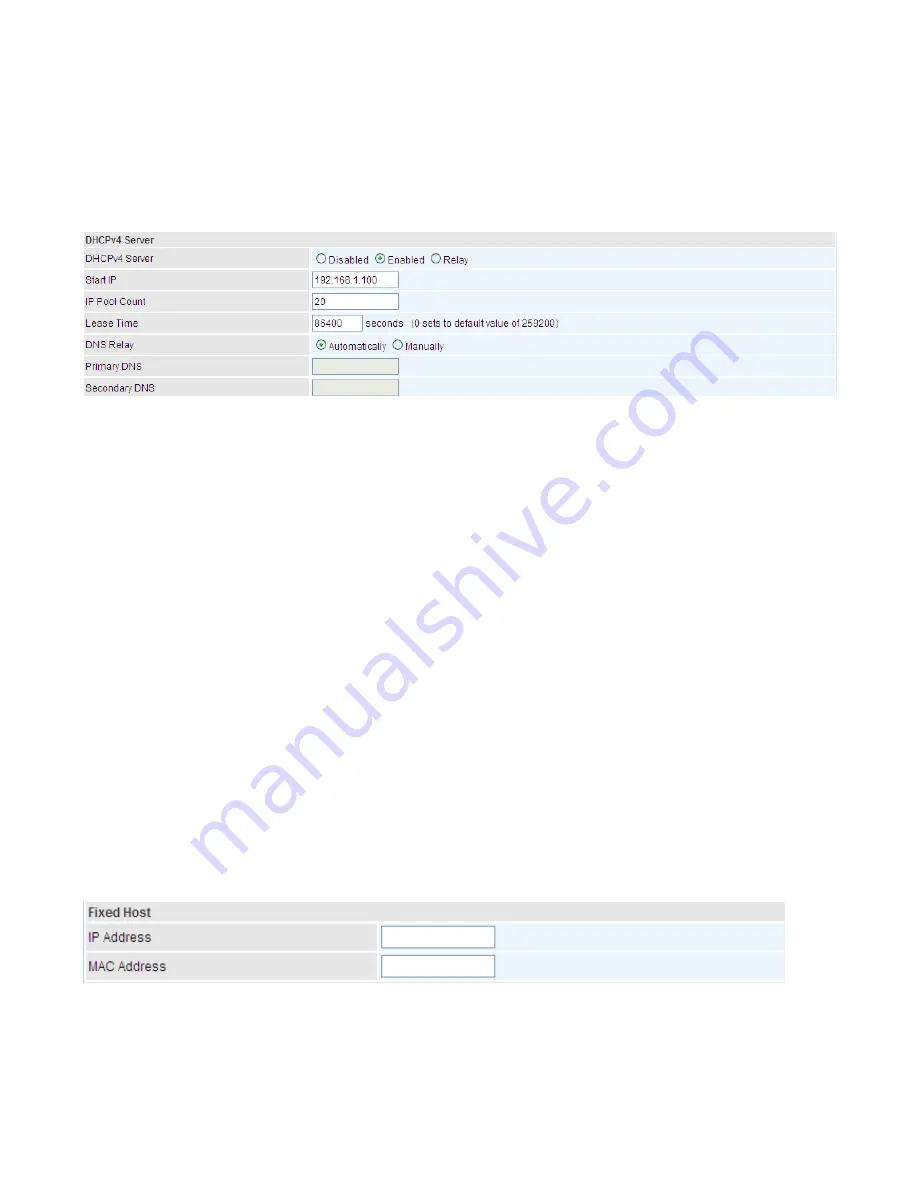
DHCPv4 Server
DHCP (Dynamic Host Configuration Protocol) allows individual clients to obtain TCP/IP configuration
at start-up from a server.
DHCPv4 Server:
If set to
Enabled
, your BiPAC 4500NZ(L) can assign IP addresses, default gateway
and DNS servers to the DHCP client.
If set to
Disabled
, the DHCP server will be disabled.
If set to
Relay
, the BiPAC 4500NZ(L) acts as a surrogate DHCP server and relays DHCP
requests and responses between the remote server and the clients. Enter the IP address of the
actual, remote DHCP server in the Remote DHCP Server field in this case.
When DHCP is used, the following items need to be set.
Start IP:
This field specifies the first of the contiguous addresses in the IP address pool.
IP Pool Count:
This field specifies the count of the IP address pool.
Lease Time:
The current lease time of client.
DNS Relay
Select Automatically obtained or Manually set (if selected. Please set the exactly
information).
Primary DNS Server:
Enter the IP addresses of the DNS servers. The DNS servers are passed to the
DHCP clients along with the IP address and the subnet mask.
Secondary DNS Server:
Enter the IP addresses of the DNS servers. The DNS servers are passed to
the DHCP clients along with the IP address and the subnet mask.
Fixed Host
In this field, users can map the specific IP (must in the DHCP IP pool) for some specific MAC, and this
information can be listed in the following table.
IP Address:
Enter the specific IP. For example: 192.168.1.110.
MAC Address:
Enter the responding MAC. For example: 00:0A:F7:45:6D:ED
When added, you can see the ones listed as showed below:
Summary of Contents for BiPAC 4500NZ(L)
Page 88: ...85...
Page 90: ...87...
Page 92: ...89...
Page 99: ...96 4 Input Internet address and Destination name for this connection and press Next...
Page 100: ...97 5 Input the account user name and password and press Create...
Page 101: ...98 6 Connect to the server...
Page 103: ...100...
Page 142: ...139 EWAN Click START to begin to diagnose the connection...


