49
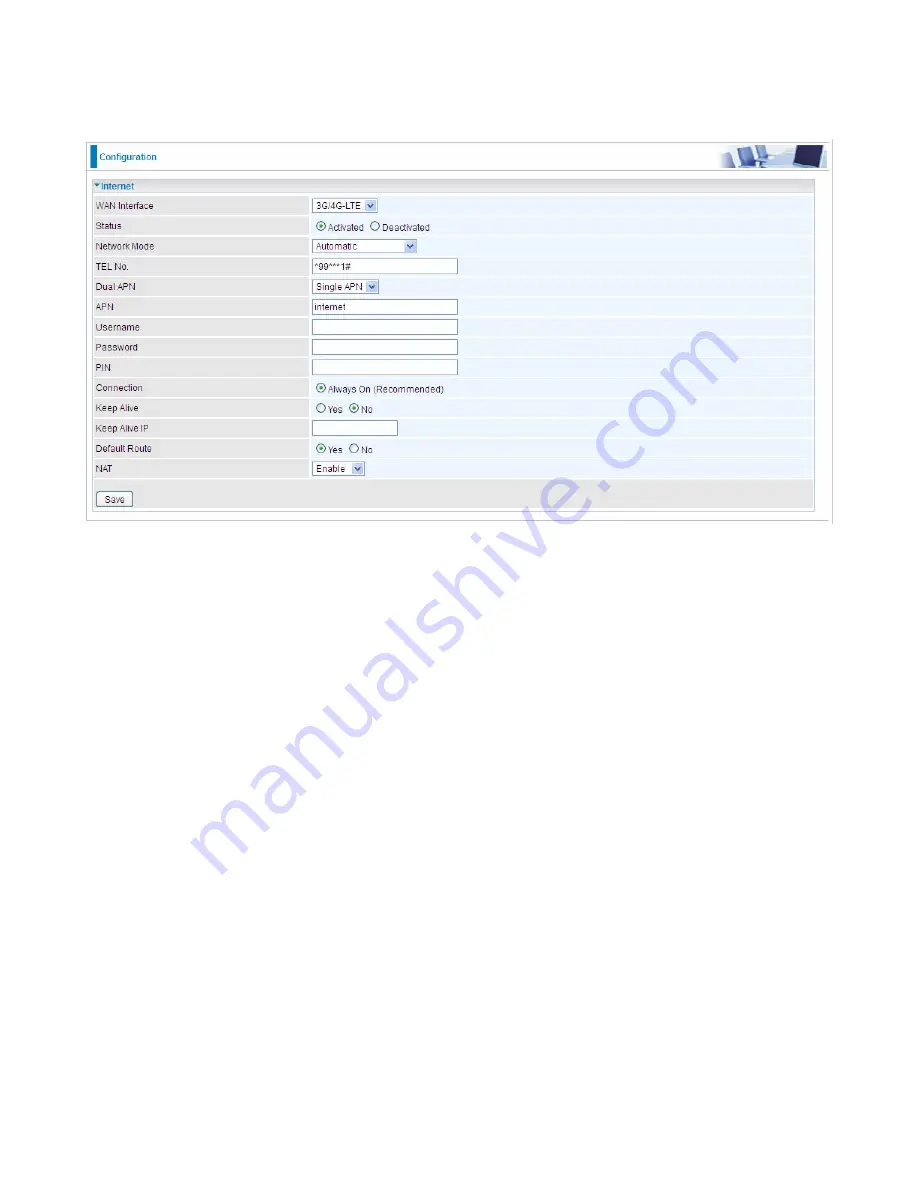
3G/4G-LTE
Status:
Choose Activated to enable the 3G/4G-LTE connection.
Network Mode:
There are 8 options of service standards: “Automatic”, “UMTS 3G only”, “GSM 2G
Only”, “UMTS 3G Preferred”, “GSM 2G Preferred”, “GSM and UMTS Only”, “LTE Only”, “GSM, UMTS,
LTE”. If you are not sure which mode to use, you may select
Automatic
to auto detect
the best mode
for you.
TEL No.:
The dial string to make a GPRS / 3G/4G-LTE user internetworking call. It may provide by
your mobile service provider.
Dual APN:
BiPAC 6 can support up to two(2) APNs. Select Single or Dual.
APN:
An APN is similar to a URL on the WWW, it is what the unit makes a GPRS / UMTS call. The
service provider is able to attach anything to an APN to create a data connection, requirements for
APNs varies between different service providers. Most service providers have an internet portal which
they use to connect to a DHCP Server, thus giving you access to the internet i.e. some 3G operators
use the APN ‘internet’ for their portal. The default value is “internet”.
Username/Password:
Enter the username and password provided by your service provider. The
username and password are case sensitive.
PIN:
PIN stands for Personal Identification Number. A PIN code is a numeric value used in certain
systems as a password to gain access, and authenticate. In mobile phones a PIN code locks the SIM
card until you enter the correct code. If you enter the PIN code incorrectly into the phone 3 times in a
row, then the SIM card will be blocked and you will require a PUK code from your network/service
provider.
Connection:
Default set to Always on to keep an always-on 3G/4G-LTE connection.
Keep Alive:
Select
Yes
to keep the 3G/4G-LTE connection always on.
Keep Alive IP:
Enter the IP address whic is used for “ping”, and router will ping the IP to find whether
the connection is on or not, if not, router will recover the connection.
Default Route:
Select
Yes
to use this interface as default route interface.
Summary of Contents for BiPAC 4500NZ(L)
Page 88: ...85...
Page 90: ...87...
Page 92: ...89...
Page 99: ...96 4 Input Internet address and Destination name for this connection and press Next...
Page 100: ...97 5 Input the account user name and password and press Create...
Page 101: ...98 6 Connect to the server...
Page 103: ...100...
Page 142: ...139 EWAN Click START to begin to diagnose the connection...


