


30
Easy Sign On (EZSO)
This special feature makes it easier for you to configure your router so that you can connect to the
internet in a matter of seconds without having to logon to the router GUI for any detail configuration.
This configuration method is usually auto initiated if user is to connect to the internet via Billion's
router for the first time.
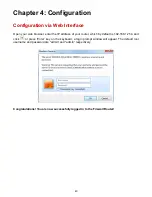
After setting up the router with all the appropriate cables plugged-in, open up your IE browser, the
EZSO WEB GUI will automatically pop up and request that you enter some basic information that
you have obtained from your ISP. By following the instructions given carefully and through the
information you provide, the router will be configured in no time and you will find yourself surfing the
internet sooner than you realize.
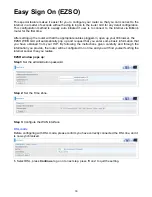
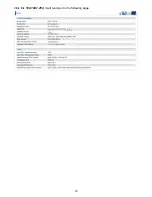
EZSO window pops up:
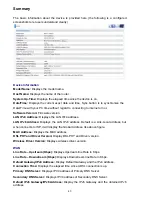
Step1:
Set the administration password.
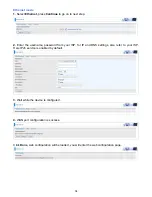
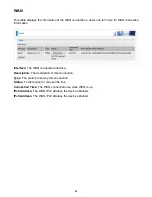
Step 2:
Set the Time Zone.
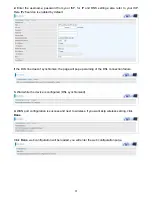
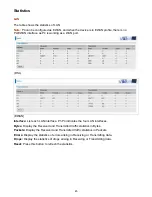
Step 3:
Configure the WAN interface.
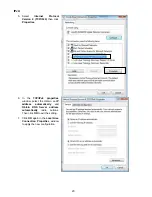
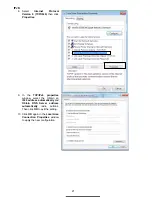
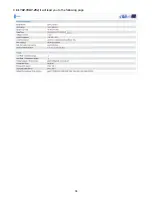
DSL mode
Before configuring with DSL mode, please confirm you have correctly connected the DSL line, and it
is now synchronized.
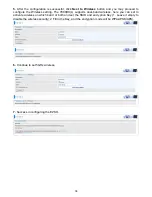
1.
Select DSL, press
Continue
to go on to next step, press “Done” to quit the setting.
Summary of Contents for 7800DX
Page 19: ...15 3G LTE Router mode ...
Page 37: ...33 Click link 192 168 1 254 it will lead you to the following page ...
Page 40: ...36 Click 192 168 1 254 it will lead you to the following page ...
Page 43: ...39 Click 192 168 1 254 it will lead you to the following page ...
Page 99: ...95 Configure AP as Enrollee Add Registrar with PIN Method 1 Set AP to Unconfigured Mode ...
Page 143: ...139 Accessing mechanism of Storage In your computer Click Start Run enter 192 168 1 254 ...
Page 145: ...141 Access the folder public ...
Page 148: ...144 Step 2 Click Add a Printer Step 3 Click Add a network wireless or Bluetooth printer ...
Page 159: ...155 Rule inactive ...
Page 186: ...182 ALG The ALG Controls enable or disable protocols over application layer ...
Page 194: ...190 ...
Page 197: ...193 ...
Page 204: ...200 5 Input the account user name and password and press Create ...
Page 205: ...201 6 Connect to the server ...
Page 206: ...202 7 Successfully connected ...
Page 208: ...204 ...
Page 219: ...215 4 Input Internet address and Destination name for this connection and press Next ...
Page 220: ...216 5 Input the account user name and password and press Create ...
Page 238: ...234 2 ipoe_eth0 with DDNS www hometest1 com using username password test test ...
Page 251: ...247 Click Apply to confirm your settings ...
Page 262: ...258 Example Ping www google com ...
Page 263: ...259 Example trace www google com ...