


209
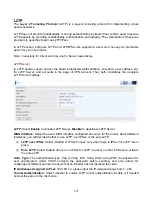
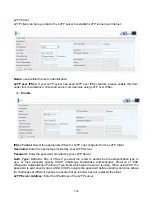
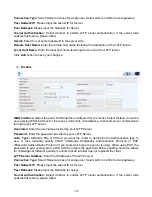
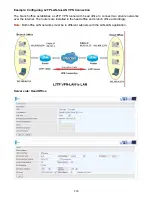
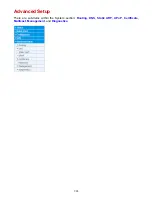
L2TP Client
L2TP client can help you dial-in the L2TP server to establish L2TP tunnel over Internet.
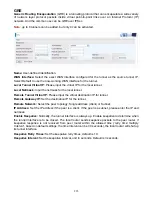
Name:
user-defined name for identification.
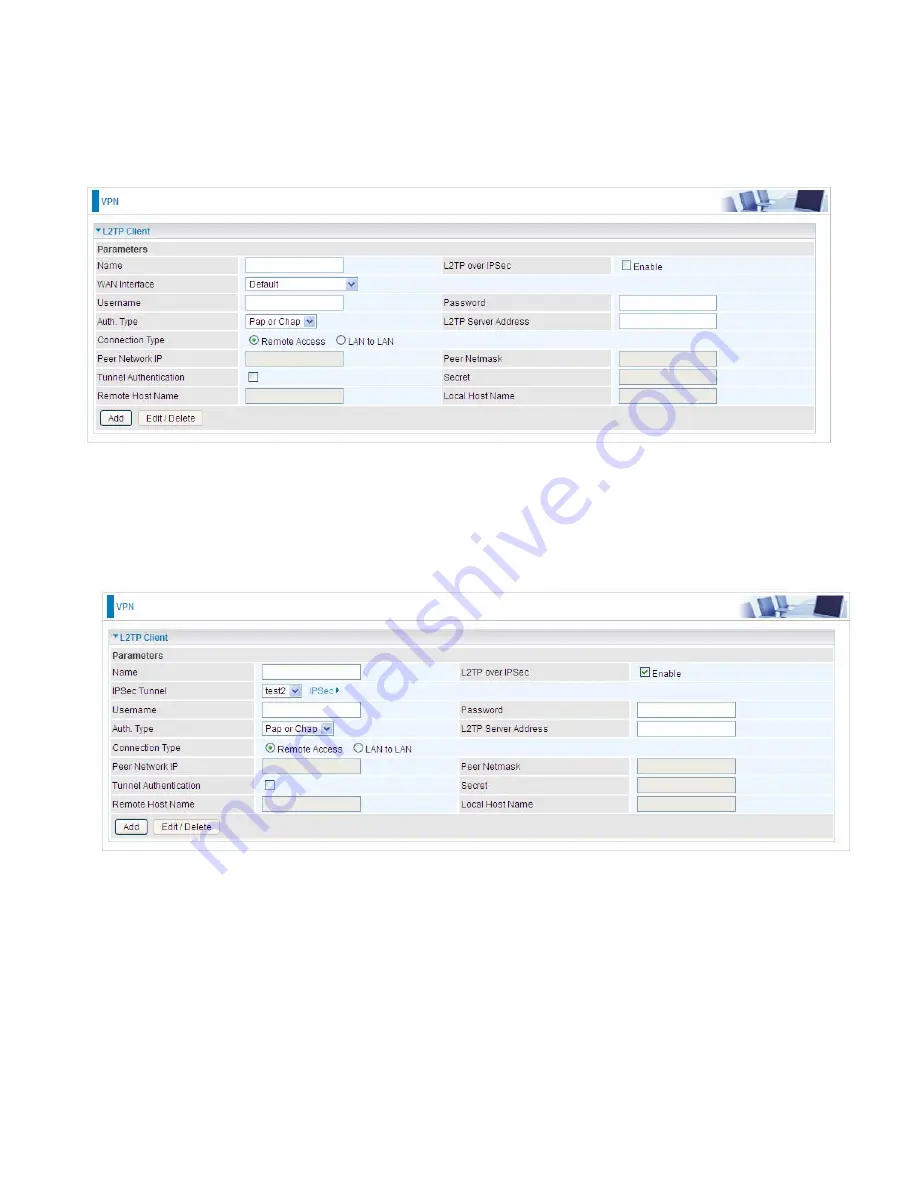
L2TP over IPSec:
If your L2TP server has used L2TP over IPSec feature, please enable this item.
under this circumstance, client and server communicate using L2TP over IPSec.
Enable
IPSec Tunnel:
Select the appropriate IPSec for L2TP rule configured for the L2TP Client.
Username:
Enter the username provided by your L2TP Server.
Password:
Enter the password provided by your L2TP Server.
Auth. Type:
Default is Pap or CHap if you want the router to determine the authentication type to
use, or else manually specify CHAP (Challenge Handshake Authentication Protocol) or PAP
(Password Authentication Protocol) if you know which type the server is using. When using PAP, the
password is sent unencrypted, whilst CHAP encrypts the password before sending, and also allows
for challenges at different periods to ensure that an intruder has not replaced the client.
L2TP Server Address:
Enter the IP address of the L2TP server.
Summary of Contents for 7800DX
Page 19: ...15 3G LTE Router mode ...
Page 37: ...33 Click link 192 168 1 254 it will lead you to the following page ...
Page 40: ...36 Click 192 168 1 254 it will lead you to the following page ...
Page 43: ...39 Click 192 168 1 254 it will lead you to the following page ...
Page 99: ...95 Configure AP as Enrollee Add Registrar with PIN Method 1 Set AP to Unconfigured Mode ...
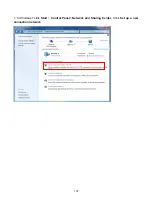
Page 143: ...139 Accessing mechanism of Storage In your computer Click Start Run enter 192 168 1 254 ...
Page 145: ...141 Access the folder public ...
Page 148: ...144 Step 2 Click Add a Printer Step 3 Click Add a network wireless or Bluetooth printer ...
Page 159: ...155 Rule inactive ...
Page 186: ...182 ALG The ALG Controls enable or disable protocols over application layer ...
Page 194: ...190 ...
Page 197: ...193 ...
Page 204: ...200 5 Input the account user name and password and press Create ...
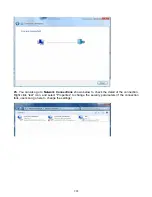
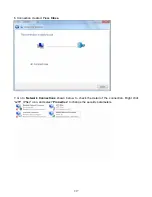
Page 205: ...201 6 Connect to the server ...
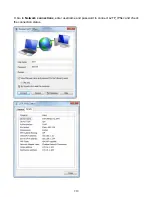
Page 206: ...202 7 Successfully connected ...
Page 208: ...204 ...
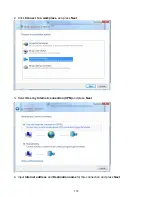
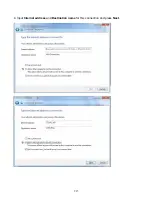
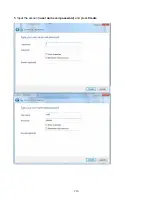
Page 219: ...215 4 Input Internet address and Destination name for this connection and press Next ...
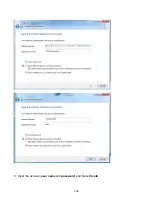
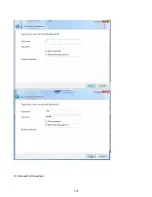
Page 220: ...216 5 Input the account user name and password and press Create ...
Page 238: ...234 2 ipoe_eth0 with DDNS www hometest1 com using username password test test ...
Page 251: ...247 Click Apply to confirm your settings ...
Page 262: ...258 Example Ping www google com ...
Page 263: ...259 Example trace www google com ...