BE1-BPR BESTlogic
5-1
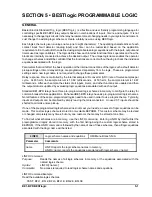
SECTION 5 • BESTlogic PROGRAMMABLE LOGIC
GENERAL
Basler Electric Standard Trip_logic (BESTlogic), is a flexible and user friendly programming language for
controlling specific BE1-BPR relay outputs based on combinations of inputs, timers, and outputs. It is not
necessary to change logic circuits in the relay hardware to meet changing needs in your system environment.
Just change the existing logic scheme or create a totally new one using BESTlogic.
Each logic scheme is given a unique name (one to eight characters). The operating characteristics of each
contact input, fault detector (analog input) and timer can be customized based on the application
requirements. Each output is then defined using simple boolean logic equations with the inputs, outputs and
timers used as logic variables. The logic defines how each internal functional block operates and how the
blocks are internally connected to achieve the desired output. The unique logic name enables the operator
to change schemes and still be confident that the functions are correct without having to check the individual
equations associated with the logic.
Parameters that don't affect the basic operation or the internal connections of the logic, such as fault detector
pickup settings or timer delay settings, are programmed separately from the logic. These are programmed
settings and a new logic name is not required to change these parameters.
Relay response time is controlled by the internal sample A/D converter (ADC) rate of twelve samples per
cycle. At 60 hertz, the sample interval is 1.389 milliseconds. At 50 hertz, the sample interval is 1.667
milliseconds. After each sample, the status of all inputs, timers, and other functions are updated and then
the output status is updated by evaluating logic equations associated with each output.
Standard BE1-BPR relays have three pre-programmed logic schemes in memory to configure the relay for
common breaker failure applications. Enhanced BE1-BPR relays have six pre-programmed logic schemes.
Not all features of these pre-programmed logics need to be used in order to use a logic scheme. Typically,
inputs and outputs can be disabled by simply leaving them disconnected. Unused CT inputs should be
shorted to minimize noise pickup.
If one of the preprogrammed logic schemes does not meet your needs, a new set of logic equations can be
made. This custom logic scheme is stored in non-volatile EEPROM. This custom scheme may be revised
or changed completely many times, but only one custom scheme may be stored at one time.
To find out what schemes are in memory, use the LINFO command. Entering LINFO by itself will list the
preprogrammed logics stored in memory, with the first listing being the custom logic scheme stored in
EEPROM. If the LINFO command is followed by the name of one of these schemes, then all logic equations
associated with that logic name will be listed.
LINFO
Logic scheme names and equations
HMI Menu Branch: N/A
Parameter
Comments
name
LINFO reports the logic scheme names in memory.
LINFO<name> reports the equations associated with logic scheme <name>
LINFO Command
Purpose:
Reads the names of all logic schemes in memory or the equations associated with the
named logic scheme.
Syntax:
LINFO[<name>]
Comments:
No access is required to read logic scheme names and equations.
LINFO Command Example
Read the available logic schemes.
TEST, BFL1, BFL2, BFL3, BFL1E, BFL2E, BFL3E
Summary of Contents for BE1-BPR
Page 31: ...BE1 BPR Application 2 17...
Page 42: ...3 4 BE1 BPR Human Machine Interface Figure 3 4 BE1 BPR Relay Vertical Mount Front View...
Page 43: ...BE1 BPR Human Machine Interface 3 5 Figure 3 5 BE1 BPR Relay Vertical Mount Rear View...
Page 49: ...4 6 BE1 BPR Functional Description Figure 4 2 Enhanced BE1 BPR Menu Display Screens...
Page 50: ...BE1 BPR Functional Description 4 7 Figure 4 3 Standard BE1 BPR Menu Display Screens...
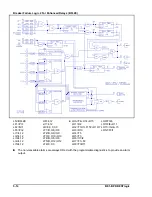
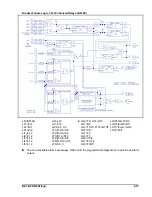
Page 94: ...5 4 BE1 BPR BESTlogic Figure 5 1 BESTlogic Function Blocks...
Page 121: ...BE1 BPR Installation 7 3 Figure 7 3 Overall Dimensions Vertical Mount...
Page 122: ...7 4 BE1 BPR Installation Figure 7 4 Overall Dimensions Side View Vertical Mount...
Page 123: ...BE1 BPR Installation 7 5 Figure 7 5 Panel Drilling Diagram Vertical Mount...

