


9. Operating Acuras
Acuras Capture is to be run only when the system is fully aligned with matching luminance and colors (red, green, blue and white)
across all channels and the Golden Alignment data has been saved. It is strongly advised to store Golden Alignment sets at different
brightness levels to cover lamp aging.
Acuras Capture for Single point or Multi-point Acuras will be decided based on the positioning data saved on the Positioning Page
of the XDS RACU graphical user interface. During Acuras Capture all stray light in the display must be removed. All light on the
screen other than the projector light should be eliminated.
Acuras capture data is stored per alignment that is de
fi
ned. Capture must be executed for each of them. For
this, active the Golden Alignments set one by one and run Acuras capture on selected group for all of them.
Acuras capture data is projector group dependent. For each of the projector groups for which the used desires
to run realign, capture must be executed. For this, active the groups one by one and run Acuras capture on
selected group for all of them.
Make sure that the Acuras position is de
fi
ned for each projector in the selected group whose Acuras value
need to be captured. Only 1 Acuras position, Single or Multi-point is allowed per projector.
The best practice is to always capture the Acuras value for all the projectors in the selected group in order to
achieve a good result.
By default, the patterns on which the automatic brightness and color measurements are performed are gener-
ated in the projectors. It is however possible to use the AutoGeometry IG testpatterns through API commands.
See R59770566 — API Commands for XDS RACU Software.
How to start the Acuras capture process?
1. Select a projector from a group, where you wish to capture the Acuras values.
2. Optional: Execute the Gray level correction for the selected projector(s) of a group.
Note:
For optimum performance of the system, it is advised to execute Gray Level Correction before the manual system
alignment and creation of the Golden Alignment. See "Starting the Gray Level Correction process", page 83.
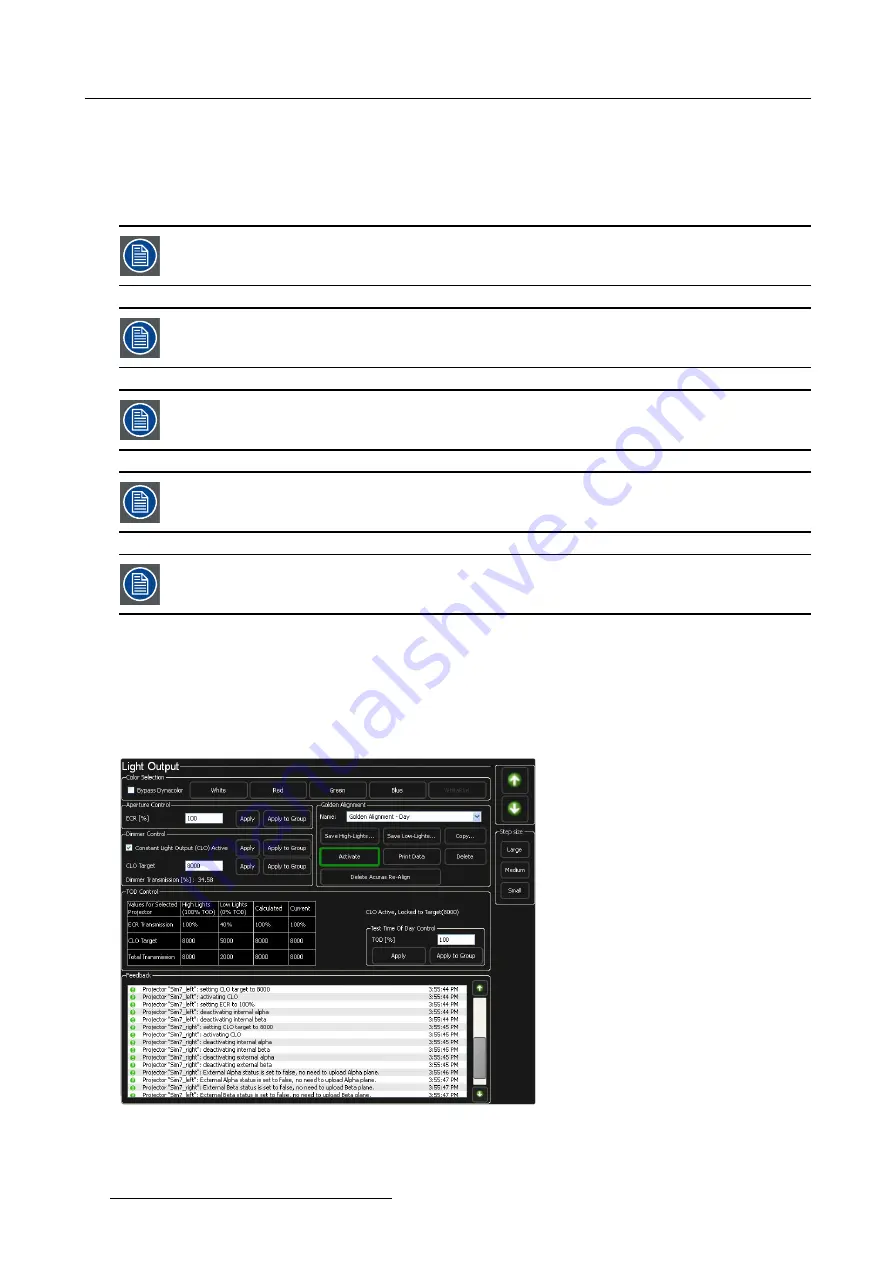
3. Navigate to the
Light Output
page and create a Golden Alignment set and activate it.
Image 9-2
Note:
Acuras capture can only be run if a Golden Alignment has been activated. The last selected Golden Alignment is indicated
at the top of the Acuras page. In case none is selected, capture can not be executed.
4. Navigate to the
Acuras
page and make either of the selections:
88
R59770509 MES ACURAS HEAD - AUTO ALIGNMENT HEAD 24/11/2010
Summary of Contents for MES ACURAS HEAD
Page 8: ......
Page 20: ...2 Safety 12 R59770509 MES ACURAS HEAD AUTO ALIGNMENT HEAD 24 11 2010...
Page 22: ...3 Compliancy 14 R59770509 MES ACURAS HEAD AUTO ALIGNMENT HEAD 24 11 2010...
Page 28: ...4 Packaging 20 R59770509 MES ACURAS HEAD AUTO ALIGNMENT HEAD 24 11 2010...
Page 112: ...10 Operating AutoGeometry 104 R59770509 MES ACURAS HEAD AUTO ALIGNMENT HEAD 24 11 2010...
Page 126: ...Index 118 R59770509 MES ACURAS HEAD AUTO ALIGNMENT HEAD 24 11 2010...
Page 128: ...List of tables 120 R59770509 MES ACURAS HEAD AUTO ALIGNMENT HEAD 24 11 2010...


