P/N 130426 Rev.
D
23
Banner Engineering Corp.
•
Minneapolis, U.S.A.
www.bannerengineering.com • Tel: 763.544.3164
A-GAGE EZ-ARRAY
Instruction Manual
PC Interface
The full functionality of the EZ-ARRAY is available by making
use of the PC interface (the graphic user interface, or “Banner
Sensors GUI”). Refer to Section 1 for a full description of the
available sensing modes and other features.
The sensor is easily configured using a Windows
®
menu-
style program via the Banner Sensors GUI software and a
PC-compatible computer (running Windows XP or 2000; GUI
software version 1.2 will also be compatible with Vista
®
).
5.1 Supplied Software
The PC interface software for configuring the EZ-ARRAY is
included on the CD packed with the receiver, entitled Banner
Sensors GUI (p/n 76978).
For the most recent software version, visit
and enter “Banner Sensors GUI” in the
search field. Install the software (version 1.1 at this writing) onto
your hard drive; the installer will automatically load the software
into a folder titled “Banner Engineering\Banner Sensors GUI”
onto your computer. If the CD is used, inserting it into your CD
drive will auto-launch the GUI installation and place the icon
onto your desktop.
Double-click on the
Banner Sensors GUI
icon
to launch
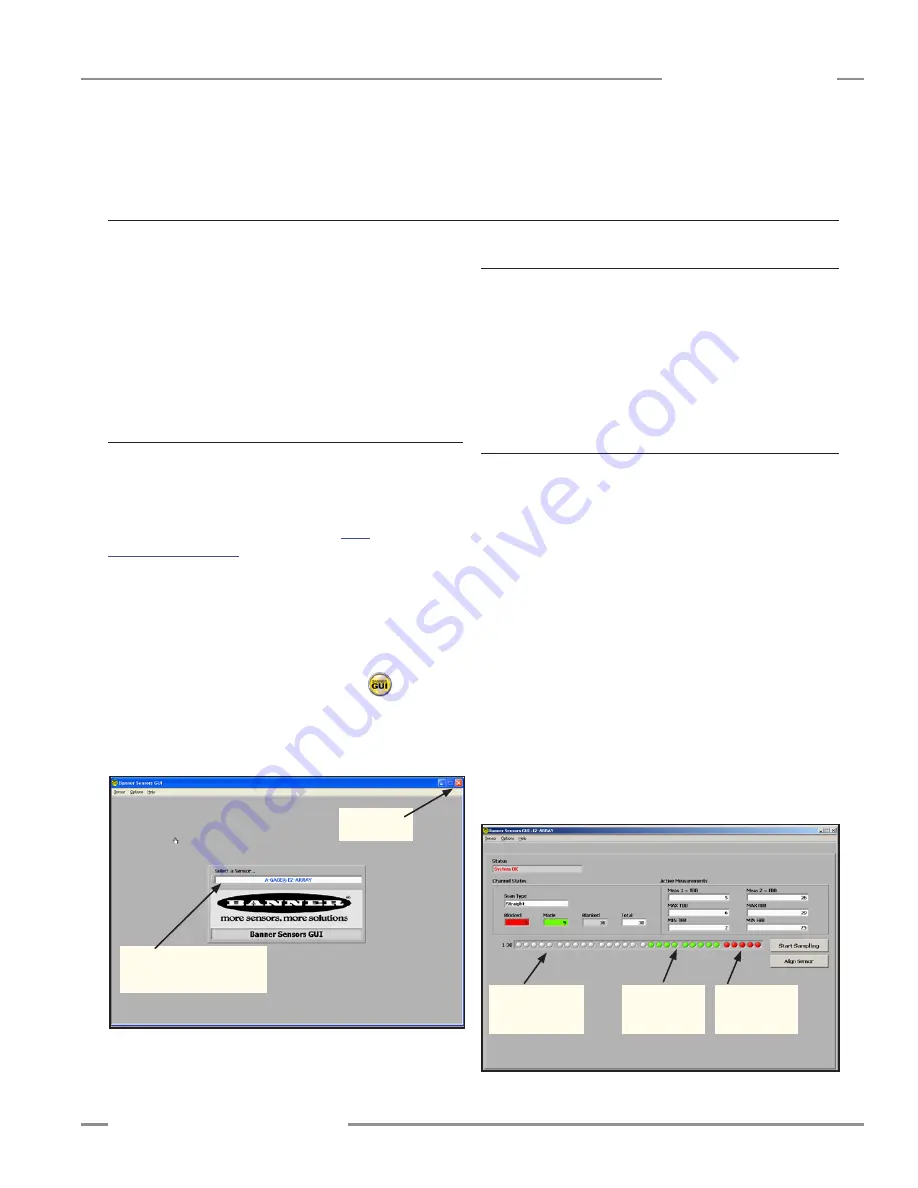
the program. The main menu screen appears. Verify that
A-GAGE
®
EZ-ARRAY
is displayed in the
Select a Sensor
field
of the screen.
5.2 Communications Connections
Connect the serial cable from your receiver to your PC, using an
RS485-to-RS232 adapter, such as the model INTUSB485-1 USB
serial adapter listed in Section 2.2. (Instructions for configuring
the adapter are included with the packaging for the adapter.)
An operating EZ-ARRAY system must be connected before the
software displays will open.
5.3 Accessing the GUI
With the sensor pair powered up and connected to your PC (as
described in Section 5.2), go to
Sensor > Connect
(Ctrl + N).
The Alignment/Status screen appears, providing a snapshot of
the current sensing alignment status, including the status of each
array beam, total numbers of blanked, made and blocked beams,
the selected measurements and their values (see Figure 5-2).
The Alignment/Status screen has three pull-down menus:
Sensor
,
Options
, and
Help
.
Sensor Menu (Alignment/Status screen)
When the Alignment/Status screen is active, the
Sensor
menu
provides the options
Setup
(Ctrl + S), which is used to modify
or view a sensor configuration,
Connect/Disconnect
(Ctrl + N),
which connects (or disconnects) the PC to the sensor, and
Exit
(Ctrl + Q). When a setup screen view is active, the Sensor menu
has other options (see Figures 5-3 and 5-5).
NOTE:
Most GUI Setup options are not available until the
Connect function has linked the PC to a sensor pair.
5. Using the PC Interface (Banner Sensors GUI)
Figure 5-2. EZ-ARRAY Alignment/Status screen
Verify that A-GAGE
®
EZ-ARRAY
is displayed in the
Select a Sensor fiel
d
Click here to
exit program
Gray circles
denote blanked
beams in the array
Red circles
denote blocked
beams
Green circles
denote “made”
(clear) beams
Figure 5-1. Banner Sensors GUI (PC Interface) main menu screen


