BeoSystem 4
Type 9666 - 9670
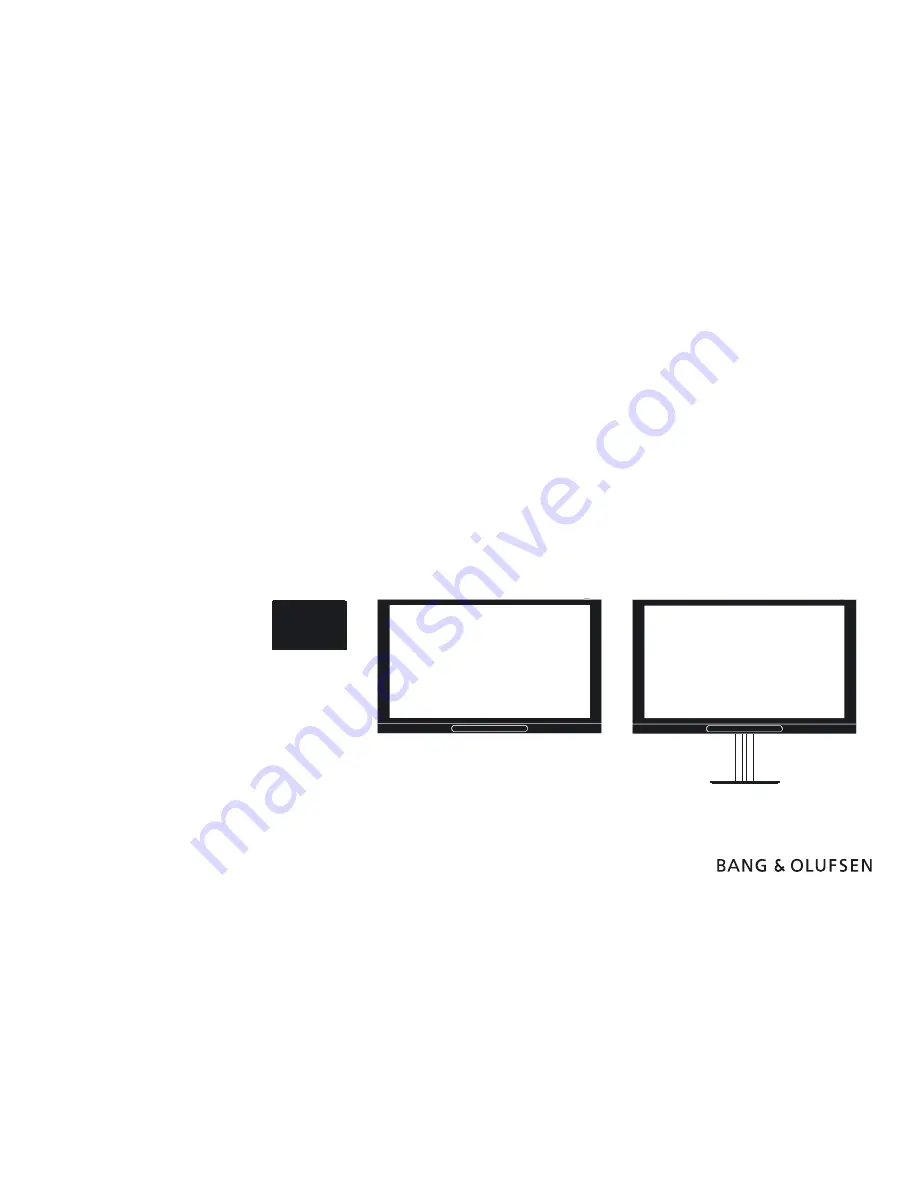
BeoVision 12-65
Type 7953 - 7957
BeoVision 12-65 MK II
Type 7958, 7964, 7967, 7977 - 7978
Installation GuideEnglish - version 1.3
29.0
8.6
28.0
43.9
161.0
96.3
5.8
7.2
2014-06-17T08:05 v1-3-01 in Design
Page 1: ...Type 9666 9670 BeoVision 12 65 Type 7953 7957 BeoVision 12 65 MK II Type 7958 7964 7967 7977 7978 Installation Guide English version 1 3 29 0 8 6 28 0 43 9 161 0 96 3 5 8 7 2 2014 06 17T08 05 v1 3 01...
Page 2: ...n guide via BeoWise Video BeoSystem BeoSystem 4 How to navigate this guide When the guide is opened it automatically opens in Full Screen Mode can be kept or changed see Esc below This is primarily do...
Page 3: ...on TIP The right side of this page and the Table of Contents page 81 acts as an active table of contents Simply click the subject you want and you are transferred to the section in question Introducti...
Page 4: ...SIDE 5V 50mA AERIAL 14 18V 0 4A SATELLITE HDMI OUT MONITOR CONTROL IR AUTO CONTRAST PL 6 CTRL 1 CTRL 2 CTRL 3 PUC 3 A B PL 1 PL 2 PL 3 EXT IR PUC 1 A B CTRL 4 PUC 2 A B CTRL 5 NOT USED PL 4 PL 5 1 2 3...
Page 5: ...be mounted on a wall by adding the wall brackets each using the existing screws See also the installation guide enclosed in the packaging for the brackets The BeoSystem 4 can by placed upright with t...
Page 6: ...can be placed flush with the cabinet front rear or displaced in order to have the cables in front of the BeoSystem 4 although behind the cabinet front frame Examples are shown below See also the insta...
Page 7: ...Connecting mains cable 7 Connecting mains cable Connect the mains cable plug into the mains socket of the BeoSystem 4 and mount the cable holder as shown...
Page 8: ...npacking and handling service stand When unpacking the BeoVision 12 65 mount the service stands Bang Olufsen part No 3376433 1 pcs and secure their position by applying a rubber band with hooks per se...
Page 9: ...connection panel of the BeoVision 12 65 and run this cable in the Cable Manager together with the other cables to the BeoSystem 4 Extending cables see page 11 HDMI IN POWER LINK CONTROL IR Out ACM IR...
Page 10: ...thout autocontrast 8087030 to the IR AUTO CONTRAST socket Note The IR eye used is the type without autocontrast Part No 8087030 and a Network Link Product Cable e g of appropriate length for example 1...
Page 11: ...ing two scenarios Hidden installation via wall outlet to the BeoSystem 4 placed in the Technical Room or similar cabinet see page 12 The cables are connected using the Power Link Junction Boxes Visibl...
Page 12: ...wing the principles as illustrated see simplified illustration above Cable connections in the Power Link Junction Box is shown below 2xRJ45 2xRJ45 BeoSystem 4 2xRJ45 2xRJ45 Living room Technical room...
Page 13: ...illustration above Cable connections in the Power Link Junction Box is shown below The junction boxes may be hidden in the socket panel of the TV and at an appropriate place near the BeoSystem 4 BeoS...
Page 14: ...IR RX TX CTRL 1 CTRL 2 CTRL 3 PUC 3 A B PL 1 PL 2 PL 3 EXT IR PUC 1 A B CTRL 4 PUC 2 A B CTRL 5 NOT USED PL 4 PL 5 1 2 3 4 5 HDMI IN S P DIF IN 5V 0 5A 12V 1 0A STAND COMMON INTERFACE CHIPSIDE CHIPSID...
Page 15: ...X TX CAT5e 6 IN LINK HDMI OUT RS232 OUT IR IN IR OUT CTRL 1 CTRL 2 CTRL 3 PUC 3 A B PL 1 PL 2 PL 3 EXT IR PUC 1 A B CTRL 4 PUC 2 A B CTRL 5 NOT USED PL 4 PL 5 1 2 3 4 5 HDMI IN S P DIF IN 5V 0 5A 12V...
Page 16: ...T HDRX IR POWER CAT5e 6 7 IN CTRL 1 CTRL 2 CTRL 3 PUC 3 A B PL 1 PL 2 PL 3 EXT IR PUC 1 A B CTRL 4 PUC 2 A B CTRL 5 NOT USED PL 4 PL 5 1 2 3 4 5 HDMI IN S P DIF IN 5V 0 5A 12V 1 0A STAND COMMON INTERF...
Page 17: ...er end of cable Connection of RJ45 end of IR blaster cable The IR cable with optocoupler and arranged with the captive screw connector can from January 2014 be ordered as Part No 8780332 The cable is...
Page 18: ...he Mini jack to RJ45 Adaptor cable Bang Olufsen Part No 6271233 is added Cable wires in captive screw connectors With the AT HDTX IR and AT HDRX IR the cable wires are fastened in captive screw connec...
Page 19: ...th PUC A IR blaster cable with 2 IR blaster has Bang Olufsen Part No 6271204 marked with PUC A and PUC B for the two blasters respectively Cut the cable in an appropriate length Observe the text print...
Page 20: ...ice the distance between the BeoVision 12 65 and the BeoSystem 4 must be no more than 1 8 m 6 ft If the distance is longer a USB extension cable must be used so that the measurement device can be conn...
Page 21: ...ialogue gives a status as follows SCREEN NOT MEASURED MEASURED depending on if a screen measurement has been completed LIGHT SENSOR NOT MEASURED MEASURED depending on if a ambient light measurement ha...
Page 22: ...t condition Perform the screen measurements in lighting conditions as dark as possible to minimise the influence of ambient light Warm up sequence If the BeoVision 12 65 has not been switched On for 5...
Page 23: ...ion will first be highlighted when the lens is in a proper position Press the Centre button to start the measurement The measurement sequence measures various intensities of white and a number of colo...
Page 24: ...reen measurements in lighting conditions as bright as possible but without light sources shining directly onto the light sensor of the BeoVision 12 65 as well as the light sensor of the reference meas...
Page 25: ...itions and redo the measurement For this measurement the measurement device is oriented as seen in the illustration The measurement device is held by hand Press the Centre button to continue The follo...
Page 26: ...llowing instructions are shown follow these see the illustration STEP 2 OF 4 HOLD ATTACH THE MEASURING DEVICE AGAINST THE SCREEN S UPPER RIGHT EDGE POINTING THE DEVICE BACKWARDS TOWARDS THE WALL BEHIN...
Page 27: ...and The following instructions are shown follow these see the illustration STEP 3 OF 4 HOLD ATTACH THE MEASURING DEVICE AGAINST THE SCREEN S UPPER RIGHT EDGE POINTING THE DEVICE TOWARDS THE VIEWING PO...
Page 28: ...is shown When measurement is finished the following text is shown in the lower right corner of the display LIGHT SENSOR MEASUREMENT COMPLETE Press and hold BACK to exit menus In case the measurement f...
Page 29: ...material The gain rating of a screen is based on how much light it reflects All Home Cinemas should have control of lighting and draperies a low gain or even a gain below 1 is preferred A gain less t...
Page 30: ...erience the projected image as un sharp and blurred and will possibly be able to see the pixel structure If the viewing distance is too long the customer will loose details and will not get the wanted...
Page 31: ...e size of the screen see previous page and how much black drop you need Take care of the ground clearance height There should be room for the BeoLab chosen It should not be placed very close to the fl...
Page 32: ...r the throw ratio in the product manual Projector centring If the corners of the room are 90 degrees use e g the right side wall to find the brackets horizontal placement Z Q Horizontal Lens Offset Ex...
Page 33: ...of the Vertical Lens Shift above the top line of the screen if supported by the projector Else the centre line of the lens must be aligned with the centre of the screen or alternatively in the top or...
Page 34: ...of the room make sure that the distance to each wall are not the same Y square root of 2 times X Note Set loudspeaker position switch according to placement wall corner free In this way most of the ha...
Page 35: ...viewing The subwoofer should be placed between the front speakers but not centred in the room Remember to set loudspeaker position switch according to placement wall corner free Also see the user guid...
Page 36: ...d setup The subwoofer should be placed between the front speakers but not centred in the room Remember to set loudspeaker position switch according to placement wall corner free Also see the user guid...
Page 37: ...DTS Digital Surround matrix surround decoding technology Placement Tips It is not always possible to place your speakers exactly as shown The pictures show placement angles so you have some flexibilit...
Page 38: ...K DELAY WIRED 50ms NETWORK DELAY WLAN 1000ms ML DELAY SETTINGS 143ms REROUTE LIGHT CONTROL NO B O NETWORK DOMAIN HbbTV ON ATSC MODULE NO RESET TO DEFAULT RESET CI AUTHENTICATIONS ON OFF 0 65535 ON OFF...
Page 39: ...ote control choose SETUP and press the Centre button Press RED button and within 3 seconds press the Centre button How to exit Customer Service Menu Press BACK on Beo6 Beo4 type 1710 or newer set in M...
Page 40: ...oard version PCB59 Extension PRODUCT Product variant defines in which device the hardware is used TUNER Tuner variant is detected from the tuner DVF type or e g factory setup It will show one of the v...
Page 41: ...WIRED NETWORK DELAY WLAN NETWORK DELAY WIRED and WLAN These are settings that will optimise for unwanted echo phenomenons between products linked up in a system Network Link and or Master Link The sys...
Page 42: ...lt Volume preset bass treble and balance are configured to default loudness off etc Video presets are configured to default brightness contrast and colour adjustments are configured to default light s...
Page 43: ...DCAST ONLY When it is DETECT OFF WSS detection is never used and when it is set to broadcast only it is only used for the internal TV tuner and not for external sources FRAME SYNC Is per default set t...
Page 44: ...nternal sources COLOUR SPACE is the input colour space either ITU601 ITU709 or RGB SIGNAL defines the input signal possible values Invalid Internal CVBS RGB or HDMI 3D Possible settings None SideBySid...
Page 45: ...n projector lift etc Limiting values are 0 to 12 V 100 mA CONTROL TIMER Control Timers can be changed in these below sub menus CINEMA ON CONTROL TIMER 1 can be changed It defines the time from the use...
Page 46: ...TIMER values are lower than 15 seconds and the WARM UP is 15 seconds then you cannot store the values if the WARM UP value is set to e g 14 seconds However increasing it 15 seconds or above will again...
Page 47: ...you to a submenu where you can activate deactivate the BtB functionality if and only if you are authorised to do so Enterprise authorized staff only REPORTING Reporting provides the possibility to col...
Page 48: ...2 PL 3 EXT IR PUC 1 A B CTRL 4 PUC 2 A B CTRL 5 NOT USED PL 4 PL 5 1 2 3 4 5 HDMI IN S P DIF IN 5V 0 5A 12V 1 0A STAND COMMON INTERFACE CHIPSIDE CHIPSIDE 5V 50mA AERIAL 14 18V 0 4A SATELLITE HDMI OUT...
Page 49: ...sibility of assigning an open collector to control a motorised Cinemasope lens which is used in front of a projector and activated by either of the two Cinemascope formats Details about connecting to...
Page 50: ...en Collector should be delayed before it is started range 1 to 200 s counting from when the Home Cinema Scene is ended Also set the Cool Down Time see section below In the section LIFT Select CABINET...
Page 51: ...Control Timer 4 Control Timer 4 time Fading light BeoSystem 4 Warm up time Warm up time SW curtains Picture Movie T0 condition is that the TV is in Quick Start mode or already On If not then the TV s...
Page 52: ...8 24 Hz 720p 50 Hz 59 94 60 Hz For Side by side and Top and Bottom formats see 1 BV4 85 FHD 3D Formats BV4 D20 series 3D ready BV4 103 MK II FHD 3D Formats BeoSystem 4 combined with Projectors and non...
Page 53: ...ojectors are supported by PUC and standard settings Samsung SP A900B SIM2 Crystal 35 Lumis 3D S Nero 3D 1 See ServiceTool or BeoWise for newest list of projectors ServiceTool updates for projectors Us...
Page 54: ...4 2 2 Sound 8 x L PCM 32 44 1 48 88 2 96 kHz IEC61937 streams Dolby Digital 5 1 Dolby Digital 6 1 EX DTS 5 1 DTS ES 6 1 matrix DTS ES 6 1 discrete AAC HDMI 576i 16 9 16 9 HDMI 576p 4 3 576p 4 3 4 HDM...
Page 55: ...an be signalled in the following ways CVBS and RGBY pin 8 in Scart YPbPr and RGBHV not possible TMDS in AVI infoframe 2 Estimated resolution for analogue sources 3 Sampling frequency for analogue sour...
Page 56: ...Outer dimensions BeoVision 12 65 with Floor Stand 1610 mm 63 4 87 mm 3 4 6 mm 0 24 964 mm 38 1321 mm 52 469 mm 18 5 357 mm 14 1 499 mm 19 6 106 mm 4 17 47 mm 1 9 143 mm 5 63 14 mm 0 55 60 mm 2 36 36...
Page 57: ...See next page regarding measures for mounting the wall bracket 1610 mm 63 4 87 mm 3 4 964 mm 38 112 mm 4 41 87 mm 3 4 43 mm 1 69 6 mm 0 24 117 mm 4 21 70 mm 2 77 64 mm 2 52 50 mm 1 97 58 mm 2 28 950 m...
Page 58: ...in each side of the wall bracket Two screws must penetrate the gypsum and be screwed a minimum of 65 mm 2 5 into a vertical stud Ventilation To ensure proper ventilation allow at least 100 mm 4 of spa...
Page 59: ...5 DSUB9 female 10 m for BSys 4 to BV4 65 85 103 6278726 RS232 cable RJ45 DSUB9 female 15 m for BSys 4 to BV4 65 85 103 6278727 IR cable IR eye with auto contrast 8089000 5 m cable external IR eye with...
Page 60: ...length for BeoSystem 4 See BeoWise TIP re If you have problems with 3D on 10 metre cables or need HDMI cables longer than 10 metres for BeoSystem 4 BeoVision 12 65 projector Extender solutions Extend...
Page 61: ...6 Green 6 Green 7 White Brown 7 White Brown 8 Brown 8 Brown Shield Braided shield Shield Braided shield RJ45 to RJ45 Network Link Part No Length Connector Colour 6271023 0 5 m 1 6 ft RJ45 RJ45 White 6...
Page 62: ...etwork Link Plenum Cable in cable reels for self mounting 6 55 mm 0 26 S FTP Cat 6 Class E 8 wires braided shield Cable is CL2P rated for use used for in special areas where high demands regarding fir...
Page 63: ...cables with RJ45 plug has pin 3 and 7 short circuit The 2 5 mm 0 1 cable with 4 wires of which 1 pair is foiled and marked with indicating MKIII Used with BeoLab 2 BeoLab 3 BeoLab 4 BeoLab 7 series Be...
Page 64: ...White Data 3 White Green Signal GND 3 White Green Signal GND 4 Yellow Speaker on off 4 Yellow Speaker on off 5 5 6 Green Audio R out 6 Green Audio R out 7 White Brown Signal GND 7 White Brown Signal G...
Page 65: ...t 6 Green Audio R out 7 Braided shield Green Brown Signal GND 7 Braided shield Green Brown Signal GND 8 Brown Audio L out 8 Brown Audio L out Shield Blue Data GND Shield Blue Data GND Part No Length C...
Page 66: ...86 ft Grey with meter markings 6250031 100 m 328 ft White Power Link Installation Extension cable in cable reels for self mounting 2 5 mm S FTP UTP 4 wires braided shield Cab be used between wall outl...
Page 67: ...ield Braided shield Data GND White Brown IR Data Brown Light White Blue BtB Signal White Green Standby Orange ON LED Blue Green GND White Orange 5V Network Link Product Cable see page 61 Seen from Pin...
Page 68: ...one using Network Link Installation Cable up to 100 m 328 ft see page 61 8 1 Green Blue GND White Orange 5V White Brown IR Data Pin Colour Description 1 White Orange 5V 2 Orange ON LED 3 White Green...
Page 69: ...uppliers The terminal shown is from www rs components com with part no 724 8953 The open collectors and IR blasters are connected as shown in the below illustration Pin Colour Description 1 White Oran...
Page 70: ...C 6 NC 6 Green NC 7 NC 7 White Brown NC 8 NC 8 Brown NC 9 NC Shield Braided shield Data GND IR cable RJ45 to MicroFit 8 pole IR cable RJ45 MicroFit 8 pin BeoSystem 4 to BeoVision 4 65 85 103 Bang Oluf...
Page 71: ...1 NC 1 White Orange NC 2 Orange RS232 Rx 2 Orange RS232 Rx 3 White Green RS232 Tx 3 White Green RS232 Tx 4 NC 4 Blue GND 5 Blue GND 5 White Blue NC 6 NC 6 Green NC 7 NC 7 White Brown NC 8 NC 8 Brown N...
Page 72: ...t_D1_DP HDMI_TXout_D2_DN NC GND GND GND GND HDMI_TXout_D2_DP P300 HDMI 15 11 12 13 14 16 10 9 8 7 6 5 4 3 2 1 HPD 5V GND DSDA DSCL CEC RXC RXC RX0 RX0 RX1 RX1 RX2 NC GND GND GND GND RX2 Pxxx HDMI 15 1...
Page 73: ...N NC GND GND GND GND HDMI_TXout_D2_DP P300 HDMI 15 11 12 13 14 16 17 18 19 10 9 8 7 6 5 4 3 2 1 HPD 5V GND DSDA DSCL CEC RXC RXC RX0 RX0 RX1 RX1 RX2 NC GND GND GND GND RX2 Pxxx HDMI 15 11 12 13 14 16...
Page 74: ...COLOR IR_CBtB IR 8 8pins 8 7 6 5 4 3 2 1 RXC RXC GND RX5 RX5 GND RX0 RX0 HPD GND 5V RX3 RX3 GND RX1 RX1 V Sync DSDA DSCL RX4 RX4 GND RX2 RX2 Pxxx DVI D C1 C2 C3 C4 C5 Red Green Blue H Sync A GND 15 21...
Page 75: ...RX2 Pxxx DVI D 15 11 12 13 14 16 10 9 8 7 6 5 4 3 2 1 ANA_CUR_MIRROR IR_IN_N GND BtB_3P_IR_IN_N GND STB_LED ON_LED 5V_EXT_IR P310 RJ45 8 7 6 5 4 3 2 1 GND OC_4_OUT_N OC_3_OUT_N PUC_3_CON GND PUC_4_CON...
Page 76: ...SATELLITE 14 18V 0 4A DVB S2 tuner F connector 75 female AERIAL 5V 50mA DVB T2 C analogue tuner F connector 75 female Ethernet 10 100 Mbit s RJ45 socket IEEE 802 3 2008 IEEE 802 3 2008 Pin 1 TD RD Pin...
Page 77: ...ata 0 Shield Pin 9 TMDS Data 0 Pin 10 TMDS Clock Pin 11 TMDS Clock Shield Pin 12 TMDS Clock Pin 13 CEC Pin 14 Reserved N C on device Pin 15 SCL Pin 16 SDA Pin 17 DDC CEC Ground Pin 18 5V Power Pin 19...
Page 78: ...digital in out analogue in Pin 2 Not used Pin 3 Not used Pin 4 GND Pin 5 IR blaster current PUC 3A PUC5 Pin 6 GND Pin 7 IR blaster current PUC 3B PUC6 Pin 8 GND Shield Data GND CTRL 2 IR blaster Hote...
Page 79: ...in 8 GND Shield Data GND HDMI OUT Pin 1 TMDS Data 2 Pin 2 TMDS Data 2 Shield Pin 3 TMDS Data 2 Pin 4 TMDS Data 1 Pin 5 TMDS Data 1 Shield Pin 6 TMDS Data 1 Pin 7 TMDS Data 0 Pin 8 TMDS Data 0 Shield P...
Page 80: ...D Pin 5 NC Pin 6 NC Pin 7 NC Pin 8 NC Shield Data GND IR AUTO CONTRAST Room Awareness IR sensor Pin 1 5V Pin 2 On LED Pin 3 Stby LED Pin 4 GND Pin 5 BtB 3rd party IR in TTL Pin 6 GND Pin 7 IR in B O I...
Page 81: ...les Outer Dimensions Table of Contents BeoSystem 4 connection panel Version 1 3 2014 07 Table of Contents Introduction 2 How to use this installation guide 3 BeoSystem 4 connection panel 4 Placement 5...