4 - 38
Adjustment
Camera calibration
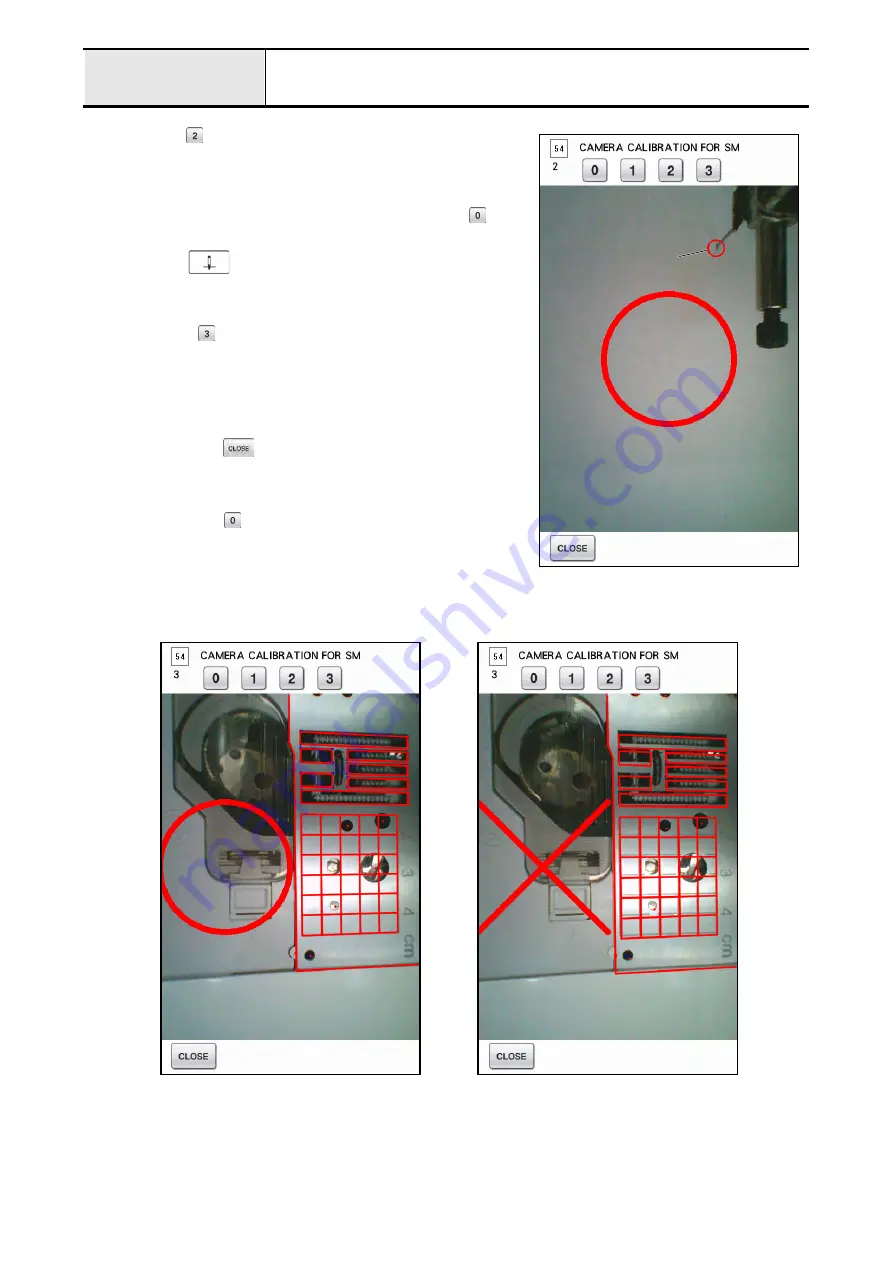
11. Press the
button image processing result it displayed. (Fig. 7)
*Key point
• “O” is success, “X” is no good.
• Check needle drop point aligns with red circle (visual check).
• When the “X” is displayed on the screen, press the
button, and then start again from the procedure 5.
12. Press the
(Needle position button), and raise the needle
up.
13. Remove the paper, and then remove the needle.
14. Press the
button, and then image processing result is
displayed.
*Key point
• “O” is success, “X” is no good.
• In case “O” is displayed, the calibration processing is
successful. (Fig. 8)
Press the
button, and then return the test mode
selection screen.
• In case “X” is displayed, the calibration processing is failure.
(Fig. 9)
Press the
button, and then start again from the
procedure 5.
When it fails again, check that the needle drop is good or
not.
<To next page>
Fig. 7 (Success)
Needle drop point
Fig. 8 (Success)
Fig. 9 (No good)
60
Summary of Contents for Ellisimo BLSO
Page 1: ...3...
Page 2: ...xvi 4...
Page 29: ...31...
Page 35: ...Tacony Corp 10 2008 2 3 In the case that the parts separate please assemble as shown 37...
Page 37: ...39...
Page 55: ...4 35 Camera calibration 57...
Page 65: ...67...


