


When you have chosen to control the camera(s) over IP, you can enter VISCA over IP to add a new IP address
or manage the existing IP address. It is also possible to assign channels to IP addresses.
Read
Switch between Serial and IP mode
, if you want to select and control a camera.
Manage Custom (existing) Address
Follow the instructions below:
1.
Select the Camera/ IP address from the list that is displayed on the screen of the controller.
2.
Choose the compatibility mode with which your camera is compatible with and click the
• Standard (Avonic CM4x or CM7x camera)
• Legacy (Avonic CM6x camera)
• Auto (The controller will automatically recognise the camera model to select the correct
compatibility mode for that camera. When you change the camera model connected to a
specific IP address, the controller will automatically change the compatibility mode.)
3.
Edit the IP address of the controlled camera using the
joystick button to confirm.
4.
Choose the protocol to transport the commands with: UDP or TCP and click the joystick
button.
5.
Edit or enter the UDP/ TCP Port number (using the Number Keys). Standard is 1259. Click the
joystick button.
6.
Move the joystick to the right and hold it in that position to delete the camera.
Add new Custom Address
Choose
add new Custom Address
to enter a new IP address to control a camera that you recently
added to your local network and follow the instructions below:
1.
Choose the method with which your camera is compatible with and click the
confirm. See above.
2.
Choose the protocol to transport the commands with: UDP or TCP and click the joystick
button.
3.
Enter the UDP/TCP port number (using the
). Standard is 1259. Click the
joystick button.
4.
Edit the IP address of the camera to be controlled using the Number Keys and click the
joystick button. A message on the display pops up with the text ‘A new camera has been
added’.
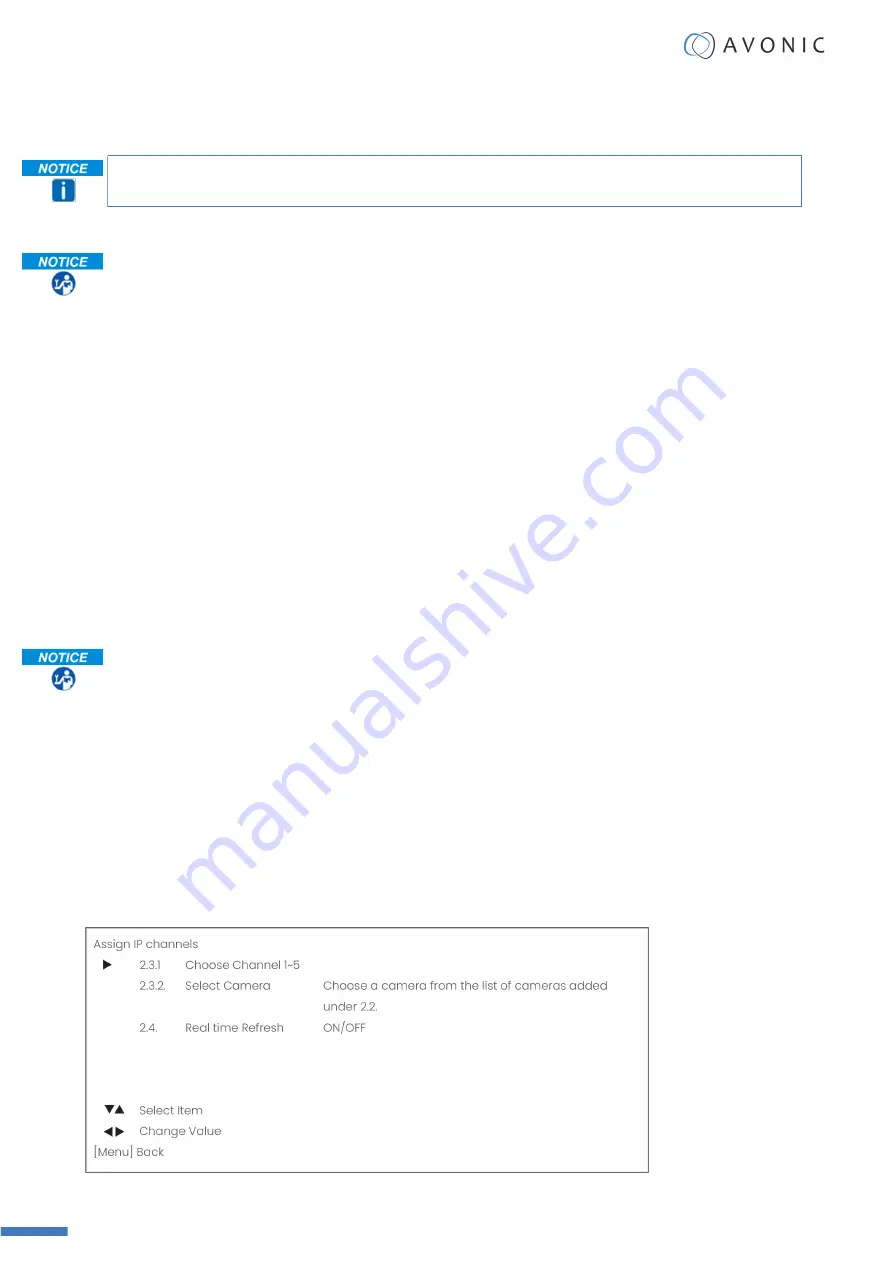
Assign IP Channels
User Manual AV-CON300-IP
| www.avonic.com
22


