


34
Name
Function
(12) Snapshot
Capture and save the screen shot in *.jpg format.
i
Please plug the USB pen drive to DVR server before press
Snapshot
button.
(13) Event log
Show the record of activities that take place in the system. (see also
Chapter 2.2.3
)
(14) AutoScan
Start/Stop video screen cycle switch.
(15) Full screen
View in full screen. To return, press the right button of the mouse
or
ESC
on the keyboard or
click the arrow icon.
Click to exit from
full screen mode
When you switch to full screen in multiple-screen mode,
Left
click to toggle to only display
one of the video in the multiple-screen mode or all.
(16) Alarm
Alert and display warning info.
(17) Virtual Keyboard
Click to enable virtual keyboard.
2.2.1
Setting Up and Using the Emap
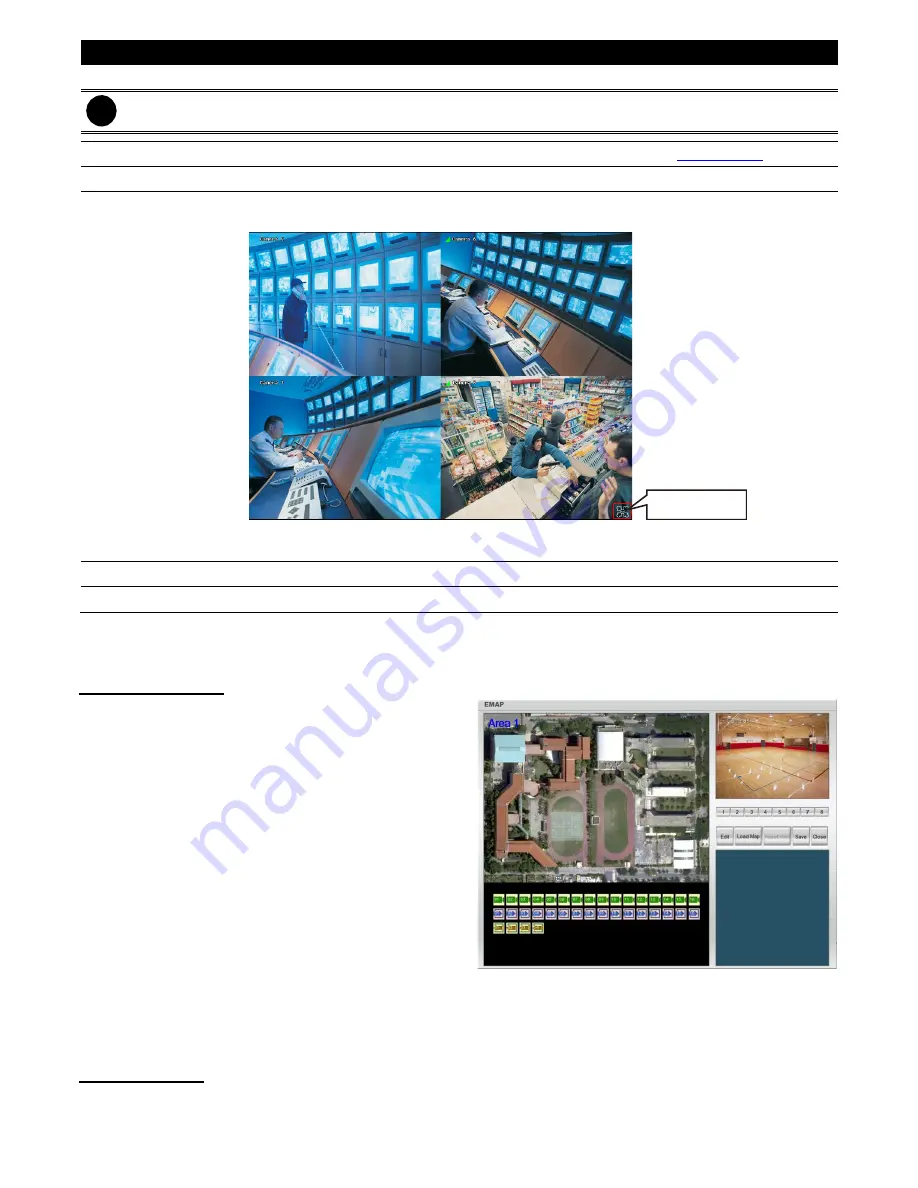
E-Map can hold up to 8 maps in *.jpg format. You may locate the camera, sensor and relay on the map.
To Set Up the Emap
1. Click
Emap
.
2. When the Emap screen appears, click the area
number (1 to 8 buttons) on where you want to insert
the map.
3.
Click
Load Map
to insert the map. When the open
dialog box appears, locate and select the map and
click
Open
.
4. When the inserted map appears on the Emap
screen, click
Edit
. You may now drag the camera,
sensor, and relay icons to its place on the map.
Icons on the map can be relocated anywhere. If you
are going to locate the icon on the map to other area,
you need to drag the icon to the black pane at the bottom of the Emap screen and then switch to the area on
where you want to locate the icon. To bring all the icons back to the black pane at the bottom of the Emap
screen, click
Reset
Icon.
5. When you are done, click
Save
button to save the new setting. To exit Emap screen, click
Close
.
To Use the Emap
1. Click
E-map
.
2. In the Emap screen, click the camera icon to switch on the area where the camera is located on the map
Summary of Contents for AVerDiGi EH5108
Page 1: ...Jan 2011...
Page 8: ......
Page 66: ...58...
Page 179: ...171 8 For manually backup click file select button and select the DVR to backup...


