


17
The terrain model has a thicker base and is more articulated than the previous model, resulting from the larger
base thickness and meshing values that you specified. The larger meshing values yielded a finer mesh.
18
In the right viewport, select and delete the terrain model.
Deepen the pond and elevate the crest of the hill
19
On the command line, enter point, and press ENTER.
20
In the left viewport, specify a point in the middle of the circular contour line that represents the deepest part of
the depression.
21
Select the point, and on the Properties palette, under Geometry, enter
-16'
for Position Z.
22
On the command line, enter
line
.
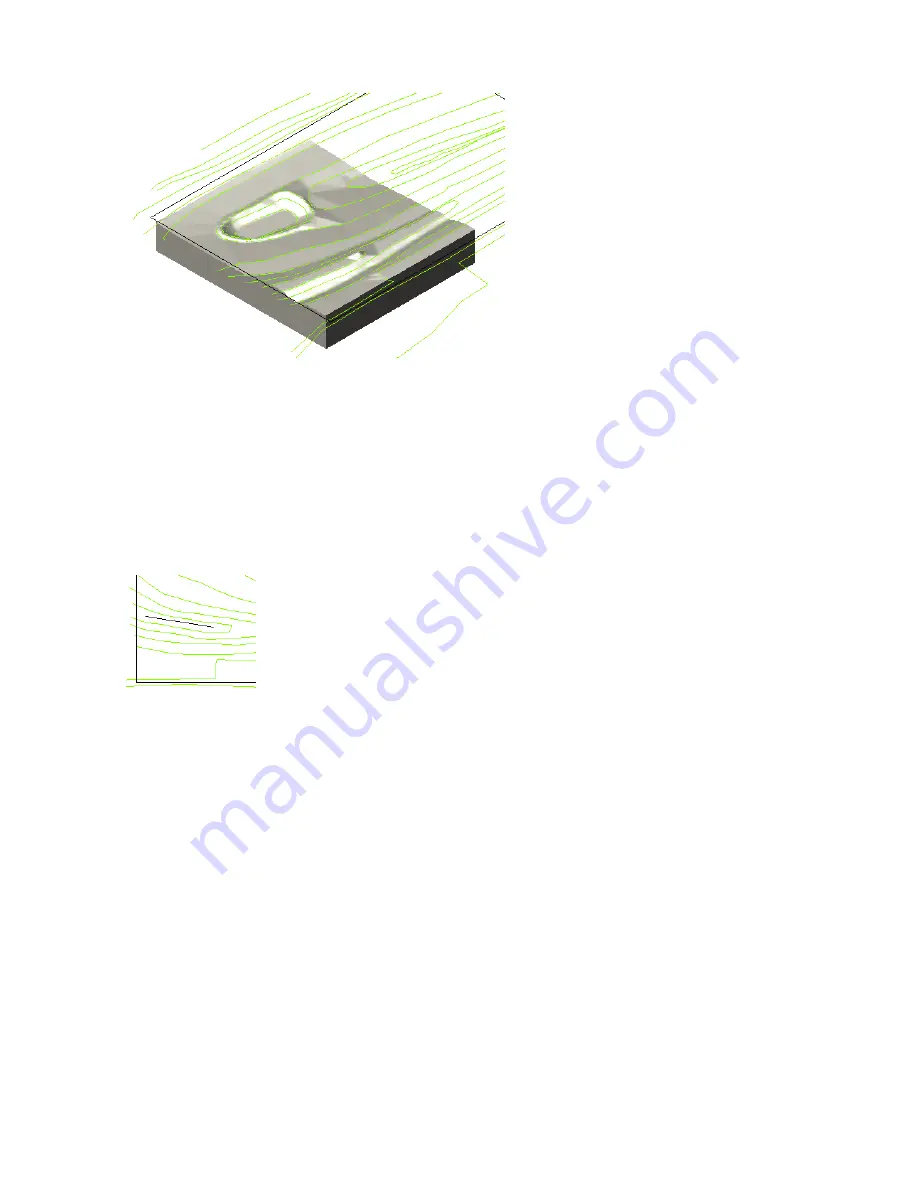
23
Draw a line across the hill below the depression.
24
Select the line, and on the Properties palette, under Geometry, enter
1'
for Start Z.
25
Enter
3'
for End Z.
26
Press ESC to clear the line selection.
Create a terrain model that features the new pond depth and hill crest
27
In the left viewport, on the Massing palette, click Drape, and recreate the terrain model:
■
Select the contour lines, the point, and the hill crest line and press ENTER.
■
Press ENTER to retain the contour lines in the drawing.
■
Press ENTER to generate a regular mesh.
■
Use a crossing window to select a rectangular portion of terrain that includes the depression and hill, and press
ENTER.
■
Enter
100
for Mesh subdivision along X direction.
■
Enter
100
for Mesh subdivision along Y direction, and press ENTER.
■
Enter
20'
for base thickness, and press ENTER.
■
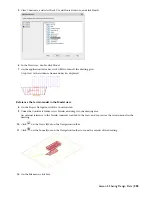
In the right viewport, view the terrain model.
The terrain model looks like the previous one that you created, only now the pond is noticeably deeper and the
hill has a pronounced crest.
Lesson 3: Sharing Design Data | 247


