


SW5502C
Wireless Serial Server
User Manual
Configuration and
setup
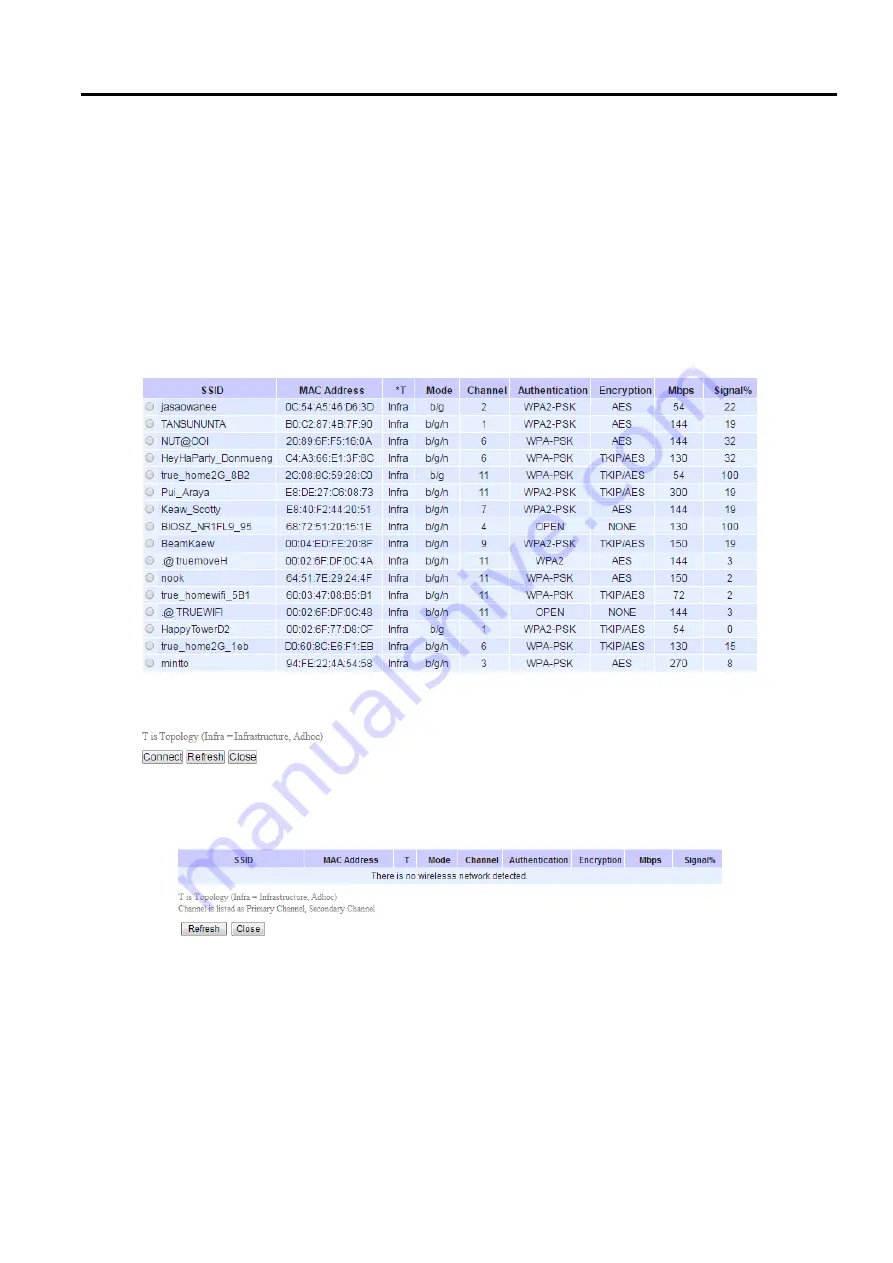
Steps to Connect to an Access Point
You can manually enter the SSID of the connecting access point in the SSID option or use the
“
scan network
”
button
to have SW550XC grab the necessary wireless information of surrounding access points in the device
’
s coverage
area
.
Please be patient as this process might take up to 10 seconds
.
Once it has finished scanning, names and basic properties of available wireless networks will be shown below
.
You
can then
select an AP from the list by clicking on the radio button in
front of the desired SSID
.
Then, click on the
“
Connect
”
button at the bottom of the page and its settings would be loaded automatically to the device
’
s user
interface
(
UI
).
If you would like the scanning process to run again, just click on the
“
Refresh
”
button
.
Otherwise,
click on the
“
Close
”
button to close this window
.
Figure 4.29
Results of network scanning when uses
“
scan network
”
buttons
If no wireless networks have been found, the list would be empty as shown below
.
Figure 4.30
Result when there is no wireless network available in the area
.
After finish configuring the Basic Settings, please click on Save button to keep the change that you have made
.
A
pop
-
up window with message
“
Please wait for a while
…”
will be displayed
.
When the saving is finished, the pop
-
up window will disappear and the web browser will remain on the Basic Settings page
.
If you want to cancel the
change and reset all changes back to their original values, just click the Cancel button
.


