14
MK20HD PLUS / MK20W
English
IP CAMERA MATRIX SETUP SOFTWARE
When using the MK20HD Plus and MK20W in LAN mode, it’s important to first set up your camera
controller and cameras in the IP Camera Matrix Setup Manager. This can be downloaded from the
Asystems website (www.asystems-sys.com) on the MK20RC Plus page. A download link can be found
in the Resources tab.
Installation
First and foremost, the POE/LAN connector on your MK20HD Plus or MK20W needs to be connected
to your LAN hub. After downloading the IP Camera Matrix Setup Manager Software archive from the
Asystems website, simply extract the files to your desired folder. Installation is not required but the
software should be copied into a dedicated directory. The software can be launched by double-clicking
the IPCameraMatrix.exe application file.
Operation
When starting the software, users will be asked to enter an account name and password. The default
values for these are “admin” and “admin.” Once logged in, go to the User submenu to change the
account name and/or enter a new password.
Controller Setup
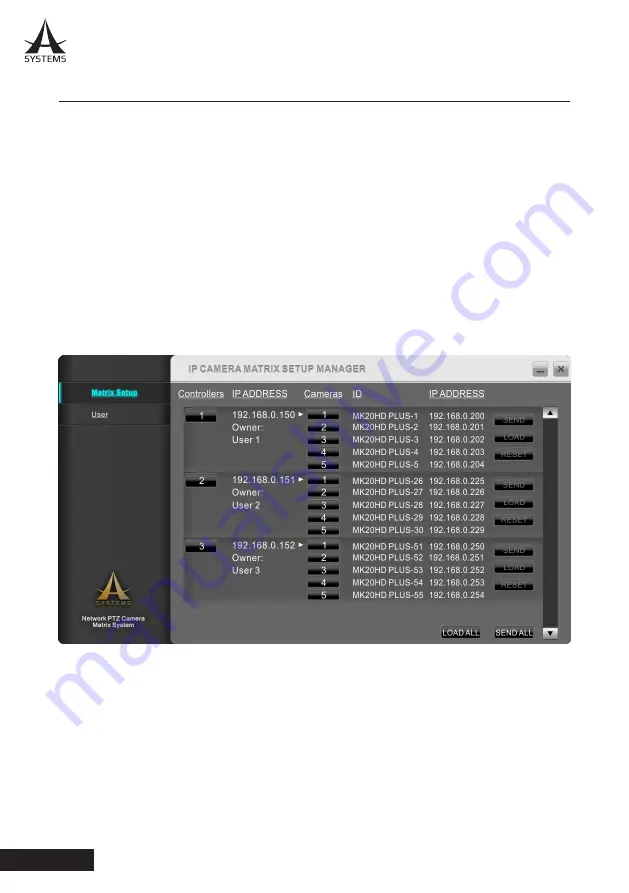
When setting up your system, your first step should be to scan for controllers.
1.
Click the “1” in the Controllers column to open the “Scan” menu.
2.
By default, the Scan function will search the IP Range from 192.168.1.1 to 254, but if your LAN uses
a different a host bit (specifically the third number in the IP address), be sure to change accordingly.
3.
Click “Scan” to begin scanning your local area network (LAN). Scanning the network may take a
moment but will identify any MK20RC Plus controllers within your LAN.
4.
Select your MK20RC Plus to assign it to Controller 1 in the software. Up to 3 controllers can be
setup within the software at any time.
5.
You can then move onto cameras or follow the steps above to assign up to 2 more controllers.


