SECTION 2
INSTALLING PRINTER
16
Install Ink Tanks
Printer uses one Printhead Cartridge and five Ink Tanks
(
two Black, one Cyan, one Magenta, and one Yellow
).
1.
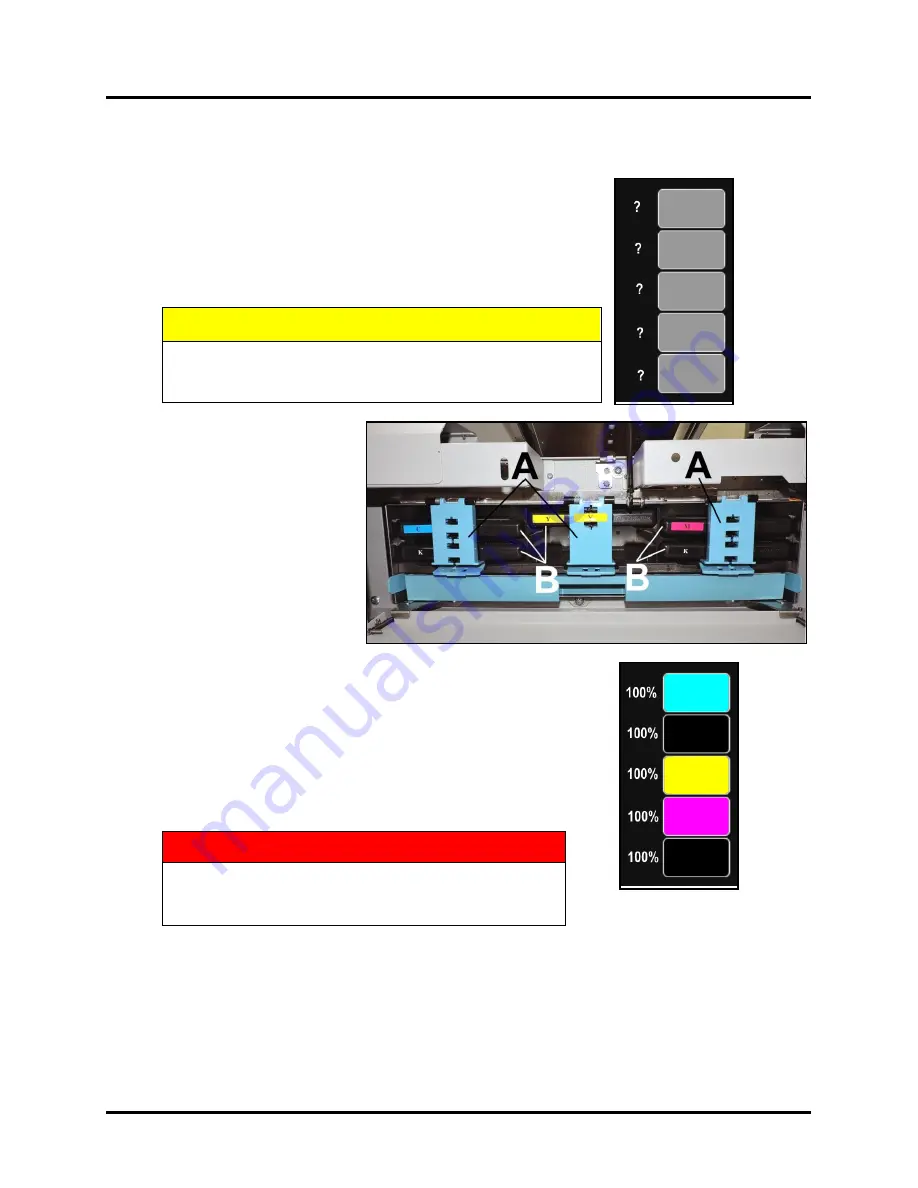
Look at the Control Panel Touchscreen.
Ink Tank status information appears in right side of the Touchscreen.
Note that the
Ink
Tank
indicator boxes are empty.
NOTE:
The question
marks indicate that no Ink Tanks are detected by the Printer.
CAUTION
VERIFY THAT THE LABELS ON THE INK CARTRIDGE AND
THE PRINTER'S INK STATION MATCH. BOTH SHOULD BE
"DN" OR BOTH SHOULD BE "DG".
2.
Open the Ink Tank Door
(
hinged at bottom
).
(
Disconnects Printer
communication with Ink Tanks
and allows safe installation
and replacement
.)
Open Ink Tank Latches
[A]
.
3.
Remove new Ink Tank(s) from
packaging.
4.
Insert Ink Tanks (
labels up
)
into appropriate color slots
[B]
.
Close Ink Tank Latches.
INSTALLATION TIP: Make sure Ink Tanks seat properly. Insert
Ink Tank into appropriate Ink Station, then pull Ink Tank back
about an inch and push forward firmly to insure that Ink Nozzles
penetrate seals on Ink Tanks.
5.
Close Ink Tank Door.
Ink colors fill in as Ink Tanks are installed. If ink
colors do not fill in after a few seconds, open Ink Tank Door again and
reinstall Ink Tank(s).
WARNING!
Ink in Ink Tanks may be harmful if swallowed. Keep
new and used Ink Tanks out of reach of children.
Discard empty tanks immediately.
Summary of Contents for AstroJet L1
Page 6: ......
Page 85: ......
Page 86: ...Copyright 2019 ASTRO MACHINE CORP Elk Grove Village IL 60007 03 12 2019 Part Number 200 L1...


