


SECTION 2
INSTALLING PRINTER
11
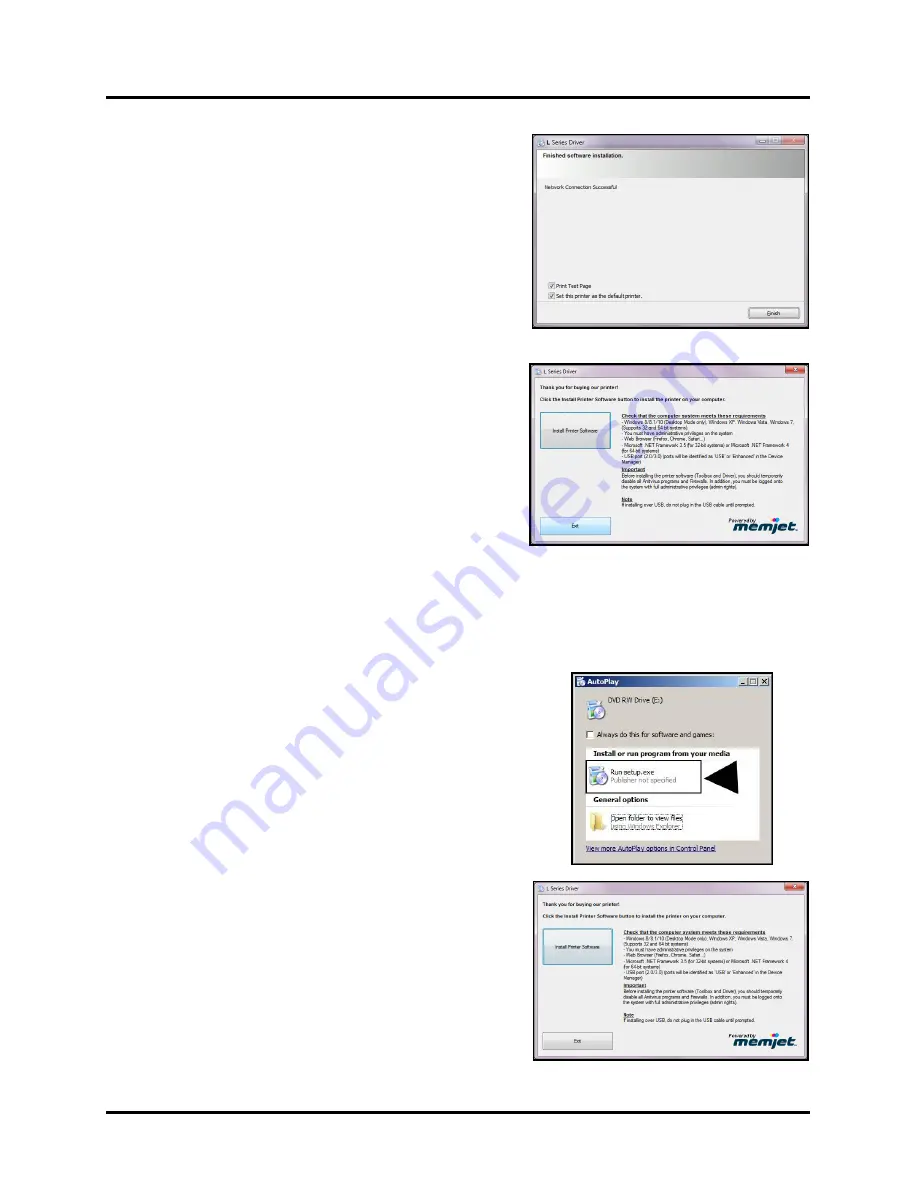
8.
Finished software installation.
Do not check the
Test Page
as Printer is not set up yet. You can check “Set
this printer as the default printer” at this time.
Click
“Finish”
.
9.
Install Printer Software.
Click
“Exit”
to close CD.
10.
Restart computer to complete installation.
Install Over Network Connection, Version A
Use this procedure to install the Print Driver over the Network connection. This procedure works for almost all
networks that allow automatic assignment of the IP address (
factory default
).
NOTE: Copy the 12-digit Hardware ID number listed on the Printer(s) on the label located below the
Ethernet port so you can identify the Printer(s) in a later step.
1.
Check that Printer is plugged in and turned ON.
Make sure the
Ethernet (
network
) cable is plugged into the Ethernet port on
the Printer.
Install disk supplied with Printer in your CD drive.
When
AutoPlay
Window opens, click
“Run Setup.exe”
to start.
2.
Install Printer Software.
Make sure computer system
meets
minimum requirements
and you followed other
instructions listed on screen.
Click
“Install Printer Software”
.
Summary of Contents for AstroJet L1
Page 6: ......
Page 85: ......
Page 86: ...Copyright 2019 ASTRO MACHINE CORP Elk Grove Village IL 60007 03 12 2019 Part Number 200 L1...


