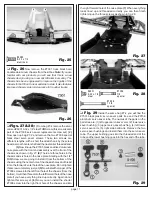
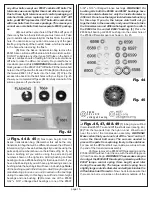
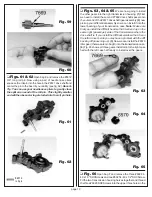


page 21
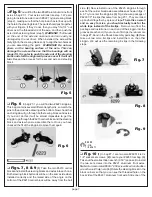
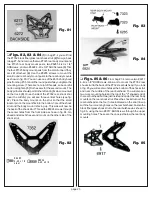
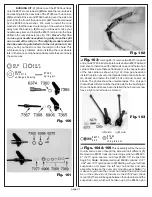
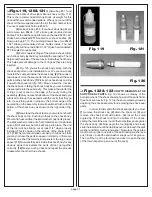
Fig. 71
❏
Figs. 72 & 73
Now we are going to start
assembling the Associated Torque Control clutch assembly.
From bag E remove the #6583 inner torque clutch hub. On
the back of the hub you will find a slot which will fit over the
#6572 roll pin of the drive gear/shaft assembly. Install the hub
onto the shaft slotted end first making sure that the slot fits
down over the roll pin.
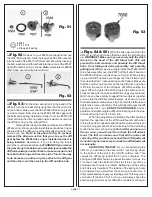
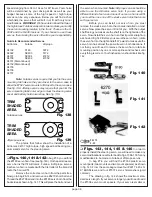
Fig. 72
Fig. 73
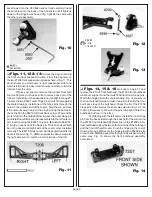
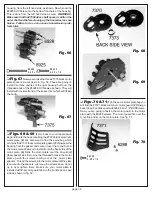
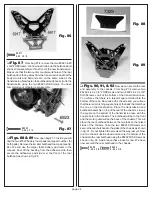
❏
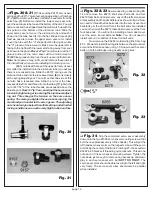
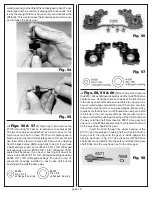
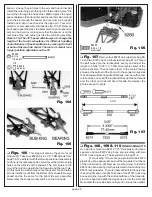
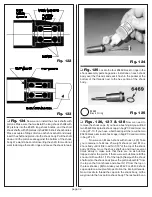
Figs. 74, 75 & 76
Bag E also contains the #6584
Associated outer torque control clutch hub and the #6585
Rulon clutch disc. Remove these from the bag. Fig. 74 shows
both sides of the #6584 outer torque clutch hub along with the
#6585 Rulon clutch disc. It also shows the two parts as-
sembled.
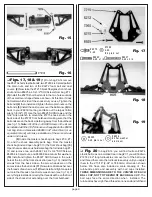
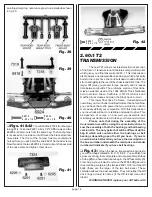
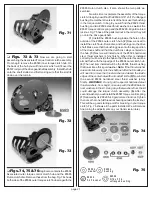
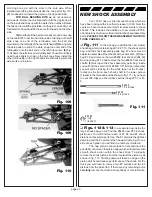
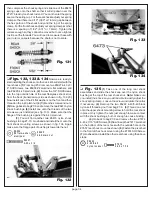
Now it is time to complete the assembly of the torque
clutch. In bag B you will find the #6596 3/16" x 5/16" unflanged
bushing. Remember all versions of the truck use this bushing
in the torque clutch. In bag E you will find the #6594 thrust
bushing and two #6594 steel thrust washers, as well as the
#6587 torque control spring and the #6629 5-40 gold colored
locknut. Fig. 75 has all the parts laid out in the order they will
go onto the drive gear/shaft.
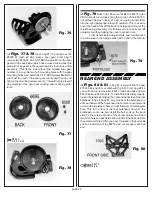
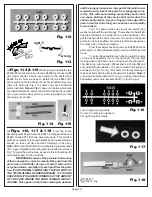
(1) Install the #6596 bushing inside the hole on the
outside of the #6584 outer clutch hub. (2) Now we need to
install the clutch hub, Rulon disc, and bushing onto the drive
shaft. Make sure that the bushing goes onto the large portion
of the drive shaft and that the clutch disc stays centered on
the hub. (3) Next we will install one of the #6594 hardened
steel thrust washers (shiny finish). When this is installed
correctly it will be inside the hub so that the outer face will be
almost flush with the top edge of the #6584 outer clutch hub.
(4) The next item installed will be the #6594 thrust bushing
that looks like a thick gold washer.
Note: If the thrust washer
does not slide easily onto the shaft just after the threads you
will need to remove the thrust washer and deburr the inside
edges of the center hole with an X-acto© knife. (5) Now install
the second #6594 hardened steel thrust washer (shiny
finish).
WARNING! Do not get the special hardened steel
thrust washers, from bag E, mixed up with the #6936 alumi-
num washers in the kit. Using any other washers from the kit
could damage the torque clutch assembly. (6) After the
second washer you will install the #6587 torque control spring
(7) followed by its #6629 5-40 gold colored locknut. Tighten
the nut so that one full thread is showing outside the locknut.
This will be a good starting point for breaking in your torque
clutch. Fig. 76 shows all the parts installed. We will discuss
fine tuning the adjustments on your transmission later.
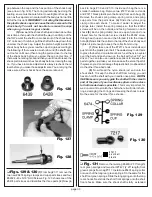
Fig. 74
#659 4
wa she r
#6 59 4
bu shin g
Fig. 75
#6 62 9
5 -4 0 lo ckn u t
# 659 6
3 /1 6 x 5 /16
u nfla ng ed b ushin g


