Page 9
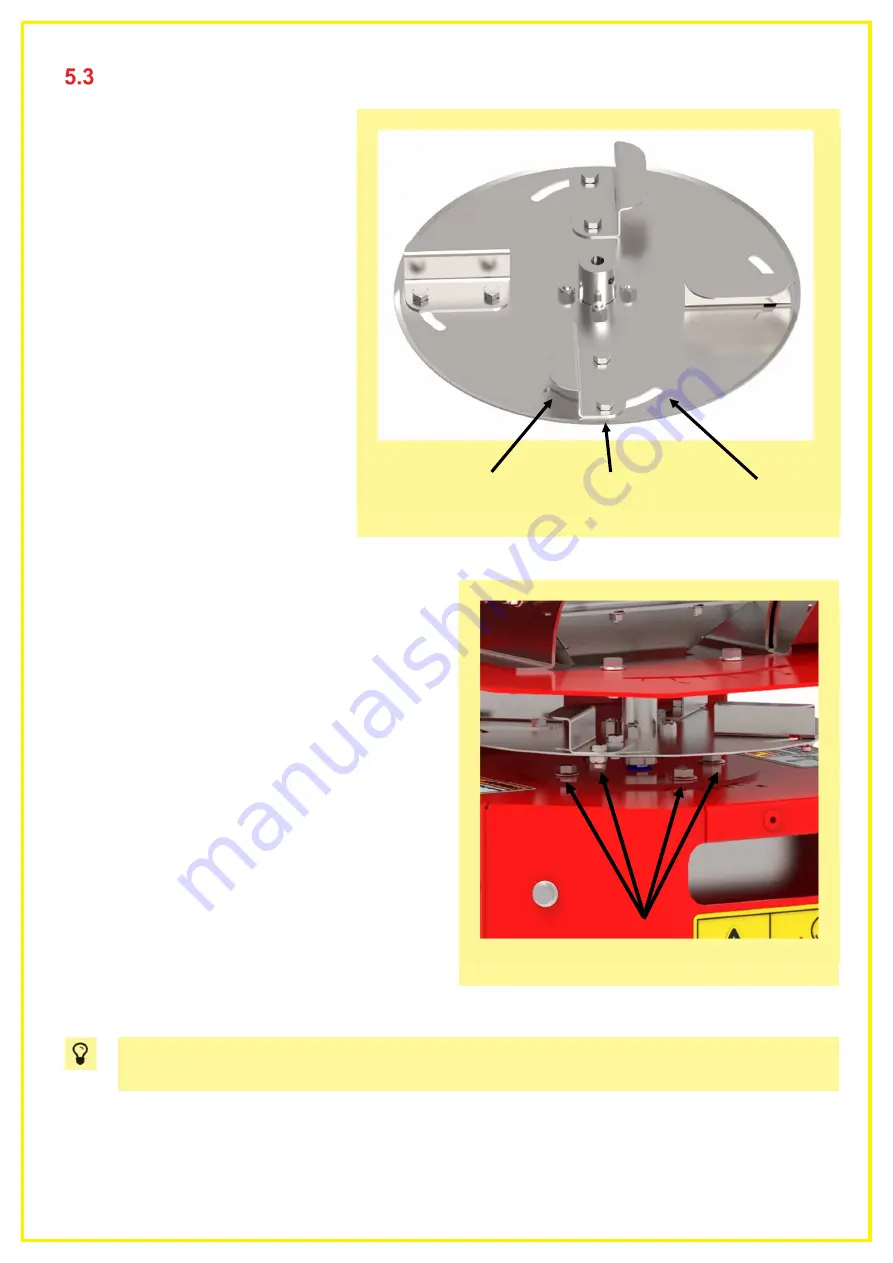
Figure 4
Positioned towards the front
Positioned straight
Positioned towards the rear
Figure 5
Spreading disc, throwing vanes, point of impact adjustment
With the variable throwing vanes
(Figure 4) attached to the spreading
disc, the spread pattern can be
adapted to the specific weight of the
spreading material. This results in
uniform lateral distribution.
When the throwing vanes are moved
forward, the spreading material exits
the spreading disc a little later and the
implement spreads a little more to the
right (when standing in front of the
spreader). When the throwing vanes
are moved back, the spreading
material exits the spreading disc a
little earlier and the implement
spreads a little more to the left (when
standing in front of the spreader).
Moreover, the point of impact can be adjusted. The
point of impact adjustment (
Fehler! Verweisquelle
konnte nicht gefunden werden.
Figure 5) can be
used to adjust the entire spread pattern by approx.
20° in both directions. This can be important for
some spreading materials, e.g. to avoid having to
adjust the throwing vanes. For example, if the
spreading pattern is turned by 15° to the right, the
point of impact adjustment is turned by 15° to the
left.
To adjust the point of impact, loosen the 4 bolts that
are marked in Figure 5. After making the
adjustment, tighten these bolts again.
PLEASE NOTE!
The seeding shaft can only be switched on when the spreading plate is rotating!
Summary of Contents for UD 100 M1
Page 20: ...Page 20 10 Connection diagram Figure 23...
Page 27: ...Page 27 Notes...


