background image

DVB Service

83

Vision

2

 Operation/Reference Guide

Scanning for Available Channels

Perform these steps to scan for available channels on all frequencies:

1.

Select 

Configure DVB

 from the DVB Service Menu on the left pane of the window. The Configure DVB 

Service page appears (FIG. 75).

2.

Select the tuner you want to use from the 

Tuner Hardware

 options menu, and click 

Apply

.

3.

Enter the IP address you want to scan in the Address field. This IP address should be the multicast 
address of the applicable transmitter.

4.

Enter the port you want to scan in the Port field.

5.

Click 

Start

. Vision

2

 begins to scan for available channels. Any channels it finds appear in the channels 

section at the bottom of the page.

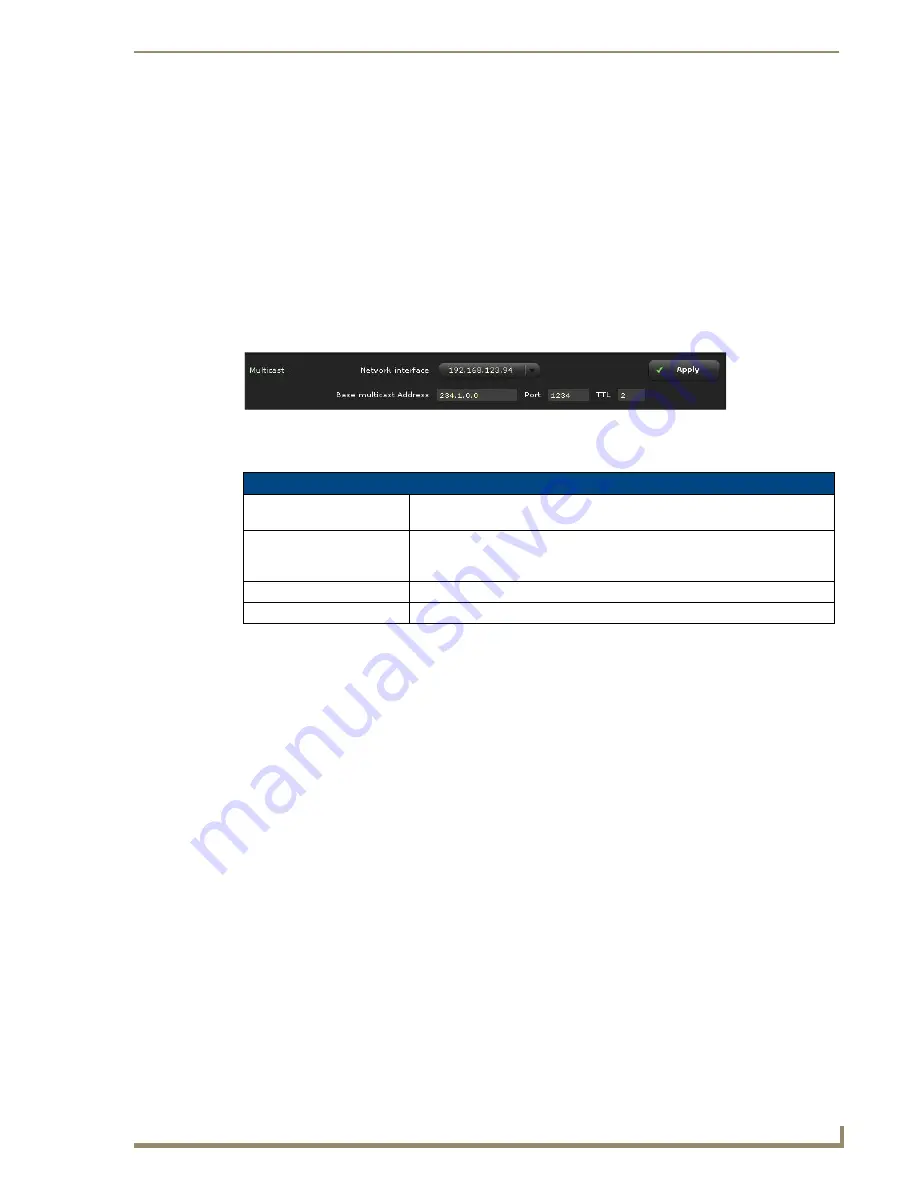
Multicast Settings

The following options are available in the multicast section:

Setting the Multicast Address

Perform these steps to set the multicast address:

1.

Select 

Configure DVB

 from the DVB Service Menu on the left pane of the window. The Configure DVB 

Service page appears (FIG. 75).

2.

Use the 

Network interface to multicast on

 options menu to indicate which network interface you want 

to use for multicasting.

3.

Enter the base multicast address in the Base Multicast Address field. All channels selected to multicast 
are offsets from this address.

4.

Enter the port for this channel in the Port field.

5.

Enter a value for the multicast TTL for this channel in the TTL field. This step is optional.

6.

In the Channels area, click the check box in the Multicast column for the channel you want to multicast. 
This step changes the multicast value of the channel from false to true. A confirmation pop-up appears. 
Click 

OK

 to accept this change. Repeat this step for each channel you want to multicast.

7.

Click 

Apply

.

FIG. 79  

Multicast Settings

Multicast Options

Network Interface

Use this setting if the server has multiple network cards and you want to 
specify which one is used. This setting does not normally require changing.

Base Multicast Address

All of the channels selected to multicast will be an offset from this address. For 
example, if the Base Multicast Address is 234.0.0.0, the first channel on the list 
is multicast on 234.0.0.0, and the second 234.0.0.1, etc.

Port

This is the multicast port number to be used.

TTL

This is the multicast TTL value. You can enter a value in the space provided.

Summary of Contents for Vision 2

Page 1: ...Operation Reference Guide Video Management Distribution Vision2 Latest Release 06 11 2012 Vision2 Operation Reference Guide ...

Page 2: ...rked on the outside of each box The RMA is valid for a 30 day period After the 30 day period the RMA will be cancelled Any shipments received not consistent with the RMA or after the RMA is cancelled will be refused AMX is not responsible for products returned without a valid RMA number AMX is not liable for any damages caused by its products or for the failure of its products to perform This incl...

Page 3: ...MPLIED WARRANTIES OF MERCHANTABILITY AND FITNESS FOR A PARTICULAR PURPOSE WITH REGARD TO THE AMX SOFTWARE THIS LIM ITED WARRANTY GIVES LICENSEE SPECIFIC LEGAL RIGHTS Any supplements or updates to the AMX SOFTWARE including without limitation any if any service packs or hot fixes provided to Licensee after the expiration of the ninety 90 day Limited Warranty period are not covered by any warranty o...

Page 4: ......

Page 5: ... Powervault Storage Archive 11 V2 STORAGE 2400 Expansion Storage 11 STB 02SB and STB 03CC Set Top Boxes 12 STB 04 Set Top Box 13 Network Switch Requirements 14 Wiring and Device Connections 15 Master Server Rear Panel Connections 15 LAN RJ 45 Port 15 WMV Appliance Rear Panel Connections 17 HD 15 Port 17 Vision2 TDS 19 Vision2 PowerVault Drive Array Rear Panel Connections 19 Set Top Boxes 20 Instal...

Page 6: ...ersion 7 1 44 Upgrading to Vision2 Software Version 7 2 45 Accessing Servers 47 Overview 47 Starting and Accessing Vision2 47 Accessing the Server 48 Accessing the Server Directly 48 Accessing the Server Remotely 48 Changing Your Server s Name 48 Adding a Server 49 Master Service 51 Server Management 51 Managing a Specific Server 52 Adding and Activating Services 53 Changing the Channel Order 53 A...

Page 7: ...ncoding Settings 74 Viewing the Stream 75 Reflector Service 77 WMV Configuration 77 Activating a Unicast Stream 78 Viewing the Stream 78 MPEG Configuration 79 Activating a Unicast Stream 80 Activating a Multicast Stream 80 Viewing the Stream 80 DVB Service 81 Configuration 81 Service Settings 82 Tuner Hardware Settings 82 Scan for Channels Settings 82 Scanning for Available Channels 83 Multicast S...

Page 8: ...ion Screen 96 Thumbnail Editor Screen 99 Playing a Thumbnail 99 Creating a Thumbnail 100 Deleting a Thumbnail 100 Adding Descriptive Text to a Thumbnail 100 Returning to Archive to Select Another Video 100 Video Playback Area 101 Exiting the Thumbnail Editor 101 Thumbnail Viewer 103 Requirements 103 Login to Thumbnail Viewer 103 Archive Navigation Screen 104 Thumbnail Viewer Screen 106 Playing a T...

Page 9: ...ontents v Vision2 Operation Reference Guide Record Service 113 Configuration 113 Service Settings 113 Recording Settings 114 Recording a Video Stream 115 Manual Recording 115 Scheduled Recording 116 Event Log 116 ...

Page 10: ...vi Vision2 Operation Reference Guide Table of Contents ...

Page 11: ...hannels or timed playback of prerecorded video content via unicast WMV only or multicast on private networks or the web The V2 DLR DEMO SYS Dealer Demo System includes 2 Live DVB T multiplexes 10 users 1 Live WMV stream 10 users 2 Producer Channels 1 MPEG 1 WMV 1 Vision2 Server 1 MAX CSE Encoder The V2 DLR DEMO 1RU Dealer Demo System FG3100 D1K provides two live MPEG channels and two live Digital ...

Page 12: ...ed channels over a standard IP network The FG3100 33K version is used to integrate DTV into an existing Vision2 system The FG3100 34K version provides a stand alone live system with support for 6 DTV streams and 6 MPEG streams The following table lists the hardware and tools included in each Vision2 TDS kit Vision2 Expansion Storage The Vision2 Expansion Storage connects directly to the Video on D...

Page 13: ... blade VBrick WMV Encoder PN 9190 4200 000 Single Channel Encoder Up to 640 x 480 The VBrick encoder has a Join Own Multicast setting This setting is not available on the Vision2 configuration page so you must adjust this setting prior to setting up the encoder to interface with the Vision2 system Use the VBrick Web Interface in a web browser to enable the Join Own Multicast setting prior to contr...

Page 14: ...e such as a PC monitor LCD panel Displays system ID status info and error messages Power button Press to power on server Rear Panel Components Video connector 1 15 pin female video connector for connecting a video output device such as a PC monitor Serial connector 1 9 pin male serial connector WMV Video connector 1 15 pin male video connector for WMV source WMV and V2 DLR DEMO SYS Dealer Demo Sol...

Page 15: ...l connector Video connector 1 15 pin female video connector for connecting a video output device such as a PC monitor USB ports 2 USB 2 0 ports for mouse keyboard or external peripheral devices LAN connectors 2 RJ 45 LAN ports for connecting to a network router 10 100 1000 Ethernet WMV Video connector 2 15 pin male video connectors for WMV source WMV appliance only Rack Mount Sliding Ready rails w...

Page 16: ...h as a PC monitor USB ports 2 USB 2 0 ports for mouse keyboard or external peripheral devices LAN connectors 2 RJ 45 LAN ports for connecting to a network router 10 100 1000 Ethernet Rack Mount Sliding Ready rails with Cable Management arm Operating Environment Operating Temperature 10º C to 35º C 50º F to 95º F Storage Temperature 40º C to 65º C 40º F to 149º F Operating Relative Humidity non con...

Page 17: ...nectors for connection to the archive USB port 2 USB 2 0 ports for mouse keyboard or external peripheral devices LAN connectors 4 RJ 45 LAN ports for connecting to a network router 10 100 1000 Ethernet Rack Mount Sliding Ready rails with Cable Management arm Operating Environment Operating Temperature 10º C to 35º C 50º F to 95º F Storage Temperature 40º C to 65º C 40º F to 149º F Operating Relati...

Page 18: ... Panel Components Serial connector 1 9 pin male serial connector Video connector 1 15 pin female video connector for connecting a video output device such as a PC monitor USB ports 2 USB 2 0 ports for mouse keyboard or external peripheral devices LAN connectors 2 RJ 45 LAN ports for connecting to a network router 10 100 1000 Ethernet Rack Mount Sliding Ready rails with Cable Management arm Dimensi...

Page 19: ...AC 100 240V Note Isolate IT Power System Connection USB ports 4 Type B USB 2 0 ports LAN port RJ 45 LAN port provides Gigabit Ethernet communication Audio Out Provides stereo audio output Note The Audio in blue and Microphone red connectors are not used Serial Port Provides serial control over devices which support RS 232 commands HDMI Video Out Provides HDMI video output to the display via an HDM...

Page 20: ...or Video connector 1 15 pin female video connector for connecting a video output device such as a PC monitor USB ports 2 USB 2 0 ports for mouse keyboard or external peripheral devices LAN connectors 2 RJ 45 LAN ports for connecting to a network router 10 100 1000 Ethernet Rack Mount Sliding Ready rails with Cable Management arm Dimensions HWD 1 11 16 4 24cm x 17 1 8 43 43cm x 15 1 2 39 37cm Weigh...

Page 21: ...rts 2 SAS connectors for connection to the Video on Demand server Expansion ports 2 SAS connectors for expansion to an additional archive server Operating Environment Operating Temperature 10º to 35º C 50º to 95º F Storage Temperature 40º to 65º C 40º to 149º F Operating Relative Humidity 20 to 80 non condensing Storage Relative Humidity 5 to 95 non condensing Dimensions HWD 5 3 16 13 11cm H x 17 ...

Page 22: ...e A USB 2 0 port for peripheral connections HDMI port 1 HDMI 1 2a with HDCP port SPDIF port 1 S PDIF optical port AUDIO VISUAL port 1 10 way Mini DIN for Composite video Component YPrPb RGB S Video and analog audio IOIOIO port 1 IR extender and TVI port Codecs MPEG 2 MP HL MPEG 4 pt10 AVC H 264 HP L4 Video Resolution Up to 720p and 1080i Graphics Resolution HD graphics up to 1280x720 Audio Analog ...

Page 23: ...s HDMI port 1 HDMI 1 3a with HDCP and CEC port SPDIF port 1 S PDIF optical port AUDIO VISUAL port 1 10 way Mini DIN for Composite video Component YPrPb RGB S Video and analog audio IOIOIO port 1 IR extender and TVI port Codecs MPEG 2 MP HL MPEG 4 pt10 AVC H 264 HP L4 Video Resolution Up to 720p and 1080i Displays up to 1080p Graphics Resolution HD graphics up to 1280x720 Audio Analog stereo audio ...

Page 24: ...onnectors for 10Base T 100Base TX 1000Base T with 8 16 24 or 48 ports Layer 2 Services IGMP Snooping V1 or V2 Not router dependant for operation IGMP Querier Layer 2 3 switching Spanning Tree Protocol STP Security QoS Storm Control Broadcast and Multicast Performance Specifications Jumbo frame support Switching Capacity Non Blocking 32Gbps 16Port 140Gbps 48Port Forward Rate 24Mpps 16Port 96Mpps 48...

Page 25: ... server rear panel Output port LAN ports Power connector Some rear panel connectors are not available with certain solutions See the Overview section on page 1 for information on the options included with your solution FIG 3 LAN RJ 45 Port FIG 4 LAN connector LEDs ETHERNET A L A Activity LED yellow lights when receiving or transmitting LAN data packets L Link LED green lights when the LAN cables a...

Page 26: ...als for the LAN RJ 45 connector and cable LAN RJ 45 Pinouts and Signals Pin Signals Connections Pairing Color 1 TX 1 1 1 2 Orange White 2 TX 2 2 Orange 3 RX 3 3 3 6 Green White 4 no connection 4 4 Blue 5 no connection 5 5 4 5 Blue White 6 RX 6 6 Green 7 no connection 7 7 7 8 Brown White 8 no connection 8 8 Brown FIG 5 RJ 45 wiring diagram Vision2 uses typical Cat5 5e 6 cabling for RJ 45 connection...

Page 27: ... 15 port for WMV source streams The female HD 15 port is available for an output device such as a PC monitor FIG 6 WMV port WMV appliance HD 15 Connector Pinouts Pin Signal Function 1 Red Red signals 2 Green Green signals 3 Blue Blue signals 4 Sense 2 Monitor ID bit 2 5 GND Signal Ground 6 RAGND Red analog ground 7 GAGND Green analog ground 8 BAGND Blue analog ground 9 N A Not used 10 SAGND Synchr...

Page 28: ...ports found on the Master server See LAN RJ 45 Port section on page 15 for information on the port and wiring cables for it HD 15 to S Video Pinouts HD 15 Pin S Video Signal S Video Connector Pin 1 2 Luminance Y 3 3 Chrominance C 4 4 5 6 7 Luminance Y Return 1 8 Chrominance C Return 2 9 10 11 12 13 14 15 HD 15 to Component RGB or Composite Pinouts HD 15 Pin Component Signal Red RCA Green RCA Blue ...

Page 29: ...tions This section details the ports and connectors on the rear panel of the Vision2 PowerVault Drive Array Use an external 4x SAS connector to connect the SAS ports on the rear of the PowerVault Drive Array to the SAS ports on the rear of the Archive Video on Demand server or to an additional PowerVault Drive Array FIG 9 displays the rear panel of the V2 STORAGE 2400 Expansion Storage device FIG ...

Page 30: ...onnected video source The set top boxes are used only for MPEG content They support viewing MPEG Video on Demand but support only Stop Play and Pause features FIG 11 displays the rear panel of the STB 02SB and STB 03CC Set Top boxes FIG 10 STB 02SB Set Top Box FIG 11 STB 02SB and STB 03CC Set Top Box rear view LAN ports HDMI port Power USB port Optical audio port Audio Video port IR extender TVI p...

Page 31: ...nnections 21 Vision2 Operation Reference Guide FIG 12 displays the rear panel of the STB 04 Set Top box FIG 12 STB 04 Set Top Box rear view USB port SPDIF port LAN port Power HDMI port Audio Video port IR Extender TVI port ...

Page 32: ...Wiring and Device Connections 22 Vision2 Operation Reference Guide ...

Page 33: ...nce 2 Live DVB T multiplexes 2 Live MPEG streams 1 Producer Channel MPEG 1 Record Channel MPEG 1 Archive up to 2 Video on Demand users The V2 DLR DEMO SFF Dealer Demo System FG3100 D2K provides one live MPEG channel and one live Digital Video Broadcasting Terrestrial DVB T multiplex for up to 10 users over a standard IP network The Dealer Demo Solution includes 1 Vision2 SFF Dealer Demo Appliance ...

Page 34: ...erver FIG 14 displays the connection locations for the VS DLR DEMO 1RU server 3 Connect an RJ 45 LAN cable to the Ethernet port on your encoder Connect the other end of the cables to any of the ports on your network switch 4 Connect a composite or S video cable to the corresponding ports on your encoder Connect the other end of the cables to a device capable of producing a video signal The encoder...

Page 35: ...t the other end of the cable to Gigabit ports on a layer 3 network switch 4 Connect breakout cables to the HD 15 ports on the WMV capture cards at the rear of the WMV appliances Connect the other end of the cables to a Windows Media Video WMV source The breakout cable provides connections for Composite S Video and Component video in addition to balanced and unbalanced stereo audio 5 Repeat steps 3...

Page 36: ...epeat steps 3 and 4 for each additional MAX CSE encoder you have in your solution Vision2 TDS Vision2 TDS provides multiple live Digital Video Broadcast DVB or MPEG channels over a standard IP network for up to 150 users for each type of channel See LAN RJ 45 Port section on page 15 for information on wiring cables for the port DVB Installation The following steps show you how to setup a typical D...

Page 37: ...her end to your Client side LAN 3 Connect an RJ 45 LAN cable to the LAN port on the rear of the MAX CSE encoder Connect the other end of the cables to any of the ports on your client side LAN switch 4 Connect a composite or S video cable to the corresponding ports on the rear of the MAX CSE encoder Connect the other end of the cables to a device capable of producing a video signal The MAX CSE enco...

Page 38: ... STORAGE 2400 Expansion Storage device FIG 21 Connect the other end of the cable to the first SAS port on the rear of the Archive Video on Demand server 2 Log in to the Admin server see the Starting and Accessing Vision2 section on page 47 for more information 3 Select Storage 4 Set the archive server to the I drive The Archive Video on Demand server must have LDAP enabled and configured prior to ...

Page 39: ... to lock the cards back into place 8 Replace the cover on the server and ensure that the cover lock is fastened securely after closing the lid Before installing the V2 STORAGE EXT800 External RAID Controller be sure to discharge any static electricity from your body by touching a grounded object FIG 22 Front cover locking mechanism FIG 23 Locking tab lift security latch upward to unlock server cov...

Page 40: ...ng on a connected video source The set top boxes are used only for MPEG content They support viewing MPEG Video on Demand but support only Stop Play Pause Fast Forward and Rewind features FIG 24 displays the rear panel of the STB 02SB Set Top box FIG 25 displays the rear panel of the STB 04 Set Top box FIG 24 STB 02CC Set Top Box rear view The Set Top Boxes have a limit of 18Mbps Heavy traffic loa...

Page 41: ...l in addition to video Use a breakout cable to connect the AUDIO VISUAL port on the set top box to your audio and video sources In place of connecting the breakout cable to your audio source you can connect an optical audio cable from the SPDIF port on the set top box to your audio source 3 Connect an RJ 45 LAN cable to LAN port 1 on the rear of the unit The other end of the cable connects to your...

Page 42: ...n2 section on page 47 for information on retrieving the server s address 8 Use the arrow keys to access the Password field and enter the password in the space provided the default is snake 9 Use the arrow keys to highlight the Save Changes button and press Enter 10 Use the arrow keys to highlight Back to Main Menu and press Enter to return to the STB Management screen 11 Use the arrow keys to high...

Page 43: ...d and Rewind features FIG 29 highlights some of the buttons you can use with Vision2 and your set top box FIG 29 Amino Remote Control Volume control Play Pause Stop Power Navigational buttons for manuvering through the Vision2 menus Menu button for accessing the Vision2 menu Turn on Subtitles Subtitles are only supported on DVB streams If you are using an STB 04 set top box and you receive a faile...

Page 44: ...IG 30 contains five options Live TV Channels Video on Demand Technical Information Configuration and Help menus The following sections describe each submenu and the actions you can take on each Live TV Channels The Live TV Channels menu displays a listing of all live channels available through the Live MPEG service Use the remote control to scroll through the list of the channels and press OK on t...

Page 45: ...and press OK on the remote control to select a channel See the Using the Remote Control section on page 33 for more information on using the remote FIG 33 displays an example of video on demand programming While viewing video on demand programming you can use the remote control to pause or stop the video stream Use the Play button to resume viewing a paused video stream FIG 32 Video On Demand FIG ...

Page 46: ...nformation is view only Configuration The Configuration screen enables you to change your video display settings On this screen you can choose to configure your margins or display output Use the up and down cursor buttons on the remote control to select an option and press the OK button to open a new screen of options FIG 34 Technical Information FIG 35 Configuration screen ...

Page 47: ...he selected margin The image on the screen moves as you increase or decrease the value of an individual margin so you can see the results of your adjustments as you make them Press the OK button to apply the new setting Output The Configure Output screen enables you to change the following display options TV standard resolution aspect radio and connection type FIG 36 Configure Margins screen Reboo...

Page 48: ... and navigating to the following location http server name tedit aspx FIG 38 displays the main screen you see when you access the Template Editor application Configuration Options TV Standard Enables you to indicate the television standard you are using You can select NTSC or PAL Resolution Enables you to select the resolution you want to display You can select SD or any of several specific resolu...

Page 49: ... appear in this list Add New Device Click to add a new device to the template list See Adding a New Device to the Device List section on page 39 for more information Delete Device Click to delete the currently selected device You will receive a confirmation warning before deleting the device Template Select a template from the available list Any new templates you create appear in this list Edit Te...

Page 50: ...ant to use 4 Click Create The left side of the Template Editor screen displays a list of options you can configure for an individual template These options are only available after clicking Edit Settings Changes do not take effect immediately After making all necessary changes click Test to view the changes to the template Click Save Changes to save the new template settings or Discard Changes to ...

Page 51: ...e between 1 and 255 Corner Radius Use the spin box to indicate the size of the corner radius of each thumbnail You can set any value between 1 and 255 Horizontal Gap Use the spin box to indicate the horizontal spacing between each thumbnail You can set any value between 0 and 255 Vertical Gap Use the spin box to indicate the vertical spacing between each thumbnail You can set any value between 0 a...

Page 52: ...ading Background Use the color chart to indicate the color of the heading background Section Text Color Use the color chart to indicate the color of the section text Background Color 1 Use the color chart to indicate the first color used to create the background gradient Note The gradient values are used to create a gradient wash over the main info image to allow text to be more easily visible Bac...

Page 53: ...f the vertical text thumbnails and page indicator on the user interface FIG 43 displays the location of the info header on the user interface FIG 42 User Interface Example 1 FIG 43 User Interface Example 2 Horizontal Margin Thumbnail Header Vertical Text Page Indicator Info Heading ...

Page 54: ...de the Vision2 software to version 7 1 1 Copy the V2upgrade7 1 exe file onto the desktop of the server 2 Double click the V2upgrade7 1 exe file to execute the script and begin the installation process FIG 44 3 Click Next 4 You can use the default installation location or specify a location by clicking the Browse button Once you determine a location click Finish The upgrade begins to install Before...

Page 55: ...m the following steps to upgrade the Vision2 software to version 7 2 1 Copy the V2 Rel7 1to7 2 upgrade exe file onto the desktop of the server 2 Double click the V2 Rel7 1to7 2 upgrade exe file to execute the script and begin the installation process 3 Follow the instructions provided in the installation window You can use the default installation location or specify a location by clicking the Bro...

Page 56: ...Installation 46 Vision2 Operation Reference Guide ...

Page 57: ...er remotely 1 Power on the Vision2 server It may take a few minutes to boot 2 Test that you can access the server via the LAN You can run this test by accessing a Command Prompt using the Ping command For example ping v2AMX SVCTAG where SVCTAG is the service name which you can find on the front of your server If the server responds continue to step 3 3 Using a web browser on a PC with network acce...

Page 58: ...ice on a remote system on the same LAN as the server 3 Using a web browser on a PC with network access navigate to http servername admin aspx The V2ServicesManager appears You can also double click the shortcut to the Vision2 Master Services page to access the Vision2 ServicesManager Changing Your Server s Name You can change your server s name from the default name assigned to it when you first r...

Page 59: ... LAN Perform these steps to add a server to your configuration 1 Test that you can access the server via the LAN You can run this test by accessing a Command Prompt using the Ping command For example ping V2AMX SVCTAG If the server responds then continue 2 Click Server Management from the Master R710 Vision2 ServicesManager web interface 3 Click Manage Servers The Manage Servers page appears FIG 4...

Page 60: ...ow control this server via the Main Master server You have now successfully added a new server On the remote server you must change the Master Server Name in the Vision2 application to the Master Server and restart the application FIG 49 Vision2 Server application Change the Master server name If an incorrect server name is entered the system will attempt the connection for 30 seconds and then if ...

Page 61: ...annels for the Windows Media Player and VLC Media Player and creates a generic XML list for custom media players Server Management When you select the Master Service a representation of all of the available services appears FIG 50 The Manage Servers menu option allows you to add and remove additional servers to and from the system For details on adding a new server see the Adding a Server section ...

Page 62: ...es Manager Activate Service This button enables you to change the active state of the selected service Server Serial Number This is the unique serial number for the selected server Server License code This is the license code which has been used to unlock the services on the server New Server License Code This is where you would paste an updated license code supplied by AMX when you purchase addit...

Page 63: ...services populate the Current Status of Services list at the top of the page 5 Select an inactive service from the Current Status of Services list Inactive services appear highlighted in green in the list and have a value of False in the Activated column 6 Click Activate Service so you can manage the service Repeat steps 5 and 6 to activate any remaining inactive services Changing the Channel Orde...

Page 64: ...e available live channels are listed under this menu entry You can view live channels by clicking on the channel name The Vision2 interface server and player do not support h 264 content therefore you cannot view the stream from an AVN420 encoder Server Logs The log files for each server can be viewed by selected the server name under this menu entry Manage Channel Order Options Add Unmanaged Chan...

Page 65: ...be set to 100 or the video may not appear in browser window The following user interfaces are available Amino UI Selecting the STB 04 user interface configuration enables you to select a custom user interface FIG 55 displays the Amino UI player You can select a template on this screen See the Creating a New Template section on page 40 for information on creating a template You must click Apply pri...

Page 66: ...cting the Tablet user interface configuration enables you to select a custom user interface FIG 56 displays the Tablet UI player You can select a template on this screen You must click Apply prior to using the Amino clients to access the system FIG 56 Tablet UI Player ...

Page 67: ...d in multiple formats Click the sample player under UI Configuration in the left panel to display the configuration options for the player FIG 58 The options for the V2 Player and the V2 MPEG Player are identical with the exception that the WMV options are not available with the MPEG player FIG 57 Sample Player 1 FIG 58 Sample Player 1 Configuration ...

Page 68: ...types of live channels you want the player to support 6 Click Apply when finished making changes to the configuration V2 Player Configuration Options Description A single line description shown in the management interface to help with identification Test Player in a sample web page Clicking this button launches the player in a new web browser with the selected options See the Testing the Player in...

Page 69: ...upport MP4 Live Channel Compatibility Amino VLC PC Client WMP WMV No No Yes Yes MPEG 2 MPEG 2 TS Yes Yes Yes Yes H 264 AVC MPEG 2 TS Yes Yes No No H 264 AVC MP4 Yes Yes No No PC Client Yes Yes Yes Yes Video on Demand Compatibility Amino VLC PC Client WMP WMV No Yes Yes Yes MPEG 2 MPEG 2 TS Yes Yes Yes Yes H 264 AVC MPEG 2 TS Yes Yes Yes Yes H 264 AVC MP4 No Yes Yes No FLV On2 VP6 FLV No Yes Yes Ye...

Page 70: ...dditional tabs in the player screen provide more options FIG 59 The Downloads tab provides links to plug ins and codecs you may need to use certain features of Vision2 The Widgets tab FIG 60 provides several different video tools Each tool comes listed with its own HTML code which you can use to embed the video tool into a webpage Simply copy the provided code into the HTML code of your webpage an...

Page 71: ...ion2 server and display available programming on a connected video source The set top boxes are used only for MPEG content They support viewing MPEG Video on Demand and supports Stop Play Pause Fast Forward and Rewind features See the Set Top Boxes section on page 30 for information on setting up a set top box FIG 61 displays the Set Top Box Management screen FIG 61 Set Top Box Management screen ...

Page 72: ...and indicating the timeout click Apply to enable the settings Play Live Channel Select a live channel to play through the set top box Click Apply when finished and the set top box begins playing the live channel Play Video On Demand Select a video on demand to play through the set top box Click Apply when finished and the selected video on demand becomes available Note Users are only able to pull ...

Page 73: ...the following entries username This is the user to impersonate domain The domain in which the LDAP server resides password The password of the user to impersonate It also contains and entry for userattributecontainingloginname This entry as the name suggests contains the name of the attribute within the user Distinguished Name DN which holds the value that the user supplies when they log in For a ...

Page 74: ...Type Example values Active Directory LDAP AMXVision2Dev Local ADAM LDAP AMXVision2Dev 50000 O AMX C UK LDAP Base DN This is the Base DN which is used as the starting point in the LDAP tree when browsing LDAP from a Content Folder in the Archive This setting prevents you from having to traverse the entire LDAP tree when restricting user access to content in the Archive thereby simplifying the proce...

Page 75: ...ideos the Restrict the users who gave access to the content in this category check box appears When enabled it displays the current DN selected for the restriction The Change button displays a tree control which contains the LDAP tree from the LDAP Base DN defined in the Master Service downwards You can then Apply a new DN FIG 63 LDAP Restriction settings ...

Page 76: ...Master Service 66 Vision2 Operation Reference Guide ...

Page 77: ... other supported third party encoder to provide the hardware encoding of video and audio signals into an MPEG 2 multicast stream Live Services as with all other Vision2 services are managed by the Vision2 Services Manager web interface Configuring the MAX CSE Encoder When you select the Configure MAX CSE Encoder option from the Live Service Menu the following page appears FIG 64 FIG 64 Configure M...

Page 78: ...ngs The bottom section of the page deals with the specific parameters defined for multicasting the video and the actual parameters which define the encoding process When you check the Stream Enable check box the system starts the encoding process and multicasts the stream FIG 65 MAX Encoder Service Settings Service Settings Options Channel Name The name of the service as it appears in the playlist...

Page 79: ...multicast UDP multicast is the only supported protocol at this time Address This is the multicast address that will be used This option is pre configured and cannot be changed Port This is the multicast port number that will be used This option is pre configured and cannot be changed TTL This is the multicast TTL that will be used You can enter a value in the space provided This option is pre conf...

Page 80: ...ck Apply Clicking Apply saves your configuration 11 Click the Enable check box to begin the multicast stream Encoding Settings Options Video Input The MAX encoder supports either S Video or Composite video inputs Video Standard The MAX encoder supports NTSC USA and Japan and PAL rest of the world excluding France video standards Aspect Ratio The MAX encoder is supports a 4 3 and 16 9 aspect ratio ...

Page 81: ...onfigure Click Apply if selecting a new encoder type Encoder Select the Enable check box to Start or uncheck to Stop the encoder Encoder Number Selects the Capture card and Encoder Encoder 1 or Encoder 2 Encoder Input Selects the input port on the capture card Component Composite or S Video S Video The video signal is divided into luminance and chrominance Results in good quality video Composite v...

Page 82: ...mponent or composite port on the encoder 7 Use the Encoder Format options menu to indicate which video standard the encoder is using 8 Use the Encoder Profile options menu to select a profile containing the appropriate pre configured encoder settings 9 Click Apply Clicking Apply saves your configuration 10 Check the Encoder Enable check box to start the encoder and unicast the video stream at the ...

Page 83: ...he username used to gain access to the encoder The default username is admin 8 In the Password text box enter the password used to gain access to the encoder The default password is admin 9 Click Apply FIG 70 WMV Encoder Service Settings Service Settings Options Service Name The name of the service as it appears in the playlists Encoder Type Use the options menu to select the type of WMV encoder y...

Page 84: ...ideo Standard The encoder supports NTSC USA and Japan and PAL rest of the world excluding France video standards Aspect Ratio The encoder is supports a 4 3 and 16 9 aspect ratio Audio Input Select the audio input you want to use from the options menu Encoding Encoder Profile Select the encoder profile you want to use Video CODEC Vision2 supports only WMV video compression on the WMV encoder Video ...

Page 85: ... Use the Video Resolution options menu to indicate the video resolution of the multicast stream 8 Use the Video Bitrate options menu to indicate the video bitrate of the multicast stream 9 Use the Video Mode options menu to indicate the video mode of the multicast stream It is recommended that you select CBR 10 Use the Audio Bitrate options menu to indicate the audio bitrate of the multicast strea...

Page 86: ...Live WMV Service 76 Vision2 Operation Reference Guide ...

Page 87: ...icast Windows Media streams as its input and can provide both unicast and multicast Windows Media streams as its output Reflector services as with all other services are managed by the Vision2 ServicesManager web interface WMV Configuration The WMV reflector accepts a unicast stream from a source and multicasts out as a channel When you select the Configure Reflector from the Reflector Service Men...

Page 88: ... You cannot edit any of the other settings while the service is enabled Service Name The name of the service as it appears in the playlists Web Service URL The URL to the Web Services interface for this service This value is automatically generated and should not be edited unless instructed by AMX Unicast source The options menu provides a list of all the Live WMV encoders in the system and also a...

Page 89: ...an choose from Local Vision2 Channel or External Source V2 Channels The options menu provides a list of all the Producer channels in the system This option is only available if you select Local Vision2 Channel as the source type URL Use the provided field to enter the URL containing an MPEG 2 or H 264 video This option is only available if you select External Source as the source type Destination ...

Page 90: ... in playlists 3 Indicate whether the source is a local channel or an external source by clicking the Local V2 Channel or External Source option button If you select Local V2 Channel select a Producer channel from the V2 Channels options menu If you select External Source enter the URL of an address containing an MPEG 2 or H 264 video in the URL field 4 Click the Multicast option button to indicate...

Page 91: ...eliver their content Where previously a single frequency was required for each TV channel by using digital compression multiple channels can be provided on a single frequency known as a multiplex or bouquet The DVB service de multiplexes the individual TV channels on a selected frequency and makes each individual channel available for multicasting to users Configuration When you select the Configu...

Page 92: ...on enables you to scan all of the frequencies used by the broadcaster and detect all of the available TV channels As the scan proceeds any detected channels display in the Channel List at the bottom of the page FIG 76 Service settings Service Options Service Name The name of the service as it appears in the services menu Apply Click to apply any change to the service name FIG 77 Tuner Hardware Set...

Page 93: ...to indicate which network interface you want to use for multicasting 3 Enter the base multicast address in the Base Multicast Address field All channels selected to multicast are offsets from this address 4 Enter the port for this channel in the Port field 5 Enter a value for the multicast TTL for this channel in the TTL field This step is optional 6 In the Channels area click the check box in the...

Page 94: ...menu option to allow you to preview the channels you have selected in the channel list Select the channel from the available list on the left pane of the window Channel List Options Name The channel name as provided by the broadcaster Type The type of channel either Digital TV or Digital Radio Multicast Checking the box multicasts the channel SID This is the DVB Service ID and it is provided for t...

Page 95: ...page deals with the settings for the service itself and consists of the following options FIG 80 Master Archive Service Configure Archive Options Service Name The name of the service as it appears in the services menu Base Service URL The URL to the Web Services interface for this service This value is automatically generated and should not be edited unless instructed by AMX Archive Path This is t...

Page 96: ...rate for high definition VC1 is 8 12 Mbits MPEG 2 MPEG 2 must be encapsulated in an MPEG 2 transport stream The supported audio formats are MPEG Layer I MPEG Layer II MPEG Layer 3 MP3 AC3 The following table lists the recommended bitrates for MPEG 2 video High definition is supported for playback to a set top box The recommended bitrate is 8 12 Mbits MPEG 4 AVC H 264 MPEG 4 files must be encapsula...

Page 97: ...with user defined number of columns Creating a New Metadata Section To create a new text section click Add new Text section The following options appear The bitrates specified above are for playback on a PC unless otherwise stated FIG 81 Metadata Configuration Add New Text Section Options Section Name This is the name of the section as it appears on the left side of the page and also when editing ...

Page 98: ...sic Video Info Music Video Credits Music Video Lyrics TV Program Credits TV Program Synopsis Displayed Name This is the name of the section as it will be displayed to a user Visible to users Check this box if you want the section to be visible to the users If it is not checked then it will only be visible in the management interface Edit Table Insert Column Allows you to insert an extra column Del...

Page 99: ...older in the right pane You can rename the folder and you can edit the description by clicking on the folder description below the images You can also create a new folder upload a new video or add an online video The process of uploading a new video is identical to the process of uploading an additional video see the Uploading Additional Versions of the Same File section on page 93 for more inform...

Page 100: ...nabled After the Sort is complete the Content list will refresh to show the new order See FIG 85 for an example The sort process applies to all subfolders and their contents and repeats recursively until all the contents have been sorted Once the sort is finished you can reorganize folders and contents manually if required The Sort Entire Archive function can be reused at any time for example when...

Page 101: ...follows FIG 86 Add an online video screen Multiple Selections Options Quick search for Enter the text you wish to search for in the metadata and click the Search button the videos in the branch of the currently selected content folder will be shown with the search text highlighted in the metadata Clear all selections The current selection is cleared Delete Selected Video Deletes the video shown in...

Page 102: ...on of the currently uploaded file formats Passing the cursor over an uploaded video format displays the upload date of the format Video Information Provides technical information on the individual video files Synopsis Provides a description of the video You can edit this option by clicking Edit Info FIG 87 Archive video Thumbnail images You cannot play any audio content from the Archive service on...

Page 103: ...ile To upload an additional file format or bitrate version of the video click Upload Additional Video to display the upload screen FIG 89 Vision2 does not support transcoding files You must upload versions of the same file with different formats and bitrates Perform these steps to upload an additional version of the same file 1 Click the Content folder under Master Archive on the left side of the ...

Page 104: ...Archive Service 94 Vision2 Operation Reference Guide ...

Page 105: ...ion 11 or higher Download from http get adobe com flashplayer VLC Media Player version 2 0 or higher Download exe installer from http www videolan org vlc download windows html In order to edit thumbnails a user must be a member of either Vision2 Servers NT Administrator Group or an NT group on the Vision2 Server listed in the file config xml which is located at c inetpub wwroot v2services ui Thum...

Page 106: ...stem administrator and click Log in The first application screen will now load the Archive Navigation Screen Archive Navigation Screen The Archive Navigation Screen consists of two main areas see FIG 91 The Archive Navigation Pane used to navigate through the video archive and select those videos you wish to create view thumbnails for The Selected Video Area shows the videos selected in the naviga...

Page 107: ... area contains the following Video title above image Video image Video description to the right of the image Number of thumbnails associated with the video thumbnail count If this number is one or more then the video will have a show thumbnails button You can also select videos using the Search bar Enter the text you want to search for and click the magnifying glass Videos with a title metadata de...

Page 108: ...with this video and the descriptive text associated with these thumbnails Remove video Click the red cross in the top right hand corner to remove this video If you selected Show thumbnails you now have a list of thumbnails Each thumbnail has an image a time and some descriptive text Time time from start of video in hours minutes seconds of this thumbnail Descriptive text text describing what the t...

Page 109: ...ns are available in this screen Play a Thumbnail Create a new Thumbnail Delete a Thumbnail Add descriptive text to a Thumbnail Play video Return to archive These actions are described in detail over the following pages Playing a Thumbnail Hovering over the thumbnail images in the thumbnail bar reveals a play icon which allows you to play the video from the time marked by that thumbnail Set the Thu...

Page 110: ...ing on the red arrow in the top right corner of the thumbnail Adding Descriptive Text to a Thumbnail Once you have created a thumbnail you add descriptive text to provide further information for users Click on the pencil edit icon or within the text field to edit the thumbnail text see FIG 97 Once you are satisfied click the floppy disk save icon to save your changes see FIG 98 You can undo your c...

Page 111: ...eo from that position Click a position on the timeline to play the video from then Click the play button to play the video Click pause to halt playback Exiting the Thumbnail Editor Navigate back to the Archive Navigation Pane once you have finished viewing a video and or creating thumbnails and click Back to Archive before exiting the application Do not close the browser or Edit thumbnail screen o...

Page 112: ...Thumbnail Editor 102 Vision2 Operation Reference Guide ...

Page 113: ...r requires two plugins Adobe Flash version 11 or higher Download from http get adobe com flashplayer VLC Media Player version 2 0 or higher Download exe installer from http www videolan org vlc download windows html Login to Thumbnail Viewer Login to the Thumbnail viewer as follows 1 Enter the application link provided by your system administrator into your web browser For example http server name...

Page 114: ...s explorer Click to expand a folder revealing its contents Click to contract a folder Videos are indicated by filmstrip icons The video title appears to the right of the icon Click a video you want to create edit thumbnails for this adds the video to the selected video area Each video in this area contains the following Video title above image Video image Video description to the right of the imag...

Page 115: ...ng Show the thumbnails associated with video Click Show Thumbnails to view all the thumbnails associated with this video and the descriptive text associated with these thumbnails Remove video Click the red cross in the top right hand corner to remove this video If you selected Show thumbnails you now have a list of thumbnails Each thumbnail has an image a time and some descriptive text Time time f...

Page 116: ...hive These actions are described in detail over the following pages Playing a Thumbnail Hovering over the thumbnail images in the thumbnail bar reveals a play icon which allows you to play the video from the time marked by that thumbnail Set the Thumbnail track video checkbox to automatically scroll the thumbnail bar to show those thumbnails closest in time to the current video playback Viewing Vi...

Page 117: ...ou can control the playback using a small panel at the bottom of the screen see FIG 105 The main controls are as follows Drag the slider to a position on the timeline to play the video from that position Click a position on the timeline to play the video from then Click the play button to play the video Click pause to halt playback FIG 105 Video Playback Control Panel ...

Page 118: ...Thumbnail Viewer 108 Vision2 Operation Reference Guide ...

Page 119: ...ent scheduled for a certain period of time Producer enables you to set an intermission source which automatically plays an MPEG 2 MP4 H 264 or WMV file from a Vision2 archive a multicast MPEG 2 or MP4 H 264 source such as a DVB or Live MPEG channel or a unicast WMV source such as a live WMV channel Please note that both the MPEG MP4 H 264 and WMV Windows Media Video variants are managed in exactly...

Page 120: ... be used as the source of the videos to be scheduled Path to content The physical path to the archives content Intermission This section defines what to do whenever there are no videos scheduled to broadcast You can schedule a specific MPEG 2 file from a Vision2 archive a multicast MPEG 2 source such as a DVB or Live MPEG channel or a WMV source such as an encoder Enable If the Intermission not en...

Page 121: ...e is from a file or a live feed After making your selection do one of the following File Select a file from the menu on the left pane of the window Live Feed Select a live feed from the Live options menu 3 Click Apply 4 Click the Enable check box in the Intermission section 5 Click the Service Enable check box to activate the intermission The Name and URL fields populate with the name and path of ...

Page 122: ...ration page to start the service and either have scheduled some content or enabled the Gap file before you can view the stream Edit Schedule Options Snap When moving a program or adding a program to the schedule the Snap limit defines the program time start boundary For example a 15 minute Snap setting only allows programs to be scheduled at 00 15 30 and 45 minutes past each hour Copy The copy opt...

Page 123: ...a specific event Recording unmanaged WMV channels is not supported Configuration When you select the Configure DVR from the Record Service Menu the following page appears FIG 108 Service Settings The top section of the page deals with the settings for the service itself and consists of the following options FIG 108 Configure Record Service FIG 109 Service Settings Service Settings Options Service ...

Page 124: ...ferentiate between the archive folders Segment length This value defines the length of each individual recordings created by a continuous recording Available options are 5 15 30 and 60 minutes Keep Archives for To prevent the continuous recording mode from filling up the hard disk used by the archive the system will delete automatically generated recordings after the period defined here To prevent...

Page 125: ...ideo stream Manual Recording After you have configured the Record service for manual recording and have enabled recording select Manual Recording from the Record services menu A video player opens with additional controls to stop and start the recording You can also enter the filename as it will appear in the archive while the video player is open The maximum supported manual recording is three ho...

Page 126: ...rding should occur A pop up dialog box appears FIG 112 3 Enter the name the recording in the Program Name field 4 Use the up and down arrows to indicate the duration of the recording in 10 minute increments 5 Click Save Event Log In common with other services the Record service generates an event log which you can examine by selecting View Event Log from the Record services menu FIG 111 Scheduled ...

Page 127: ...Record Service 117 Vision2 Operation Reference Guide ...

Page 128: ...t you have the opportunity to gather the information and experience you need to deliver strong AMX solutions Plus AMX courses also help you earn CEDIA NSCA InfoComm and AMX continuing education units CEUs Visit AMX University online for 24 7 365 access to Schedules and registration for any AMX University course Travel and hotel information Your individual certification requirements and progress 30...

Reviews: