

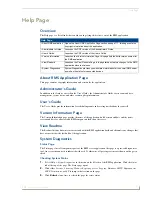


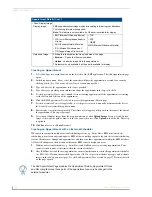


Help Page
172
RMS - Administrator’s Guide
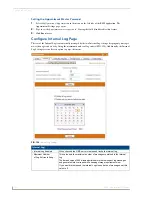
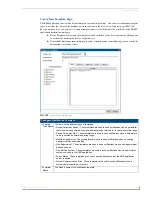
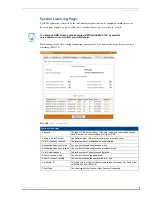
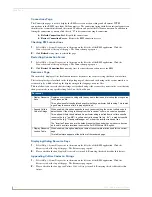
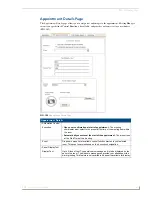
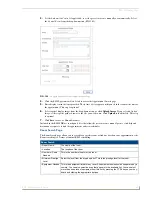
Connections Page
The Connections page is used to display the RMS server connection settings and all current TCP/IP
connections to the RMS Server from NetLinx masters. The connection listing includes an internal connection
identifier, the system identifier and the remote IP address and port of the NetLinx connection. In addition to
listing the connections, you can click the red "X" to disconnect any single connection.
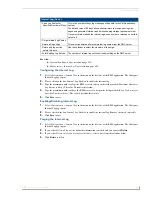
Refresh Connection List
- Repolls the connections.
Restart Connection Server
- Restarts the RMS connection server.
Checking RMS connections
1.
Select
Help > System Diagnostics
in the menu on the left side of the RMS application. Click the
Connections
tab at the top of the page. The Connections page opens.
2.
Click
Refresh
at any time to refresh the page.
Restarting Connection Server
1.
Select
Help > System Diagnostics
in the menu on the left side of the RMS application. Click the
Connections
tab at the top of the page. The Connections page opens.
2.
Click
Restart Connection Server
at any time to restart the connection server for RMS.
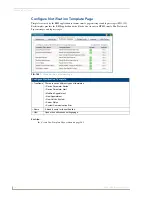
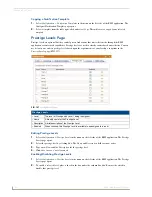
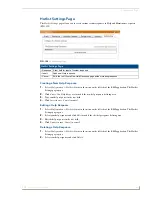
Resources Page
When checked, displays all the localization resource key names for each text string that has been localized.
The text displayed gets localized to the foreign language of choice and each string in the system must have a
resource key by which to look up the display string in the language resource files.
This tool allows you to verify that the strings are localized and get the resource key name in the event that any
changes are made to any specific string, label, text field, or button.
Displaying/Hiding Resource Keys
1.
Select
Help > System Diagnostics
in the menu on the left side of the RMS application. Click the
Resources
tab at the top of the page. The Resources page opens.
2.
Place a check in the box
Display Resource Keys
to enable. Removing the check disables this feature.
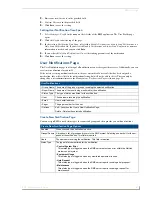
Appending Culture Codes to Strings
1.
Select
Help > System Diagnostics
in the menu on the left side of the RMS application. Click the
Resources
tab at the top of the page. The Resources page opens.
2.
Place a check in the box
Append Culture Code to Strings
to enable. Removing the check disables this
feature.
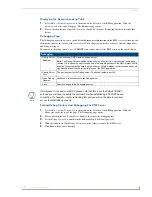
Resources
• Display Resource
Keys
Replaces every resource string with the key name that is used to lookup the string value
in the resource file.
This option is useful to understand exactly what key a particular field is using. This is also
a good way to ensure a field is properly defined.
• Append Culture
Code to Strings
When enabled, this option appends to each resource string the current culture code in
parentheses. If the string is coming from the "invariant" culture, no code is appended.
This option will help to understand if a particular string is pulled from a culture specific
resource file (e.g. "es-MX"), a culture neutral resource file (e.g. "es"), a product specific
resource file (e.g. "ClassroomManager.es") or from the invariant resource files.
The "invariant" resources are the default resource files used when no resource key can
be found in a culture localized resource file. For RMS this is US English.
• Display Resource
Lookup Table
When enabled, this option displays a table of resource information used for the current
page.
This table always appears at the bottom of the rendered page.
Summary of Contents for RMS
Page 24: ...RMS Resource Management Suite 12 RMS Administrator s Guide ...
Page 58: ...RMS Configuration Wizard 46 RMS Administrator s Guide ...
Page 72: ...RMS Administration 60 RMS Administrator s Guide ...
Page 78: ...RMS Hotlist 66 RMS Administrator s Guide ...
Page 170: ...Reporting Page 158 RMS Administrator s Guide ...
Page 182: ...Configuration Page 170 RMS Administrator s Guide ...
Page 186: ...Help Page 174 RMS Administrator s Guide ...
Page 188: ...Sitemap Page 176 RMS Administrator s Guide ...
Page 211: ...RMS Touch Panel Pages 199 RMS Administrator s Guide ...