manualshive.com logo in svg
background image

Windows
Macintosh

p. 10
p. 56

• This guide explains how to install the software programs and 

briefly introduces their functions and operating procedures. 

• Please read the software license agreement in this guide before 

using the software. By using the software, you agree to be 
bound by the terms of the agreement. 

Software Starter Guide

(For the Canon Digital Camera Solution Disk Version 14)

Windows/Macintosh

Windows

Macintosh

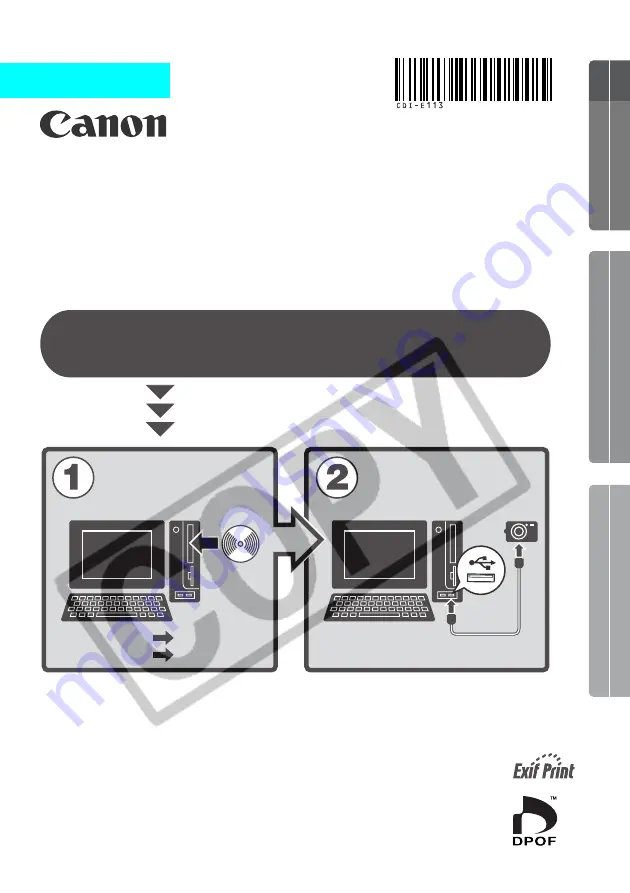
You must install the software bundled on the Canon 
Digital Camera Solution Disk before connecting the 
camera to the computer.

Install the software.

Connect the camera 
to the computer.

ENGLISH

Содержание PowerShot SD10 Digital ELPH

Страница 1: ...e before using the software By using the software you agree to be bound by the terms of the agreement Software Starter Guide For the Canon Digital Camera Solution Disk Version 14 Windows Macintosh Win...

Страница 2: ...er names and products not mentioned above may be registered trademarks or trademarks of their respective companies Copyright 2003 Canon Inc All rights reserved SAFETY PRECAUTIONS Warnings This symbol...

Страница 3: ...of this Agreement You must reproduce and include the copyright notice on the back up copy 3 SUPPORT AND UPDATES Neither Canon nor its subsidiaries dealers or distributors will be responsible for prov...

Страница 4: ...null and void with respect to the jurisdiction of that court or tribunal and all the remaining provisions of this Agreement shall remain in full force and effect 9 CONTROLLING LAW The terms of this A...

Страница 5: ...nting Images 24 Using the Software on the Windows Platform 29 Advanced Techniques The ZoomBrowser EX Windows 30 Checking Images before Downloading 32 Replaying Movies 35 Searching Images 36 Operating...

Страница 6: ...ch 80 Enjoy Customizing Your Camera with the My Camera Settings 82 Appendices 87 About the CD ROMs Supplied with the Solution Disk 88 Uninstalling the Software 90 Memory Card Folder Structure 94 Troub...

Страница 7: ...to use the software About this Guide The explanations in this guide are based on Windows XP and Mac OS X v10 2 If you are using another version of these operating systems the actual screen contents a...

Страница 8: ...ht at Home Like a Pro 2 It s so Simple Make Prints Right at Home Like a Pro See your Camera User Guide for shooting instructions Just install the software once at the beginning Shoot the images Instal...

Страница 9: ...Windows Macintosh 3 Download images to the computer Print the images Connect the camera to the computer...

Страница 10: ...the diverse layouts available in PhotoRecord Windows and ImageBrowser Macintosh The examples shown are from PhotoRecord Windows Stitch a Panorama Together Create a panoramic image from a series of ima...

Страница 11: ...mail software from within ZoomBrowser EX Windows or ImageBrowser Macintosh Operate the Camera Shutter from the Computer Release the camera s shutter from the computer with ZoomBrowser EX Windows or Im...

Страница 12: ...ods and features of the software contained on the CD ROMs other than the Canon Digital Camera Solution Disk Using the PDF Manuals The following PDF format manuals hereafter PDF manuals are provided to...

Страница 13: ...m 300 MHz or higher processor RAM Windows 98 Windows Me Windows 2000 64 MB or more Windows XP 128 MB or more Interface USB Free Hard Disk Space Canon Utilities ZoomBrowser EX 200 MB or more Including...

Страница 14: ...ee Hard Disk Space Canon Utilities ImageBrowser 120 MB or more PhotoStitch 30 MB or more Display 800 x 600 pixels 32 000 Colors or better is required 1 024 x 768 pixels or better is recommended A CD R...

Страница 15: ...g the Software on the Windows Platform Preparations This chapter explains the basic procedures for installing the software and connecting the camera to a computer Read this material before you connect...

Страница 16: ...be properly installed if the camera is connected to the computer at the start 2 Close any programs that are running 3 Place the Canon Digital Camera Solution Disk in the computer s CD ROM drive The in...

Страница 17: ...staller panel if it does not appear automatically Windows XP 1 Select My Computer from the Start menu 2 Right click the CD ROM icon and select Open 3 Double click the Setup exe icon Windows 2000 Windo...

Страница 18: ...the software for connecting is required when the camera is connected to the computer with a USB cable Ensure that you select a USB driver from below the appropriate one for your operating system Windo...

Страница 19: ...ge will display if you selected and installed the USB driver in Step 8 11 When the installation is over select Yes I want to restart my computer now and click Finish Users of Windows XP Professional a...

Страница 20: ...ones will appear during this process first connection only Windows XP The following dialog will appear after a few moments and the USB driver supplied with the Windows operating system will automatica...

Страница 21: ...Software on the Windows Platform The Basics p 17 This concludes the software and USB driver installation and the procedures for connecting the camera to the computer You may now download camera image...

Страница 22: ...16 MEMO...

Страница 23: ...rm The Basics This chapter explains the procedures for using ZoomBrowser EX to download the camera s images to the computer and print them Read this chapter after completing the preparations in the Us...

Страница 24: ...he folder shown in the Save to section of the Download image window p 20 You can change the settings for the images to be downloaded and the downloading destination by clicking the Camera menu in Zoom...

Страница 25: ...h the procedures described below in If the Events Dialog Does not Appear If the Events Dialog Does not Appear Perform the following procedures 1 Double click the ZoomBrowser EX icon on the desktop 2 C...

Страница 26: ...mera images download to the computer The downloaded images are saved into folders according to the shooting date A dialog allowing you to select the camera model will display if a camera and a memory...

Страница 27: ...Windows The Basics 21 When downloading is complete the thumbnails tiny versions of the downloaded images display in ZoomBrowser EX s main window Next print out the images p 24...

Страница 28: ...IA adapter if required See the manual for the memory card for its connection and handling instructions 2 Start ZoomBrowser EX Double click the ZoomBrowser EX icon on the desktop 3 Click Camera Memory...

Страница 29: ...nails tiny versions of the downloaded images display in ZoomBrowser EX s main window Next print out the images p 24 A selection dialog will appear if multiple memory card readers loaded with memory ca...

Страница 30: ...ocedures for PhotoRecord See the program s Help menu for more details 1 Click Print in the main window 2 Click Layout Print in the next menu 3 Click on the image s you wish to print and click the Next...

Страница 31: ...the steps that will take you through the printing process will display on the left side Follow the steps in order to proceed To add a comment to an image select it in ZoomBrowser EX and click Properti...

Страница 32: ...he Album Type section By selecting Booklet you can create a margin at the left side so the images can be kept in an album Selecting Simple Album creates equal margins on both sides To adjust the margi...

Страница 33: ...The Themes category provides consistent designs for use throughout an entire album Selecting a theme automatically sets the background image border and text border for all images You can also click A...

Страница 34: ...by setting the number of rows and columns per page the Exif data shooting information display size and paper size and then clicking Print There is a difference between the shooting information shown i...

Страница 35: ...anced Techniques This chapter explains various ZoomBrowser EX features such as how to play movies and create panoramic images Proceed to this chapter once you have mastered the basic ZoomBrowser EX pr...

Страница 36: ...hem to e mail messages You can change the zoom speed for images displayed in the Browser Area Click the Tools menu select Preferences and slide the Zooming lever Folders Area Select image folders here...

Страница 37: ...ra s Auto Rotate function set to On When JPEG images are rotated with the camera s manual rotation settings When JPEG images are rotated in the Camera Window To download both the pre rotation and post...

Страница 38: ...ra Window 1 Display the Download image window To download images from a camera follow Steps 1 2 in the Camera to Computer Connection section p 18 To download images from a memory card follow Steps 1 4...

Страница 39: ...tination folder will display 5 Confirm the destination folder and click OK If you are downloading images previously selected with the camera s Transfer Order setting click Select and select Select Sen...

Страница 40: ...ers and Cameras Wizard and other procedures You do not even need to install ZoomBrowser EX or the USB driver However there are some inconveniences and limitations to this downloading method See the Fo...

Страница 41: ...the Windows Explorer to play it That will start Windows Media Player which may not support this file type To replay movies start QuickTime Player through the Start menu and open the file using the Qui...

Страница 42: ...1 Select a folder to search in the Browser Area 2 Click View Modify followed by Search in the next menu 3 Set the search parameters Place a check mark in the parameter you wish to use If you selected...

Страница 43: ...ch criteria Images in this folder can be selected printed and saved to another folder The images will display in this folder until ZoomBrowser EX is closed or another search is performed Setting Image...

Страница 44: ...ords to images 1 Select the image in the Browser Area and click Properties 2 Click View Modify Keywords 3 To add an existing keyword to an image click the keyword to add a check mark beside it 4 Click...

Страница 45: ...uter and that ZoomBrowser EX is displaying its main window 2 Open the lens cover or remove the lens cap on models equipped with them Proceed to the next step if your model does not have one 3 Click Ca...

Страница 46: ...which images are captured You can add comments to images by placing a check mark here and typing text in the boxes below Viewfinder Display Click the Start Stop Viewfinder button while a connection to...

Страница 47: ...remote shooting procedures were initiated Ensure that you turn off your computer s standby mode before you begin remote shooting The device performance cannot be guaranteed if the computer enters the...

Страница 48: ...ied interval 4 Click OK in the confirmation dialog Timer Shooting Timer shooting is a method of shooting that records a frame after a specified number of seconds 1 Click the Shooting menu in the Remot...

Страница 49: ...he icon in the RemoteCapture Task window Selecting Computer only in the Save Images On category allows you to shoot when there is no memory card in the camera or when the camera s memory card is full...

Страница 50: ...titch Photos in the next menu 2 Select a series of images in the Browser Area and click Finish A window similar to that below will appear 3 Merge the images following the instructions in the guidance...

Страница 51: ...atically arranges them in the correct order and orientation Stitch Assist mode images appear in the Camera Window as shown below You can start PhotoStitch by clicking the mark shown on images shot in...

Страница 52: ...odify in the ZoomBrowser EX main window and Backup to CD in the next menu 4 Follow the instructions at the left of the display to proceed The disk will automatically eject from the drive once the file...

Страница 53: ...form this function Displaying the My Camera Window To save the My Camera Settings to the camera you use the My Camera window The following explains the procedures for displaying the My Camera window 1...

Страница 54: ...selected the Data Type can also be selected Displays the list of My Camera Settings files saved onto the computer Add File Button Click here to add a file as one of the My Camera Settings to the My C...

Страница 55: ...file If a setting for this category has previously been saved to the camera it will be overwritten Repeat steps 1 3 as required To use this data on the camera change the start up image and sound sett...

Страница 56: ...file s from the Camera list that you wish to save to the computer If you are working in the Setup as a theme tab the thumbnail tiny version of the start up image will display to the right and the sou...

Страница 57: ...ted the data and saved it to the computer use the following procedures to add it to the My Camera window 1 Open the My Camera window click the Set individually tab select Startup Image from Data Type...

Страница 58: ...recorded sound 1 Click the Camera menu in the ZoomBrowser EX main window and select Create a My Camera Sound The My Camera Sound Maker window will display 2 Click the tab of the sound file you will b...

Страница 59: ...th the blue or red switch The extra data outside the starting and finishing switches can be erased by clicking the Cut button 7 Click the Save tab confirm that the sound file was created input a file...

Страница 60: ...he Delete button at the bottom of the My Computer list Record the sound as an 11 025 kHz or 8 000 kHz 8 bit mono sound in the WAV format The following chart shows standard time lengths for My Camera S...

Страница 61: ...ons 55 Using the Software on the Macintosh Platform Preparations This chapter explains the basic procedures for installing the software Read this material before you connect the camera to the computer...

Страница 62: ...ce the Canon Digital Camera Solution Disk in the computer s CD ROM drive 3 Double click the CD ROM icon followed by the Mac OS X and Canon Digital Camera Installer icons With Mac OS 9 double click the...

Страница 63: ...sk from the CD ROM drive when the installation is complete This concludes the software installation Continue by downloading images to the computer p 67 See Uninstalling the Software p 93 to delete the...

Страница 64: ...58 MEMO...

Страница 65: ...form The Basics This chapter explains the procedures for using ImageBrowser to download the camera s images to the computer and print them Read this chapter after completing the preparations in the Us...

Страница 66: ...not start proceed to Step 3 2 Click at the upper left of the iPhoto or Image Capture window to close it 3 Double click the Canon ImageBrowser icon on the desktop If the Canon ImageBrowser icon does n...

Страница 67: ...rt up at the same time as the Camera Window Step 6 is not required when neither program starts up automatically 6 Click the icon at the top left of the iPhoto or Image Capture window to close the prog...

Страница 68: ...Preferences 2 In the next menu click the Camera Preferences list box and select Other 3 Select ImageBrowser in the program selection window 4 Close Image Capture ImageBrowser will start automatically...

Страница 69: ...a is connected 3 Confirm that USB port is selected as the port option and that your camera model name or Canon Camera are selected as the detected camera Click Set The Camera Window will open and disp...

Страница 70: ...e How to Set ImageBrowser to Not Start Automatically 1 Click the Apple menu and select Control Panels and Canon ImageBrowser Auto Launch The Settings for USB Connection dialog will display 2 Click The...

Страница 71: ...ageBrowser Double click the Canon ImageBrowser icon on the desktop If the icon does not appear on the desktop double click the folder in which you installed the program followed by the Canon Utilities...

Страница 72: ...es from the memory card will display as thumbnails tiny versions in the Camera Window Next download images to the computer p 67 See Memory Card Folder Structure p 94 for information about memory card...

Страница 73: ...wser Window and bring it to the foreground 2 Select the Users folder and the subfolder labeled with your user name on the startup disk Mac OS 9 users should select Macintosh HD in the Explorer View se...

Страница 74: ...wnload images to the new folder 1 Click the Camera Window to bring it to the forefront 2 Click the images to download A blue frame appears around selected images You can select multiple images by hold...

Страница 75: ...ac OS X at the top left of the Camera Window Your camera uses a standard image transfer protocol called the Picture Transfer Protocol PTP With the PTP protocol and Mac OS X you can easily download ima...

Страница 76: ...ppears around selected images 2 Click the Print button and select Layout printing from the displayed menu This displays the Layout Options dialog and the Print window 3 Confirm that Custom layout prin...

Страница 77: ...n for printing Selecting an alternative option allows you to print the images in an index or in a tiled arrangement The Canon perforated paper printing option can be selected with Mac OS 9 The setting...

Страница 78: ...is also available It provides further information about the program s features and procedures See Using the PDF Manuals p 6 Change the Image Size Drag the border to resize the image Change the defaul...

Страница 79: ...ed Techniques This chapter explains how to use various ImageBrowser features such as how to play movies and create panoramic images Proceed to this chapter once you have mastered the basic ImageBrowse...

Страница 80: ...click an image with a movie icon in the ImageBrowser s Browser Area QuickTime Player will start and replay the movie 1 Double click an image with a movie icon QuickTime Player will start 2 Click the p...

Страница 81: ...d to the computer and that ImageBrowser is displaying its Browser Window Close the Camera Window if it appears 2 Open the lens cover or remove the lens cap on models equipped with them Proceed to the...

Страница 82: ...which images are captured You can add comments to images by placing a check mark here and typing text in the boxes below Viewfinder Display Click the Start Stop Viewfinder button while a connection to...

Страница 83: ...he remote shooting procedures were initiated Ensure that you turn off your computer s sleep mode before you begin remote shooting The device performance cannot be guaranteed if the computer enters the...

Страница 84: ...s at the specified interval 4 Click OK in the confirmation dialog Timer Shooting Timer shooting is a method of shooting that records a frame after a specified number of seconds 1 Click the Edit menu a...

Страница 85: ...ect Camera s LCD monitor and click OK 3 Click the icon Selecting Computer only in the Save Images On category allows you to shoot when there is no memory card in the camera or when the camera s memory...

Страница 86: ...Stitch Start PhotoStitch from ImageBrowser 1 Select a series of images in the ImageBrowser s Browser Area 2 Click the Edit menu and select PhotoStitch A window similar to that below will appear 3 Merg...

Страница 87: ...tically arranges them in the correct order and orientation Stitch Assist mode images appear in the Camera Window as shown below You can also start PhotoStitch by clicking the mark shown on images shot...

Страница 88: ...ra Settings saved onto your computer to the camera and vice versa Use ImageBrowser to perform this function Displaying the My Camera Window To save the My Camera Settings to the camera you use the My...

Страница 89: ...Camera Window p 85 Type Select the My Camera Settings type Displays the list of My Camera Settings files saved onto the computer Add Button Click here to add a file as one of the My Camera Settings to...

Страница 90: ...the Save to Camera button This concludes the process of saving the My Camera Settings to the camera To use this data on the camera change the start up image and sound settings on the camera itself Pl...

Страница 91: ...his concludes the process of saving the My Camera Settings to the computer Adding New Data to the My Camera Window To add new data to the My Camera window you need to create the new data save it to th...

Страница 92: ...file format to the WAV format after you have copied the sound file Then proceed with the steps on the previous page To delete a setting select the file name and click the Send to Trash button at the b...

Страница 93: ...ter introduces the CD ROMs included in your package and the procedures for installing the programs It also explains how to uninstall the programs Read the Troubleshooting section in this chapter if yo...

Страница 94: ...sh system What Can Be Accomplished with ArcSoft Camera Suite 1 2 Special Effects and Image Editing for Various Purposes ArcSoft PhotoImpression This program can be used to apply special effects and ed...

Страница 95: ...ng 2 Place the ArcSoft Camera Suite CD ROM in the drive 3 Open the CD ROM window and double click the PhotoImpression 4 English and PhotoImpression Installer icons Installation will start Follow the o...

Страница 96: ...era Solution Disk This explanation uses ZoomBrowser EX to demonstrate how to uninstall a program 1 Click the Windows Start menu and select Programs or All Programs followed by Canon Utilities ZoomBrow...

Страница 97: ...USB cable to the computer s USB port and the camera s Digital Terminal Prepare the camera for communication with the computer For USB cable connection instructions see Information about Your Camera p...

Страница 98: ...Scanners and Cameras folder Windows 2000 Windows 98 Select your camera model name or Canon Camera and click Remove Windows Me Select your camera model name or Canon Camera right click the mouse and se...

Страница 99: ...a WIA Driver x x Uninstall WIA Driver The uninstall process will start To connect the camera to the computer and download after this point use the following procedures 1 Reinstall the driver 2 Connect...

Страница 100: ...is inserted as the third digit in the name i e STA_0001 JPG STB_0002 JPG STC_0003 JPG The xxxx in file names represent four digit numbers All folders except the xxxCANON folders contain image settings...

Страница 101: ...em with a genuine Apple Computer built in USB port Is the camera correctly connected to the computer See Information about Your Camera pp 105 109 for the correct connection procedures Also check to en...

Страница 102: ...er Next read Start by Checking This on the previous page and resolve the problem Camera not detected Events dialog won t display or images will not download to the computer when camera is connected to...

Страница 103: ...nstall it first and then reinstall it Solution 2 If the problem is not resolved with the procedures in Solution 1 continue by implementing the following procedures The specific steps are explained bel...

Страница 104: ...Camera if it appears in one or more places in the Other devices or Imaging devices categories 6 Close the System Properties window Delete the setup information files 7 Double click the My Computer ico...

Страница 105: ...eras that you noted down in Step 9 If the Inf Folder Is Not Visible in the Winnt Folder Use the following procedures to show all files and folders 1 Open the Winnt folder 2 Click the Tools menu and se...

Страница 106: ...ategories if it is being recognized as an other device 4 Select your camera model name or Canon Camera and click Remove 5 Click OK in the confirmation dialog Delete all instances of your camera model...

Страница 107: ...sents numerals If the Inf Folder Is Not Visible in the Windows Folder Use the following procedures to show all files and folders 1 Windows 98 Click the View menu and select Folder Options Windows Me C...

Страница 108: ...setting to a lower setting 1 Click the Windows Start menu followed by Control Panel and Appearance and Themes With Windows 2000 Windows Me or Windows 98 click the Start menu and select Settings follo...

Страница 109: ...up to this point and click the Start button e g C Program Files Canon ZoomBrowser EX Database My Database zbd This will display the titles and comments input in the earlier versions in the comments se...

Страница 110: ...Troubleshooting 104...

Страница 111: ...are package and the procedures for connecting to a computer and preparing for data transfers vary between camera models Certain software functions may also not be supported by some camera models Read...

Страница 112: ...c to that model pp 108 109 Programs and Compatible Operating Systems The CD ROM labeled Canon Digital Camera Solution Disk is provided with all models It contains the following programs Program Compat...

Страница 113: ...occurs disconnect the other devices from the computer and try reconnecting the camera Do not connect two or more cameras at the same time to the same computer via the USB interface The connections may...

Страница 114: ...ower on This will prepare the camera to exchange data with the computer CD ROMs in the Package Canon Digital Camera Solution Disk ArcSoft Camera Suite 1 2 See ArcSoft Camera Suite 1 2 CD ROM p 88 for...

Страница 115: ...l prepare the camera to exchange data with the computer CD ROMs in the Package Canon Digital Camera Solution Disk ArcSoft Camera Suite 1 2 See ArcSoft Camera Suite 1 2 CD ROM p 88 for information abou...

Страница 116: ...Macintosh 67 Windows 18 E E mail 5 Events Dialog 19 96 Exif 2 2 Exif Print Macintosh 71 Windows 28 Explorer View 60 65 67 F Folder New 67 Folders Area 30 Function Buttons 30 31 I ImageBrowser 4 5 106...

Страница 117: ...ows 35 44 52 QuickTime Player Macintosh 74 Windows 35 R Remote Shooting Macintosh 75 Windows 39 S Save Folder for Images 33 Saving Images on CD R RW Disks 46 Scanners and Cameras Wizard 34 Searching I...

Страница 118: ...112 MEMO...

Страница 119: ...113 MEMO...

Страница 120: ...114 MEMO...

Страница 121: ...115 MEMO...

Страница 122: ...116 MEMO...

Страница 123: ...Limited Warranty supplied with your camera ArcSoft Customer Support North America 46601 Fremont Blvd Fremont CA 94538 Tel 510 440 9901 Mon Fri 8 30 AM 5 30 PM PST E mail support arcsoft com Other Regi...

Страница 124: ...CD I E113 010 X X 03CH X X 2 003 CAN O N I N C PR I N TED I N J APAN...

Отзывы: