


Color Active-Matrix LCD Mini-Touch Panels
Installing Mini-Touch Panels
13
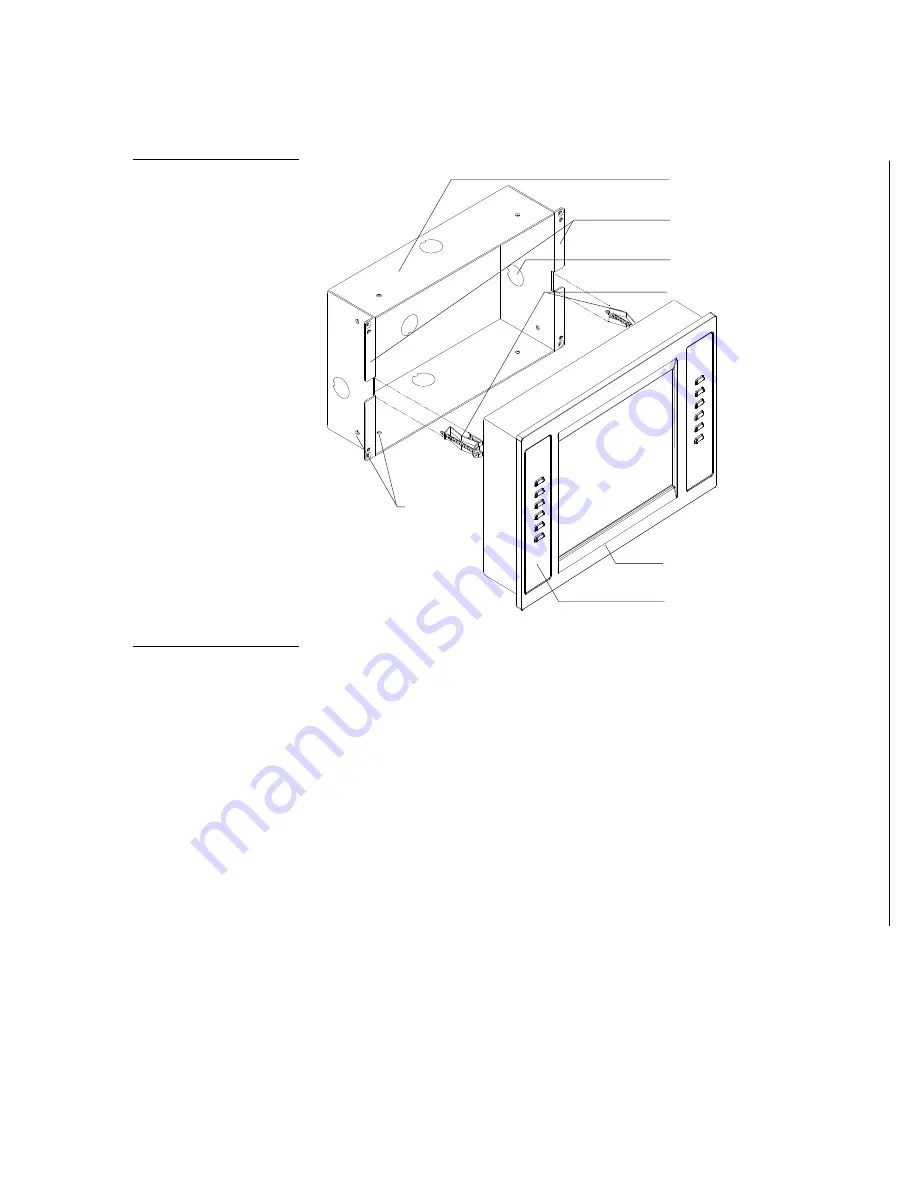
Plasterboard surface
mounting flanges
Knockout
BB-MTP UniMount Back
Box enclosure
Expansion clips
Engraved overlay
Stud
mounting
holes
AXD-MCV/PB
faceplate
2.
Carefully insert a flat-blade screwdriver into the release slot on the touch panel’s
faceplate and remove the engraved overlay.
3.
Lay the touch panel facedown onto a soft cloth and remove the screws from the
low-profile Back Box. Remove the Back Box and discard.
4.
Place the BB-MTP into the cutout and mark the threaded insert positions as
shown for the UniMount (Figure 14) or the Decor-style panel (Figure 15).
5.
Remove the BB-MTP and drill four #6-32 insert holes. Then, place a threaded in-
sert (or screw anchor) into each hole.
6.
Remove the BB-MTP and drill four #6-32 insert holes. Then, place a threaded in-
sert (or screw anchor) into each hole.
7.
Disconnect the AXlink connector from the Central Controller and optional video
wiring from the video source.
Figure 13
AXD-MCV/PB and BB-MTP
UniMount Back Box (plaster-
board)
Note
The touch panel must always
be installed with the release
slot located at the bottom.
Summary of Contents for AXD-MCA
Page 30: ...22 Installing Mini Touch Panels Color Active Matrix LCD Mini Touch Panels ...
Page 68: ...60 Designing Touch Panel Pages Color Active Matrix LCD Mini Touch Panels ...
Page 130: ...122 Touch Panel Program Reference Color Active Matrix LCD Mini Touch Panels ...
Page 180: ...172 Memory Upgrade Color Active Matrix LCD Mini Touch Panels ...


