


Color Active-Matrix LCD Mini-Touch Panels
Installing Mini-Touch Panels
7
7.
Fasten the low-profile Back Box to the surface using the #6-32 machine screws
supplied with the enclosure.
8.
Attach the AXlink and optional RCA video connectors to the mini-touch panel.
Refer to Wiring the Mini-Touch Panels for wiring diagrams and pinout descrip-
tions.
9.
Test the connection by reconnecting the AXlink connector to the Central Con-
troller and the optional RCA video connectors to the source equipment.
10.
Disconnect the above connections until the installation of the panel is complete.
11.
Fasten the touch panel and low-profile Back Box to the surface using the #6-32
machine screws supplied with the enclosure.
12.
Place the UniMount backing plate or Decor-style faceplate onto the bezel. You
can optionally secure the Decor faceplate to the bezel using the four Phillips flat-
head security screws.
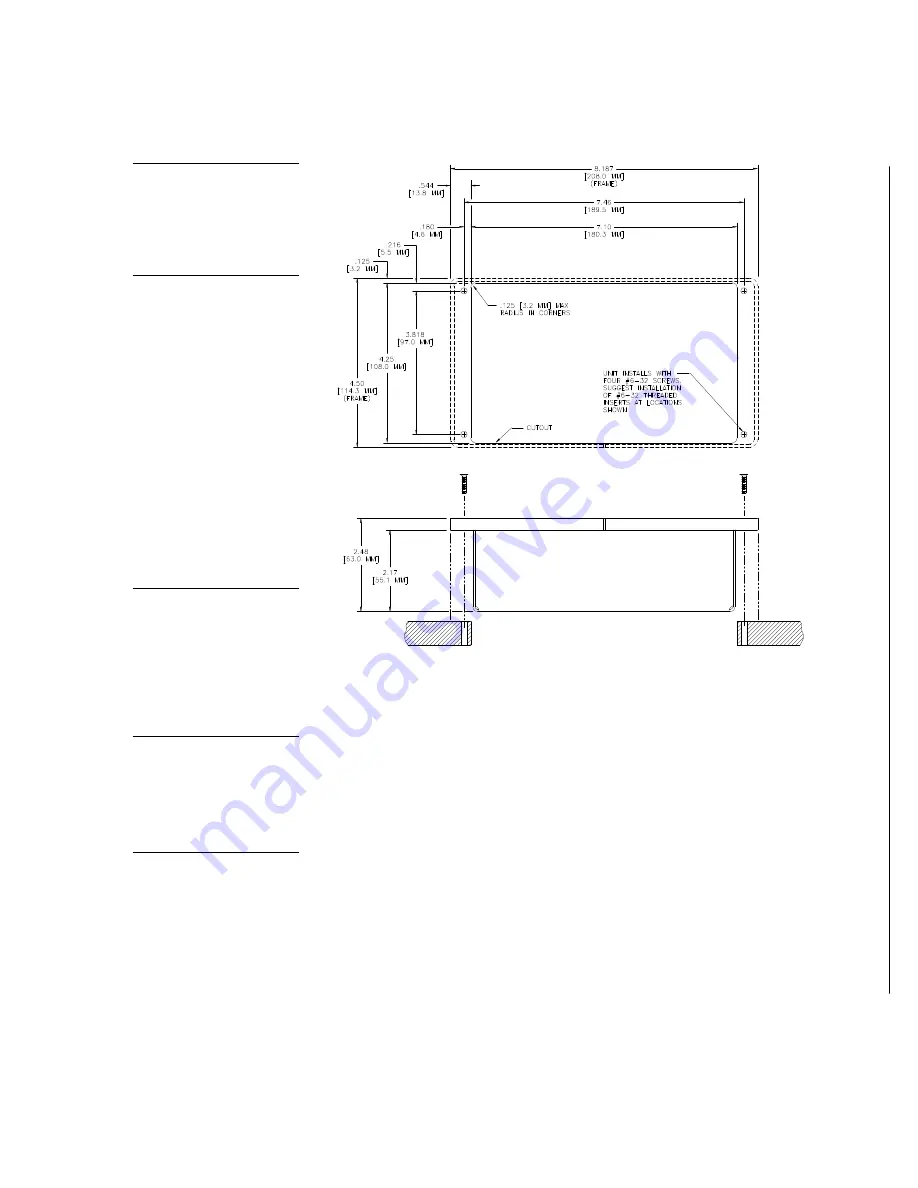
Figure 6
UniMount (AXU) and low-
profile Back Box cutout di-
mensions
Note
The touch panel must always
be installed with the release
slot located at the bottom.
Note
Refer to the Wiring the Mini-
Touch Panels subsection for
de-tailed information.
Note
RCA connectors are used
with video capable mini-touch
panels.
Note
Once attached to the Decor-
style faceplate, the security
screws can’t be replaced
without removing the overlay.
Summary of Contents for AXD-MCA
Page 30: ...22 Installing Mini Touch Panels Color Active Matrix LCD Mini Touch Panels ...
Page 68: ...60 Designing Touch Panel Pages Color Active Matrix LCD Mini Touch Panels ...
Page 130: ...122 Touch Panel Program Reference Color Active Matrix LCD Mini Touch Panels ...
Page 180: ...172 Memory Upgrade Color Active Matrix LCD Mini Touch Panels ...


