background image


AudioFile SCX user manual 

387

 Revision 

0.91 

 
Jan 2008 

AAF Export 


AAF Export enables an AudioFile project to be exported as an AAF file 
which is compatible with any system supporting the AAF file format. 
AAF exports  To export an AAF file, you need to have the AudioFile 
Project loaded on the system first. To do this go into the Projects page 
and LOAD the project containing the events list you want to export. 
Once you have loaded the project, press expanded access and then 
press the AAF EXPORT key. 


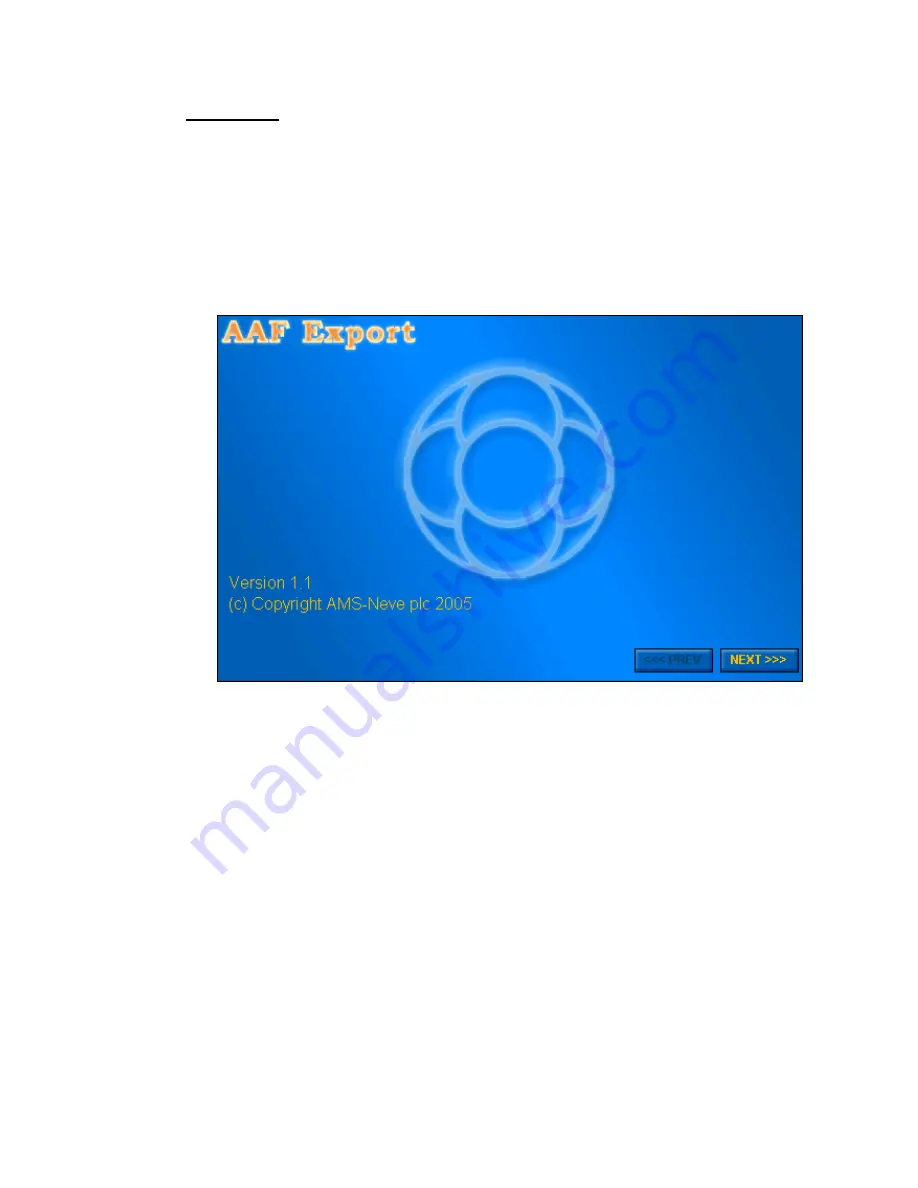
The AAF export defaults can be set by clicking on NEXT from the AAF 
export main page:- 


Summary of Contents for AudioFile SC/X

Page 1: ...AudioFile SCX user manual 1 Revision 0 91 Jan 2008 ...

Page 2: ...ing up the AudioFile SCX Bootup 3 2 System Setup 3 5 Start a New Session 3 6 Recording a New Cue 3 8 Add a Cue to the Source Stack 3 11 Source Editing 3 13 Adding Events 3 17 Trimming an Edit 3 19 Saving an Event List 3 22 Some Common Functions 3 23 Shutting Down and Turning Off the AudioFile SCX 3 28 4 SETTING UP Defaults 4 1 Input Output Configuration 4 11 Miscellaneous Page 4 14 AMS Trandisk In...

Page 3: ...rd 5 16 ADR 5 17 6 CUT AND SPLICE Introduction 6 1 Cut and Splice in Source 6 3 Expanded Access in Source 6 16 Cut and Splice in Assembly 6 18 Expanded Access in Assembly 6 38 Cut and Splice Local Defaults 6 46 Error Prompts 6 49 Softwheel Nudge Key Modes In Cut And Splice 6 50 7 EDITING Editing Cues 7 1 Cues and ReelRock 7 4 Editing Events 7 5 TimeFlex 7 9 Some Editing Applications 7 11 Edit Deci...

Page 4: ...ue 11 4 OMF Optional Software Module 11 8 12 TRIGGERS Record Triggers Facility 12 1 Assigning Triggers 12 1 Auditioning Assigned Cues12 1 Deleting Triggers 12 2 Recording Triggers 12 3 Jukebox 12 4 GLOSSARY Cue This is a fundamental term in the AudioFile SCX vocabulary and signifies a piece of digital audio material stored on hard disk Cues can be created by direct recording to AudioFile SCX hard ...

Page 5: ...ents are used in the Event List The Cue Stack is useful for selecting a segment of a cue that is going to be used several times in the Event List Default A pre set value that is automatically selected AudioFile SCX uses a range of default settings to govern how the system operates EMC Electro Magnetic Compatibility as defined by the European Community Directive 89 336 i e a system should neither g...

Page 6: ...ng and or end of a cue segment that has been marked automatically This is useful in preventing a sudden jump or drop off in level when marking cues by threshold levels e g using Strip Silence or when using Threshold Recording HardKey HardKeys are the dedicated function keys on the AudioFile SCX control surface HardKeys have legends that indicate their function Internal The timecode source supplied...

Page 7: ... there are two or more sounds occurring simultaneously on the same Track Events can also be deliberately muted No Slip Mode The opposite of slip mode whereby the duration of an event is edited while maintaining the original synchronization Also called lock mode Nudge To move in small steps of one frame or one tenth of a frame using the Nudge keys immediately beneath the softwheel Offsetting Taking...

Page 8: ...ble control of the timeline ReelRock is used when editing and allows the audio to be monitored as it is edited Resequencing Automatically putting events into chronological order This happens automatically when Events are moved edited inserted or deleted Retake When a recording has been made but is not satisfactory the same process is repeated with a retake Ripple This is when adjustments are made ...

Page 9: ...ce To join two recordings together or insert one into another Sync Point A reference point in a piece of recorded material that corresponds with a particular action in a video sequence Timecode An electronic signal stored with and as part of a recording that can be used to synchronize two pieces together or to identify frames of video uniquely in a chronological sequence Transport Keys The keys at...

Page 10: ...oFile SCX AudioFile SCX is the latest model of the very first non destructive multi track hard disk recording and editing system AudioFile A winner of an Emmy award or technical excellence A AudioFile SCX user manual 10 Revision 0 91 udioFile and now AudioFile SCX remains the most se system of its kind al is mainly presented as a reference owever AudioFile SCX will be new territory for many users ...

Page 11: ...on of r concepts for the AudioFile SCX You will soon find that AudioFile SCX is easy and intuitive to use F T the contents and the index T sequentially Therefore use the index at the back of the manual to find information Using AudioFile SCX AMS Neve recommend tha o A encounter If problems do occur it is absolutely necess c are particularly important Dedicated Server Your AudioFile SCX system may ...

Page 12: ...re the d re installation of the recommended system and AMS Neve software supplied software only The system ft without the third party software installed The plus expenses will be chargeable e indows XP operating system tec Opener Conversion Plus dobe Acrobat Reader le Dehiss the system in e recommended way ined through AMS Neve are fitted to AMS eve equipment then they are not covered by the AMS N...

Page 13: ...l provides reference for using AudioFile SCX If you are a AL If you are a new user s chapters of the manual Glossary Of Terms This has definitions of terms as they u G After this discussion of the manual this chapter gives basic information about the AudioFile SCX and instructions for editing and using macros these are u w G This describes how to start up AudioFile SCX and some exercises that are ...

Page 14: ...ation shown because they do not change function or legend C ecomes a uniquely belled Cue A Cue can be a fraction of a second long or it can extend to the capacity of the system s storage medium subject the actual duration of Cues up to 16000 different Cues can be recorded per tereo Cues use twice the storage space of Mono Cues any particular input can be replayed on any available track tereo is re...

Page 15: ...e Event can use the same Cue and or different parts of the same Cue Changing n Event does not affect a Cue it but changes when the Cue is used or which A h a part of it is used The Events shown above in Figure 2 1 use three Cues called A B and C which se a combined audio storage time of 12 minutes he left hand group of Events uses all three Cues to give 12 minutes of audio racks This hows how a Cu...

Page 16: ...oints of view an sequenced udio Editing ue Start and End points can be edited easily and non destructively allowing a used several times in an Event List with a different portion used ach time dit and Event List Data py disk and a standard printer ort is used to print all edit data ime Number Entry his can be entered displayed as timecode or feet and frames box is displayed with time fields expres...

Page 17: ...ey entries only two are required i e the Macro n required to execute this process is entered from the control urface and stored in memory r on screen ocess is completed Key nd enter an ID this can be any single QWERTY or numeric Key ow execute the operation desired then press the MACRO HardKey again and active until deleted a Macro is not saved it will be lost when AudioFile SCX is powered down al...

Page 18: ...RO SoftKey becomes the SAVE ALL MACROS SoftKey and LOAD ALL MACROS becomes LOAD MACRO Macro IDs are sorted alphabetically and can be searched for in the same way as Cues in the Cue Library A Macro sequence must only be selected from the page in which it was created If a Macro is unintentionally selected from any other page a series of actions with potentially serious consequences could be initiate...

Page 19: ...ave a permanent i e non changing function and are permanent QWERTY Keypad ly labelled accordingly This is used to enter names comments etc and occasionally to confirm an ction in response to an on screen prompt a Numeric Keypad These keys are used to enter desired values and the numeric element of prefixes tc first key ress ransport Keys e In some situations when entering numeric information i e u...

Page 20: ... POSTION ASSEMBLY TRIM EDIT TRIM VERNIER IN ASSEMBLY ROCK VARI TRIM REELROCK IN SOURCE TRIM MARK TRIM WITH MARK HIGHLIGHTED ROCK TRIM REELROCK IN ASSEMBLY GETTING STARTED Ease of Use This chapter is aimed at users who are new to the AudioFile SCX and aims to lustrate how easily it can be put to work he AudioFile SCX is an easy system to use for working with Cues and ist to produce a finished piece...

Page 21: ...ts to a Cue before using it in the Event ow to add Events to the Event List ing an Edit aving an Event List arious useful functions that are used in several places hutting Down and Turning Off the AudioFile SCX TARTING UP THE AUDIOFILE SCX BOOTUP The instructions in this AudioFile SCX system is available and that a suitable audio source is available a In This Chapter This chapter is d Starti H Sys...

Page 22: ...e from the Spectra control surface Press the first left most Trigger key and the LOC Transport key Switch on the 4U rack and the monitor Unit Windows XP will bootup o th The user name and password are factory set The user name is administrato The password is admin and must be entered in lower case F This is called a T1 LOC and instructs the AudioFile SCX software to start up in a synchronised mann...

Page 23: ... one for bank B The software uses the Windows ASPI layer to poll for SCSI devices This can take up to 1 minute Once the Scan has completed the boxes will show any AudioFile format drives connected to the SCSI bus he SCX can support up t T o 8 audio drives All drives are connected on a single a on the drives is cached by the dioFile software SCSI chain The banks are virtual banks SCSI ID s 0 1 2 3 ...

Page 24: ...dware engine boot The Spectra bootup display shown on the control surface screen shows the progress of device initialisation The card being processed will have its frame AudioFile SCX user manual 24 Revision 0 91 Jan 2008 ...

Page 25: ...is is because the main area of the screen may stay the same but the function of the SoftKeys will change to provide a different page of options The system is now ready for use ow to get back to Main Menu H e to lose track of how the current page was accessed in ometimes it is possibl S However it is easy to return to the Main Menu to start through the pages aga from the top level To return to the ...

Page 26: ...new users who are curious abou e following section tar rning to change the t how the system is setup Other users should skip to th t A New Session It is not necessary at this stage of lea S system setup System Configuration he system configuration can be changed and this is recognised d T uring the vides a full system AudioFile SCX bootup process The Starting Up chapter pro escription of how the b...

Page 27: ...st pages have an associated Local Defaults page that is accessed with the LOCAL are relevant to the current function L When where it appears For instance if the Default Track is changed in the Cut and Splice Local Defaults then the Cut and splice default channel will also chang User Defaults and vice vers the setting of a Default is changed the change is shown in all pages Start a New Session Usua...

Page 28: ...shly booted then the display will be as shown ut and Splice page will be displayed according to how it was last used If the AudioFile SC In the bottom right corner of the screen is the SOURCE ASSEMBLY SoftKey genta bright purple highlight This switches Cut and Splice between working with Cues Source and working with the Event List Assembly The current selection on the SoftKey will be indicated by ...

Page 29: ...g area of the screen switches emphasis between the Source Window and the A T le the SOURCE ASSEMBLY SoftKey to ASSEMBLY Press the EXPAND ACCESS HardKey The Expanded Access page for Cut and Splice in Assembly will be displayed Press the DELETE MENU SoftKey A page of delete options will be displayed Jan 2008 ...

Page 30: ...e EXIT CUT AND SPLICE SoftKey to return to the Main Menu Recording a New Cue The easiest method of recording a new Cue is Source Recording or Recording Source This records audio material from an input stores it as a Cue on the SCX are described in the Recording in AudioFile SCX hard disk and adds the Cue to the Source Stack All methods of recording to the AudioFile chapter To record a new Cue From...

Page 31: ...rently elected for storing newly recorded Cues A volume is a hard disk a partition on er storage device that can be used for storing ues ur th correspond to the Trigger keys The REC s a hard disk an optical disk or oth C Optical disks are a slower storage medium and only allow a maximum of fo tracks to be recorded simultaneously If required press the REC VOL SoftKey until the required volume is sh...

Page 32: ... as an audio source to be controlled independently ssary if it is already set to EXTERNAL Sw th Toggle the STEREO MONO SoftKey as required his depends on the source material It also affects the arming of the inputs as T described below Press the RECORD ENABLE SoftKey his allows the inputs to be armed for T recording The Trigger key legends will show the arming status of the inputs Press the Trigge...

Page 33: ...s recorded The name of the new Cue will be shown in the Source Stack to the left of the Source Window hen a short piece of material has been recorded press the STOP Transport If MONO STEREO W key and then stop the audio source To audition a newly recorded Cue The Transport keys can not be used with a Cue when the inputs are armed Press the RECORD ENABLE SoftKey so that it is un pressed left as the...

Page 34: ... a Cue to the Sou A king with in e or dividing up the Cue using Marks so that different used in an Event List will already exist as Cues on the effects theme music etc he Source Stack is a list of Cues that are currently selected for wor T Cut and Splice The advantage of using a Source Stack is that basic edits can b made to the Cues before they are used in the Event List The edits to a particular...

Page 35: ...d then the Cue will play back automatically see the Cut and Splice chapter for information on Auto Audition The left hand Softwheel is assigned to Cue selection in the S Press the ADD TO SOURCE SoftKey or press the ENTER key The selected Cue will be shown in the Source Stack The Source Stack is sorted alphabetically There is effectively no limit to the number of Cues that can be placed in the Cue ...

Page 36: ...ill cycle back to the first matching name To find a Cue by name When the required Cue has been found press the ADD TO SOURCE SoftKey To jump to a different volume A volume is a hard disk a partition on a hard disk an optical disk or other device that can be shown in the Cue Library storage Press the relevant Trigger Key he first Cue on the selected volume will be highlighted T ftKey Library page T...

Page 37: ... is to make a rough top and tail edit to a Cue by changing the in and out points This is a non destructive opera S doing this a section of th ther operations that can be quickly and easily performe Defining several points along the Cu p D repeated a fixed number of times This is useful for atmospheric effects re A See the Cut and Splice chapter for a full description of operations in Cut and Splic...

Page 38: ...orward and The source cursor will rapidly move from right to left a is If move approximately 1 second If There are a number of ways to move the Rewind are sufficient for the purposes of this exercise Press the SET SOURCE IN POINT SoftKey he beginning of the yellow tape will jump to the cursor position Also a Mark ove the source cursor again with Fast Forward T will be added at the in point M Press...

Page 39: ...es of segments from a single Cue could be used as required in the Event List Also the in and out points can be selected by pressing the IN POINT OUT OINT SoftKey which causes the source cursor to toggle its position between P the two points Optional Exercise 1 One of the other ways of setting the in and out points is on the fly hen in Source the Transport keys effectively treat the curr W ently se...

Page 40: ...the yellow tape shorter Also because R Cue will be played back at a rate that o is turned The playback rate is shown of this ftwheel until the e that the bottom right SoftKey is a VERNIER REELROC ROCK selected by default and that the status display ab R Softwheels shows Rock and Vari as the Softwheel functions Rotate the left hand Softwheel clockwise The a M eelRock is selected the audio in the rr...

Page 41: ... the TRIM SoftKey to end Trim mode Experiment with Trim including toggling the VERNIER REELROCK SoftKey ERNIER using the PLAY FROM and PLAY UP TO SoftKeys and changing to the er keys V Source Windows size with the ZOOM IN and ZOOM OUT Trigg Adding Events When Cues have been added to the Source vent List The Event List is a description o Stack they can now be used in the f which parts of which Cues...

Page 42: ... when building a new Event urs isplay Defaults and then locate to 0 feet on the Timeline lues are not used So if zero feet was set be possible to place new material before feet point To set the starting point for work Press the LOC Transport key T Enter 10 hours as the locate time and press ENTER T List This is because it allows plenty of time after 0 hours and before 24 ho for manipulating Events...

Page 43: ...fter the new one This can be if there is enough room for e name to be displayed Trigger key several times electing Events otate the right hand Softwheel ts The currently elected Event is highlighted yellow T Default Track s The Timeline will a changed in USER DEFS so that the timeline remains at the start of the event Notice that the Cue name is shown within the Event th Press the SPOT SEG New Eve...

Page 44: ...lected M Trimmin Edits can be finely adjusted using the Trim function Rotate the right hand Softwheel to select a join between two Events The legend on the TRIM SoftKey changes according to which Event is highlighted Press the TRIM SoftKey The Trim page will be displayed This shows the pair of Events on either side of the Timeline position Notice that the whole of each Cue used by the Events is sh...

Page 45: ... In Slip the audio in the Event moves back and to depending on the type of Slip being used Also it is possible to affect downstream Events with Slip an R is useful for instance if a whole scene has gone out of s p following Events will slip into place togeth Ripple can affect either all following Events on the same Track all following E be made using a functio Lock Slip and Ripple are described in...

Page 46: ...ve the SLIP Trigger key will T now allow selection of NO RIPPLE RIPPLE or TAG RIPP with NO RIPPLE selected by default Again press the PRE POST or BOTH Trigger keys in turn and ReelRock the edits with the left hand Softwheel or use the left hand Nudge keys to move the w each combination of Trigger keys changes edit by one tenth of a frame This should have demonstrated ho the way that the edits are ...

Page 47: ...ents are played The amount of audio played is controlled by the Pre and Post Roll times Press PLAY LOOP again to stop looping Edits can be trimmed while any of the PLAY keys are active Saving an Event List The Filing page is used to store the current Event List as a file or retrieve an t to floppy or hard disk with a single key press see Cut nd Splice for details rcise the Event List will be saved...

Page 48: ...en for entering a new file name Th is because NEW was already is selected more details e g on using Folders al Exercise tart a new session as described earlier Type in a suitable name e g LEARN1 and press ENTER The Event List will be stored on the floppy disk in the named file The name of the file will be shown in the list of files The Filing page is also available from Expanded Access in Cut and ...

Page 49: ... Transport controls also have the same focus as the Play key as shown by the Timecode Display Mode This can show CUE LIST or MCS When CUE is displayed the Timecode shows the position within the currently selected Cue When LIST or MCS is displayed the Timecode shows the Timeline position within the Event List or the machine position according to whether Internal or External is selected In the Event...

Page 50: ...ast the Softwheel is turned R These are similar to jog and shuttle on conventional ta m R ReelRock is used to move at varying speeds either forwards or backwards through a Cue an Event o ti by ear When ReelRock is se If Varispeed is enabled on the right hand Softwheel then the Status Display above the Varispeed Softwheel will show the ReelRock rate as a fraction of play speed The audio stops i If ...

Page 51: ...drop down in the top left corner of the The blank Transport key on the left of the row has the same functionality as the GRAB TIME Hard H T From the Main Menu press the CUT AN Toggle the SOURCE ASSEMBLY SoftK Position the Timeline cursor at the required point T Event List and the Event List can also be in Press the GRAB TIME HardKey A screen ress 1 9 on the n P umeric pad to select its storage pla...

Page 52: ...ired Trigger key to the time on the selected Trigger key at number and pressing the key will otice that un assigned Grab Time N number on the Trigger key legends If one of these is selected then the Timeline will locate to zero ress the req P he Timeline will locate T If the legend on the Trigger key is GRAB followed by a number then this means hat no Grab Time has been stored against th t locate ...

Page 53: ...ether START or STOP was selected Z T Press the GRAB TIME HardKey The SET ZERO FEET SoftKey will appear at the bot Press the SET ZERO FEET S The setting will also be used in the Display Defaults page Tagging Tagging is used to select a set of Cues Events backup Jobs etc so that an elected items together e g deleting opying moving ing a ntial items using or Rewind and Fast Forward Transport keys nd ...

Page 54: ...n searching in Cue that match on different hard disks W back to the first mat Expanded Access Expanded Access is used to provide ancillary functions to AudioFile SCX pages tra functions provided are those that are sed less frequently For instance Strip Silence in Cut and Splice is available he EXPAND ACCESS HardKey is used to display the Expanded Access page ey illuminates to indicate it is active...

Page 55: ...chapter describes various options governing the configuration of the AudioFile SCX Defaults The Defaults are used to set options that control how the AudioFile SCX performs its functions These can be changed at any time during a session The current Defaults can be saved to the hard disk so that they are used next time the AudioFile SCX starts up If changes are made to the Defaults then the saved D...

Page 56: ...play Defaults SoftKey as required Local Defaults Most pages have an associated Local Defaults page that is accessed with the LOCAL DEFS HardKey Local Defaults are used to set only those options that are relevant to the current function Default is changed the change is shown in all pages instance if the Default Track is changed in the Cut and The De Local Defaults are described in context where the...

Page 57: ...n of the AudioFile SCX to be U changed to suit different working preferences Cut and Splice default channel e g the right hand Softwheel eration Cut and Splice editing will initially occur on the track s selected in this field Th desired track s can be entered from the numeric keypad or increased and ecreased usin d The mono stereo status and track number s are specific to your work in progress an...

Page 58: ... This default should always be set to HARD DISK Load event List on Used to load the Event List saved to CURR with quick save the Autosave file or none on bootup Expanded access default The default may be set to select either Label Start Name Stop or Output on entry into the Expanded Access Page Discard ends handle length SS FF Used to define the initial operating mode for editing and recording to ...

Page 59: ...en reel rock is pressed the current event will be reel rocked and scrubbing across edits is disabled This is the equivalent of The default controls what happens when you enter reel rock mode not the subsequent behaviour Once in reel rock you can change tracks locate and or the punch in source when the transport is stopped ation ms ate e ord Pre Handle in frames ord events handle in frames nudge Mo...

Page 60: ...et the post ha System Sample Rate This sets the current sample rat 4 sample rate is changed User Defaults Page View folders in cue library re automatically active every time the cue he conventional VOLUMES are displayed in zone on exit library page If this default is set to YES folders a brary is entered If it is set to NO t li the cue library Relink event to This default is not currently implemen...

Page 61: ...he new copy f the event If set to NO the cursor will remain on the original event after the haves when an event is put into the vents list by using SPOT SEG If set to YES the cursor will jump to the end of sor will remain at the Setting this default to d for all cues Ignore muted events Setting this default to YES will cause the events list ig Ig S The cursor will not stop on assembly marks w Jump...

Page 62: ...rary whilst in folders mode cues which are referenced within the folders but not present on local storage will be picked up during text s U S this default is set to YES Mono colour S RED or BLUE as de Stereo colour Sets the stereo bank designator colour to either NONE conventional mode RED or BLUE as desired P E system is playing an events list already it will locate back to the previous play star...

Page 63: ... power and prefade The settings define how trim behaves when adjusting audio fades Classic mode is the normal AudioFile crossfade trim mode where the fade is ramped out starting at the current edit and extending the ramp s back into the event Power mode produces the crossfade using the current edit point as the central ning out the fade either side of this point This allows the rossfade to be adju...

Page 64: ...operation Prefade mode will produce the crossfade by extending the fade backwards into the post fade event and backwards from the end of the pre fade AudioFile SCX user manual 64 Revision 0 91 Jan 2008 ...

Page 65: ...urrent system sample rate during import This process can be applied to wav bwav AIFF Protools OMF and AES31 import e conversion during imp None Sample rat Auto Media files are automatically converted to the current system sample rate during import rompt Us P User default settings To save and changes you have made to the defaults press SAVE DEFAULTS to the hard disk Defaults settings are also autom...

Page 66: ...e Either standard timecode i e Hours Minutes Seconds Frames and Hundredths of Frames or simplified timecode i e Hours Minutes Seconds and Frames can be selected Zero feet setting Used to set zero feet to a specific timecode value this also alters the value in the Grab time Box When the first numeric key is pressed an enter box will appear on screen having made the selection press the ENTER Key to ...

Page 67: ...g beside the software version icon on the screen Stereo Waveform Format his determines whether a combined stereo waveform shows the left or right l eparately as alues in trim NTER Key to confirm selection Used to sele eg T on top above the centre line Default Waveform Display Format sed to select a split waveform that shows the left and right leg s U two parallel waveforms urrent event highlight C...

Page 68: ... roll when used with cycle expressed in seconds roll when used with cycle expressed in en auto locating to a program record es and frames Cycle post roll SS FF Determines the value of the post econds and frames s Program locate pre roll SS FF Determines the value of the pre roll wh vent expressed in seconds and fram e rame rate F AudioFile SCX user manual 68 Revision 0 91 Jan 2008 ...

Page 69: ...tracks or performing assemble edits ropout limit frames etermines the timecode dropout value expressed in frames Control Mode Determines AudioFile SCX s status either Master i e in control or Slave i e being controlled Machine instant locate Used to instantly locate machines Optimum results are achieved when using random access media Enable beeps D 2 2 2 2 3 E Sets the external refere T T Displays...

Page 70: ...beep frames Determines the length of each beep 1 30 frames Tempo of ADR beeps frames Determines the beep tempo 1 30 frames Gap between last beep and ADR frames Determines the gap between the last beep and the ADR 1 30 frames Threshold Defaults This page is used to modify the defaults for Threshold Recording and Strip Enables the relay accessed via t Silence Jan 2008 ...

Page 71: ... audio will stop being d line on the recording level meters sho Pre Record Handle Seconds Frames A continuously written to the audio drive when not recor o Post S Allows a handle to be attached to the end of the recordin or example a pre and post handle of 2s would result in 2 F audio before the start threshold and after the stop t Record Hold Time Seconds Frames Allows recording to continue for a...

Page 72: ... Handle Seconds Frames Used to put an audio handle after retained sections Strip Silence Hold Time Seconds Frame s an Event or Cue Segment to continue for a pre set time after the level below the threshold in much the same way as a noise gate would operate s completed If Strip Silence is interrupted then the old Eve Allows rops d This allows for a long decay without a sudden cut off The Post Recor...

Page 73: ...dio ontoller Failure to do this will result in incorrect operation of the 48T waveform isplay timecode This default is not currently switchable Timecode is displayed on the 48T display regardless of this setting Screen saver when the AudioFile boots Screen Resolution This must be set to match the resolution of c display D AudioFile SCX user manual 73 Revision 0 91 Jan 2008 ...

Page 74: ...ck display Monitor Setup This display is used to configure the relative orientation of the 2 monitors If they are side by side select Horizontal If they are vertically aligned such as with tegrated AudioFile SCX Logic MMC combination select Vertical Sets the screensaver mode used on the 48T screen when the Spectra scree In I O Configuration Used to establish which ancillary devices are connected t...

Page 75: ...e Keys located beneath until the appropriate name is h o select the parameter for adjustment T Use the horizon tc to select t e The facilities are arranged in priority from left to right and each device should b set up in this order i e inputs cannot be enabled until RECEIVE SYNC has be selected for the chosen device etc he horizontal SoftKeys correspond to the functions display T of the page ordc...

Page 76: ...e until via Local Defaults from either Source or Assembly S Use the right hand Softwheel or ass b Press the appropriate SoftKey to set the direction of the either to or from the selected device Select the inputs outp used for backing up audio restoring or both When recording it is possible to have a combination of both analogue and d inputs Connections At power up ch The small squares are hollow w...

Page 77: ...nter the time and date view config file notes view the T Use the right hand Nudge keys to outline the required input source Press the INPUT CONTROL LEFT and ENABLED SoftKeys Press the INPUT C It stereo recording If If during the session the sync feed is lost an error message wi th If AudioFile SCX is within a Logic system the I O cannot be changed in this way see Logic User Manual To deselect disa...

Page 78: ...eal time clock is aved together with the record data of the Cue his unique identifier is used whenever Event Lists are saved ftKey S this page after the main operating software has been installed Features can also be added as required to a current configuration without re in T FEATURE floppy disks Feature disks were universal to all To install a new option Insert the NEW FEATURE disk Press the MIS...

Page 79: ...nfirm selection Notes Software System read only To view notes T A To view the software direc Toggle the Notes Software System SoftKey to Software A directory of the installed software wi To view system information Toggle the Notes Software System System information e g the software version the number of inputs outputs etc will now be displayed AMS Trandisk Interface Window The AMS Trandisk Interfa...

Page 80: ...will be The AMS Trandisk Interface window will be displayed To view devices in a bank D The devices on the displayed To tell the system that a drive is a removable device e g an external movable hard disk d hard disk icon re Right click the require A small flyout menu will appear Jan 2008 ...

Page 81: ...e re started using T1 LOC on the control surface see Getting Started This K REMOVABLE MEDIA SoftKey available in the Media After a drive has been m b makes the LOCK UNLOC tilities page U To close the TranDisk Interface window Double click the TranDisk Interface icon in the System Tray AudioFile Window This shows the current User name used to login to the system To display the AudioFile window Jan ...

Page 82: ...on in the System Tray AudioFile SCX Controller Window This is used to launch the AudioFile SCX SCSI disk formatter software for scanning the audio hard disks ile SCX Controller window formatting initialising and To display the AudioF Double click the AudioFile SCX Controller icon in the System Tray AudioFile SCX user manual 82 Revision 0 91 Jan 2008 ...

Page 83: ...udio drive bandwidth configuration This system enables the user to attached any LVD SCSI 160 drive to the system and set the maximum playback and record tracks This is set by running drivelistedit exe which is situated on the Desktop of the Studio Computer This application allows the user to set the maximum record AudioFile SCX user manual 83 Revision 0 91 Jan 2008 ...

Page 84: ...ser must take care not to allow drive bandwidth to be set beyond the capability of the drive Failure to observe this precaution may result in audio playback problems from the drive repeated missing audio In addition setting record bandwidth in excess of the drive s capabilities will result in record errors or DVE problems AudioFile SCX Audio drives s oes not guarantee that it will fore using Narro...

Page 85: ...le SCX Formatter Aspiprog This is a utility that is used to format initialise and scan the audio hard disks i e the hard disks which store the Cues To start the Formatter Click the Launch The Formatter On Reboot check box in the AudioFileSCX Controller window The box will be checked with an tick ress T1 LOC on the AudioFile SCX control surface P AudioFile SCX user manual 85 Revision 0 91 Jan 2008 ...

Page 86: ...ioFile SCX user manual 86 Revision 0 91 mat Operations ialogue box will be isplayed This re starts the AudioFile SCX software The request to start the Formatter will be recognised and the For d d Jan 2008 ...

Page 87: ...rd disks will be shown in SCSI ID order Click the required hard disk The Individual Drive Details box will show information about the hard disk To format a hard disk Click the Winchester i e hard disk Optical or Exabyte check box as appropriate Click OK When the all devices have been scanned the Status box will display OK and the devices that the Formatter can work with will be listed in the Multi...

Page 88: ...y two months ard Disk Environmental Considerations H r the o the ambient conditions before use his is particularly important whenever disk formatting is required following the stallation of a replacement disk or a system upgrade It is also advisable to allow the system time to stabilise at normal operating temperature before carrying out the recommended user maintenance procedures The system is no...

Page 89: ...off in the Defaults Display Page Wordclock Reference AudioFile SCX records using an internally fixed sampling rate reference either 44 1 or 48kHz or with an external sampling rate when an external device is selected and identified in the Input Output Configuration Page Any external word clock information fed into the system automatically supersedes the internal rate and AudioFile SCX then works wi...

Page 90: ...en select the required inputs using the appropriate Trigger Keys they will display READY to confirm selection Press the REC Transport Key and recording will begin When recording is complete press the STOP Transport Key The MARK SoftKey can be used during recording to mark edit points and they are shown along the top of the Cue graphic in the Source Window To locate them use either the right hand S...

Page 91: ...is is the name that is shown in the Source Stack while the Cue is recording To change the default Cue name Press the LOCAL DEFS HardKey Press the CHANGE RECORD PREFIX SoftKey nter the three character prefix and press the ENTER key E Renaming a Cue To replace the default Cue name Highlight the required Cue in the Source Stack using the left hand Softwheel Srce Select Press the RENAME CUE SoftKey A ...

Page 92: ... CUES AND EVENTS SoftKey is toggled to CUES croll through the Cue Library using the right hand Softwheel until the the warning prompt box will appear asking for confirmation i e X Cues have been selected for deletion Are you sure you want to delete audio Press Yes or No Press Y or N as required To delete several Cues Scroll through the Cue Library using the right hand Softwheel Press the GRAB TIME...

Page 93: ...ies with the speed of the code received unless AudioFile CX is fed with an external word clock pulse in that case the word clock ly begin when AudioFile SCX is receiving valid timecode i e 10 of play speed Any significant timecode dropout will cause recording to be abandoned and if this happens the EXT message will lose its highlight Externally recorded Cues can be inserted into an Event List so t...

Page 94: ...making a multi track recording keep the tracks used for recording within the Event List free e from any of the available recording inputs and it is mono recordings simultaneously by feeding be made at the same time sport Key y Mono recordings can be mad ossible to make two or more p different mono signals into different inputs ono and Stereo recordings can M All existing Events on tracks selected ...

Page 95: ... and MONITOR he MONITOR option allows playback to be disabled on a particular track uses for example when ducing the contents of tracks 3 8 into a mono mix the final mixdown can be n track 2 and try again In this way different variations can be corded and the best can be chosen later he MONITOR position also allows recordings of different durations to be made oftKey to MONO READY independently of ...

Page 96: ... now switch to READY and o When the recording Monitoring In record mode audio is monitored via all tracks displaying READY These now erial occupying them cannot be played audio on remaining tracks will replay as normal he services connector at the rear of the system incorporates a relay contact monitor the audio input so any audio mat re T which is closed during the record period this can be used ...

Page 97: ...usly in the path of the new recording is retained in its original place The difference between Overlap and Punch in is only relevant when recording to a track with audio material already present With Punch in the previous part of an Event occupying the space taken by the recording will be replaced by the new audio Although the punch in point becomes a new edit point in the list no audio is lost fr...

Page 98: ...The S and SC platforms had a default called punch in input select Normally this default would be set to track input as shown AudioFile SCX user manual 98 Revision 0 91 Jan 2008 ...

Page 99: ...rack 9 you would send the input to track 9 and so on In some cases it is more convenient to send the input to a fixed track and have the AudioFile route this input to the track you select to punch in On the S and SC platforms this was achieved by changing the punch in input select default to be a fixed track AudioFile SCX user manual 99 Revision 0 91 Jan 2008 ...

Page 100: ...mode the signal on inputs 1 or 1 2 would be routed to and recorded on whichever track is armed for punch in and this could be seen from the metering display AudioFile SCX user manual 100 Revision 0 91 Jan 2008 ...

Page 101: ...unch in on all record tracks simultaneously Due to this enhanced capability the punch in monitoring and routing system has been modified to cater for this The punch in input select default has been removed and replaced b Punch in input to track routing is now carried out by using the track enable keys in combination with the track view keys on the numeric keyboard Together t form a sliding routing...

Page 102: ...Press the Track 1 arm key and you have the signal on input 1 routed to punch in rack 1 in a very straightforward way t AudioFile SCX user manual 102 Revision 0 91 Jan 2008 ...

Page 103: ... directly from the system input of the same number instead you want to route the system input 1 to track 9 press the numeric key still be inputs 1 8 If 9 on the Spectra The track display will shift to show tracks 9 24 The system inputs to the displayed tracks will AudioFile SCX user manual 103 Revision 0 91 Jan 2008 ...

Page 104: ...If you press the track 9 arm key input 1 will be routed to track 9 and this is shown on the meter bar AudioFile SCX user manual 104 Revision 0 91 Jan 2008 ...

Page 105: ...le to route inpu he track display will show tracks t 1 to track 3 press 3 on the numeric keypad 3 18 and arming track 3 will cause input 1 to T be routed to track 3 AudioFile SCX user manual 105 Revision 0 91 Jan 2008 ...

Page 106: ...You can use this method to route and arm punch in tracks across page boundaries For example route input 1 to track 3 and input 2 to track 10 AudioFile SCX user manual 106 Revision 0 91 Jan 2008 ...

Page 107: ...This method allows any of the tracks to be armed for punch in including tra 1 48 cks 4 AudioFile SCX user manual 107 Revision 0 91 Jan 2008 ...

Page 108: ...his track arming system is also used in 16 track record enable for example to T arm tracks 1 4 from inputs 1 4 AudioFile SCX user manual 108 Revision 0 91 Jan 2008 ...

Page 109: ...Or to additionally arm tracks 35 38 from inputs 5 8 and tracks 43 46 from tracks 13 16 AudioFile SCX user manual 109 Revision 0 91 Jan 2008 ...

Page 110: ...nt ck p hen RE W tracks 1 2 and the selected record tracks default tracks f PLAY I default track When in Stop Mode there is an option to monitor on the selected Punch in tra see User Defaults Programmed Recordings rogrammed recordings can be made by creating Record Even P ts Record Events no audio but have all the usual time parameters of normal Events ed contain AudioFile SCX user manual 110 Revi...

Page 111: ...NAL tart point ress the CREATE PROGRAM RECORD SoftKey sing the Trigger Keys toggle PLAY ENABLE to ENABLE on the required tracks reating a Record Event 2 Press the CUT AND SPLICE SoftKey The Cut and Splice page will be displayed T Press the RECORD AUDIO HardKey Toggle the MANUAL PROGRAM ADR SoftKey to PROGRAM T Toggle the STEREO MONO SoftKey as required Use the and or LOC Transport Keys to position...

Page 112: ...f timecode passes the record start point at play speed The Programmed Recording To make a programmed recording in Assembly the Record Event is enabled for recording it is displayed at full brightness in the vent ED vent and immediately enters record mode he recording stops as programmed at the end time of the Record Event fter a programmed recording has been made a Recordable Event becomes a he la...

Page 113: ...t which was created from the desired Program Record P P C mbly Record Page ber with the numeric pad d Track number sed for recording and playing out at the same me Press the EXPAND ACCESS HardKey in the Asse Select the required Event Press the O P Trigger Key Enter the new Track num The Event moves to the selecte In record mode tracks can not be u ti Jan 2008 ...

Page 114: ... allows you to define a default record name to be applied to and ich allows you to set a efault record name is in the Assembly record Local defaults page T recordings made onto the DEFAULT tack The key wh d ressing the key allows yo P u to enter the default track name Jan 2008 ...

Page 115: ...en set O any assembly recording made on the default track will be ck name followed by a incremental number named according to the default tra nd track designator a AudioFile SCX user manual 115 Revision 0 91 Jan 2008 ...

Page 116: ...6 track record k T ey activates 16 track arm keys s feature 16 meters 16 track recording is enabled from the 16 ck Record es 16 track arm keys e conventional 8 track arm he record page T track record enable key ource 16 Tra S his page featur T he 16 track arm keys work in the same way as th T keys Assembly 16 Track Record AudioFile SCX user manual 116 Revision 0 91 Jan 2008 ...

Page 117: ...P Previous AudioFile platforms only allowed a maximum of on stereo or mono track arm when in punch in mode With the SCX platform this restriction has been removed and it is now possible to arm all of the 16 possible record tracks even in punch in mode The RECORD PUNCH IN OVERLAP key can be found in the record page LOCAL DEFAULTS AudioFile SCX user manual 117 Revision 0 91 Jan 2008 ...

Page 118: ... shown below T shown by the number b udioFile track each input will be recorded to This information is also shown o A the track arm keys Track arm mapping in the 16 track record enabl irectly to it s appropriate input and AudioFile tra d When not in 16 track record enable the mapping of the track arm keys is not necessarily linear It is possible to arm input 1 onto track 1 and input 3 onto t 1 at ...

Page 119: ...in the Event List which can then be stored in a list A grabbed time can o create a Grab Time e CUT AND SPLICE SoftKey oggle the SOURCE ASSEMBLY SoftKey to ASSEMBLY n 12 As the system is not in the 16 track record enable page it is only poss to control the arming of 8 tracks maximum Therefore if a track above 8 is arm y numerically selecting tracks above 8 just press 9 on the keybo b n p then be re...

Page 120: ...nt Grab Times will drop down in the top left corner of the screen Press 1 9 on the numeric pad to select its storage place within the list The list will close The most recently grabbed time is also stored as Gr To recall or load a Grab Time Press the CUT AND SPLICE SoftKey in the Main Menu P Select the required time field by pressing the START or STOP Trigger key followed by the ENTER Key A and a ...

Page 121: ...he Trigger Keys will show 01 THRSH to 08 THRSH corresponding to the 8 recording level meters All are selected by default The record on and record off thresholds Press 01 THRSH to 08 THRSH to toggle threshold recording on the required inputs Exit from local defaults Press the RECORD ENABLE SoftKey Select the drive to record th Arm the tracks On armed tracks the THRESHOLD tally will turn r AudioFile...

Page 122: ...tKey The threshold defaults will be displayed elect the required parameter w S ith the left hand Softwheel and rotate the right ich the audio will start to be recorded This can not be g Off Threshold A vertical line on the recording level meters shows the threshold Recording Off Threshold 20 to 64 dBs hand Softwheel to set the value Recording On Threshold 20 to 50 Used to set the level at wh set l...

Page 123: ...red in RAM when not recording and recorded to disk once recording has been triggered Post Record Handle Seconds Frames Allows a handle to be attached to the end of the recording For example a pre and post handle of 2s would result in 2 seconds of extra audio before the start threshold and after the stop threshold Record Hold Time Seconds Frames Allows recording to continue for a pre set time after...

Page 124: ...transport to be unning Recording r running and locked Cues recorded with Threshold recording cannot be transferred to 16 bit M systems via removable drives ecord into Folders R he AudioFile can be configured to record into cue folders if de T sired The system y is set to the FOLDERS view to the selected drive orded into the CURRENT folder e setting of the RECORD INTO will only record into folders ...

Page 125: ...ed the source Cue as required ress the STOP Transport key when the recording is complete required Varispeed can be engaged before starting to record a fixed Varispeed rate is required by entering a value with the numeric keypad utomatic Dialogue Replacement ADR T ReelRock and Varispeed allowing ReelRock and Varispee d To use digital Varispeed record F T Select the Cue that is to be to T Press the ...

Page 126: ... Takes can be overwritten to optimise space usage on hard disks c sing ADR U If desired create single or multiple Record Events before the start of the session ge will appear Since it is possible to create Record Events within the ADR page this is unlikely to be necessary In the Cut and Splice page toggle the SOURCE ASSEMBLY SoftKey to ASSEMBLY Press the RECORD AUDIO Hardkey Toggle the MANUAL PROG...

Page 127: ... System chapter for a detailed description of transport control when using External T Use jog shuttle or and or LOC to position the transport at the beginning of the region to Press the CREAT Use jog shuttle or and or LOC to position the transport at the end of the region to be replaced Press the GRAB TIME HardKey To use Internal for ADR T T selected Use and or LOC to locate to the beginning of th...

Page 128: ... of the Cut And Splice Page Cycle setup in ADR Cycle Set up is automatically determined in ADR by the pa u cycle points before using the cycle facility To set up a cycle The settings in this page can be adjusted as the transport is running Set the pre and post roll times with the CYCLE PRE ROLL and CYCLE POS ROLL SoftKeys use the numeric pad to enter values in the Time Box then p the ENTER key T r...

Page 129: ...e Times Assembly List at any one time though it is ossible to store up to eight cycles by saving them to the Trigger Keys e SAVE SoftKey and then press a Trigger Key for that cycle these will e labelled MEM1 through to MEM 8 Press SET CYCLE START or SET CYCLE END M Press the GRAB TIME H M P the key M Press SET CYCLE START or SET CYCLE END P T Press the required numeri Method 4 Press SET CYCLE STAR...

Page 130: ... encompasses all the Record Events required Press SETUP CYCLE EXIT Making the Recording ecord Events are recorded sequentially by playing through the list to cycle the ress CYCLE e hen two or more Record Events occupy the same time across tracks the first will be enabled and the other s muted ng empty sections between Record Events a user one he minimum setting is five seconds and the maximum thir...

Page 131: ...s disabled THIS Record Events can be muted in EXPANDED ACCESS with the STATE Trigge ey and selected Record Events enabled from the muted list using the THIS VENT CYCLE LOCK uickly make new recordings sequentially one by one use the t without stablishing new points oints are established to coincide with the list start stop times of the Event vent and press the THIS Trigger Key to then cycle recordi...

Page 132: ...age will appear with a prompt Press discard and retake or retake Press the DISCARD AND RETAKE SoftKey retake and discard old audio or ress the RETAKE SoftKey retake only ccessible from the Cue Library ents but due to the potentially dangerous sed to select the desired Volume hard disk that the new Cue will be stored on oggle through the available volumes and as they are selected the sed to set pro...

Page 133: ... between punch in and record Select Punch in or Overlap ress the LOCAL DEFS HardKey iled description P The PUNCH IN RECORD SoftKey will become the PUNCH IN OVERLAP SoftKey See Punch in and Overlap in the Index for a deta Track Search List Search Used to select in what way a search is executed i e scroll through the track for or scroll through the Event List for Events Events Press the LOCAL DEFS H...

Page 134: ...ginning of one take which is usable but end is of no use and the end of another that is usable but the beginning is of o use sing in TRIM mode it is possible to merge the useful segments of each take e segments at the desired points in the usual way the desired length expand sections ress the PLAY ACROSS PLAY UP TO and PLAY FROM SoftKeys In the n U In Assembly Cut th Access Trim Press the ADR TAKE...

Page 135: ...Trimming Use Trim description For C ADR Position If the ADR POSITION SoftKey is toggled to ADR then the right hand Softwheel an only select ADR Loops and a Loop can be enlarged i e increase the takes to Event OSITION SoftKey to ADR ht hand Softwheel is now used to select ADR oggle the ADR POSITION SoftKey to ADR The Loop will jump and cover uncover the nearest Take c within it or reduced i e reduc...

Page 136: ...me To recrea ress the CREATE PROGRAM SoftKey ress the RETAKE CURRENT LOOP SoftKey Event Lists containing ADR loops Select the Take which was created from the desired Program Record P P Saving and Loading taining ADR loops all ADR loop lated information will be preserved on saving and recreated on loading ueing in a Voice Artist When saving and loading an Event List con re C A voice artist can be p...

Page 137: ...hed using PIN 20 and PIN 22 will RELAY 3 PIN 20 COMMON PIN 22 NORMALLY OPEN for controlling monitor witching on mixing consoles ag Functions To enable this facility first press t E T one to the start of the next making the total time from the beginning b recognised standard BEEP DELAY See Machine Defaults Global in Setting Up for a detailed description of Beep Delay option BEEP TEMPO To adjust the...

Page 138: ...Stack Used to add all tagged takes to the source stack Press the ADD TAKES TO SOURCE STACK SoftKey Tag ADR Program Record Used to tag the actual Program Record This Loop All Lo T displayed and All Loops is used to tag all Loops of ta Toggle the THIS LOOP ALL LOOPS SoftKey Toggle Tagged Takes Used to toggle the tag between the display Toggle the TOGGLE TAGGED TAKE The highlight will cover the curre...

Page 139: ...ack that can be worked with before being used in the Event List Cues are added to the Source Stack from e Cue Library New recordings are also added to the Source Stack ue is selected in the Source Stack it is shown in the Source Window th When a C The yellow highlighted area of the waveform shows the current edit to the Cue to the Cue are lost if it is removed from the Source Stack he white arrow ...

Page 140: ...ivalent to the an show 12 trac c applies to systems with more than 8 tracks Working in Cut and Splice enerally when using the cut and splice p G age users will find themselves uently between Source and Assembly selected in Source This is needed in ove to the first point it is needed and Then move to a different point and spot it down mmediately to repeat the same segment Cut and Splice in Source s...

Page 141: ...l be black Cues must first be added to the Source Stack from the Cue Library Press the CUE LIBRARY SoftKey Cue Library The Cue Library allows Cues to be added to and removed from the Source Stack The Cue waveform is sampled as a background task when a Cue is added to the Source Stack unless waveform display has been turned off AudioFile SCX user manual 141 Revision 0 91 Jan 2008 ...

Page 142: ... that the full long cue name is displayed etting the Local Defaults list details default to details will change the cue library To add a Cue to the Source Stack AudioFile SCX user manual 142 Revision 0 91 Jan 2008 ...

Page 143: ...TIME HardKey to jump to the next Cue name that matches Use the right hand Softwhee If Auto Audition is enabled in Cue Library Local play back Press the ADD TO SOURCE SoftK The selected Cue will be shown a There is effectively no limit to the number o S To enable Auto Audition Press the LOCAL DEFS HardKey while in Cue Library The Cue Library Local Defaults will be displayed P The key will be highli...

Page 144: ...ighted o Tag select multiple Cues in the Cue Library ress the TAGS SoftKey This allows a partial name to be entered and then the required Cue can be found if the whole name is not d To jump to a different volume A storage device that can be shown in the Cue Library P T T P The SoftKeys will change to show the Tag options Cues can now be tagged in different ways To Tag individual Cues Highlight a r...

Page 145: ...ted it has been Tagged The Tag will be toggled each time the GRAB TIME is pressed while on the C T Highlight the first Cue using the right hand Softwheel P Scroll through to the last Cue in All the selected Cues will be Tagged Cues in the T will toggle the Tag Release the Transport Key Tag all the Cues present in the current Event List Press the TAG EVENT CUES SoftKey To Tag all Cues on a Volume T...

Page 146: ...ess cancel or clear Press the CLEAR SoftKey to continue or CANCEL to quit To copy Cues elect a Cue or tagged Cue using the right hand Softwheel and press the CUE ill be copied location and remove them selected location oftwheel To press CONTINUE to proceed or CANCEL same volume using the olume select keys S COPY SoftKey If a tagged Cue was selected then all tagged Cues w Press the MOVE SoftKey to ...

Page 147: ...g the Press the CONTINUE SoftKey to complete th Cue Library features O and EDIT CUE are described in the Editing chapter MEDIA UTILS in Saving chapter Sample Rate Conversion Of Internal Audiofile irely within the domain of the udioFile This function is available in the cue library expanded access page AudioFile cues can be sample rate converted ent A Tag the cues you wish to SRC using any of the T...

Page 148: ...lows the user to set up and organised cue folders c cues In addition to the e viewed as folders b user defined folder according to their type Th e desired cue during the track lay process th he cue folder system is a virtua T overhead The cues are still stored in a flat directory on the disk and it is ossible for a cue to exist in multiple folders without the need for multiple copies p of the cue ...

Page 149: ...vel of the folder tree CREATE IN will create a new folder within the current selected folder within the tree list Type in the name for the folder followed by ENTER Deleting a folder To delete a folder highlight the folder in the tree list and press delete folder Deleting a folder will not delete cues which were within that folder F The folder tree list allows the user to navigate through the cue f...

Page 150: ...anded access or enter the folder utilities page The folder utilities page can then be used to add cues to folders as described above Within the cue library in folders mode the folders can be navigated in two ways way volumes display mode ources tree sired folder If the number of exceeds 6 then the back and more keys allow access to further from the softkeys The RH softwheel navigates through the c...

Page 151: ... present on the system i e the drive containing the cue is not present are shown dimmed blue T to show its sub fold eleting cues D When deleting cues from the system it is possible to retain the references to ue with the in the folder s in or remove the references to the deleted but the reference to the cue retained in the mmed in the folder and added to a folder by the same method used to add igh...

Page 152: ...a folder which has folders within it will also delete all folders within the he folders system can be used in sub cue where it simplifies the process of Press ENTER or ADD CUE TO F Or Turbo tag cues by ho w O T FOLDER Further tagging option Removing cues from folders Cues can be browsed and removed from p D folder The folder system allows the user to define folders within folders Any folder which ...

Page 153: ...ise cues will simply be recorded onto the selected drive the FOLDERS view is active cues will be recorded into the CURRENT folder e selected DEFAULT folder according to the setting of the RECORD INTO OLDERS default will only record into folders if the Cue library is set O If or th F AudioFile SCX user manual 153 Revision 0 91 Jan 2008 ...

Page 154: ...pposite shows the presence of the projects folder which is always situated after the in Project Manager Folder entries can be stored with Projects by using the projects folder s The tree is specifically designed for this purpose and will not be present unless a p lo T defaults folder at the bottom of the folder tree When in use the projects folder can be used in xactly the same way as any other cu...

Page 155: ...s folder just as with any other folder In addition it is possible to move or copy the entries of other folder s into the projects folder tree To do this _ Browse to the source folder and press the COPY REFS key from the cue library AudioFile SCX user manual 155 Revision 0 91 Jan 2008 ...

Page 156: ...eferences within any folder to any of the folders crea within the pr ted ojects folder tree wse to the projects folder you want to put the folder contents After pressing COPY REFS bro to in AudioFile SCX user manual 156 Revision 0 91 Jan 2008 ...

Page 157: ...ressing either COPY TO or MOVE TO In addition it is possible to move or copy the entries to the top folder level root by pressing COPY TO ROOT or MOVE TO ROOT The screen opposite shows the source folder copied into the Marcel folder which is part of the projects folder tree AudioFile SCX user manual 157 Revision 0 91 Jan 2008 ...

Page 158: ...ect folders into a file or just those within the _ EXPORT KEY The folders import export page allows fol into the currently loaded project The folders import export page is used to transfer cue folder records to from StarNet or local projects You can either exp urrent folder c _ Select EXPORT ALL FOLDERS or EXPORT CURRENT FOLDER as required AudioFile SCX user manual 158 Revision 0 91 Jan 2008 ...

Page 159: ... file into on of the folders with use any of the IMPORT FOLDER keys according to the desired import target Importing will take place from the highlight tr Transferring Projects containing Folders Zones When using the PROJECT MANAGER to transfer Projects to either STARNET or a local backup folder the user will be asked to confirm the inclusion of the folder files or zone files if they are present I...

Page 160: ...nd Softwheel Cue name using the QWERTY keyboard then press the ENTER cases the Cue will be displayed in the Source Window evel ramp and offset ss the Transport Key eel to et the Varispeed Or ype in the T Key n both I ny existing edits will be shown Also displayed are the l A values defined in Cue Edit To audition the Cue Pre Or Press the REELROCK Trigger Key se the left hand Softwheel to ReelRock ...

Page 161: ...t mode for many functions e g when Trimming a Mark ue In Point and Out Point R T be played according to how quickly the b Softwheel will show the rate The audio stops immediately w s R V T forwards or backwards m shows the current rate C dio will start and end within the Cue hen it is used in the Event List This defines the extent of the Cue Segment used in the Event List several times and can hav...

Page 162: ...4 8 or 15 dow can not zoom out any further than is necessary to Press the ZOOM IN Trigger Key The WINDOW value will change and the ZOOM OUT Trigger Key will become available Each press of the ZOOM IN Trigger Key increases the scale to a maximum of 8 seconds le arking W his is useful for instance T or when making fine adjustments e g in Tri When a Cue is first selected from the Source Stack the Zoo...

Page 163: ...om Mark to Mark e according to which Mark is elected r Out Point he cursor will toggle between the two positions with each key press k he ADD SOURCE MARK SoftKey will become the RENAME SOURCE MARK To select a Mark Turn off Ree The Status Display above the right hand Turn the right hand Softwheel or press the The cursor will jump The legend on the TRIM SoftKey will chang s For instance if the In Po...

Page 164: ...rim Mark and Edit Loop he cursor will jump back to the Mark Marks ne Mark he Expanded Access for Cut and Splice in Source page will be shown Type in the desired name using the QWERTY keyboard and pres k To hear audio before a Mark Select the required Mark Press the PLAY UP TO SoftKey B audio played is changed by the PRE ROLL tim The cursor will stop on the Mark This is useful for in context auditi...

Page 165: ...Press the DELETE MENU SoftKey ress the DEL MARK Trigger Key The delete options will be shown P The Delete Mark options will be shown AudioFile SCX user manual 165 Revision 0 91 Jan 2008 ...

Page 166: ... available Press the EXPAND ACCESS HardKey to return to Cut and Splice in Source The In Point Mark Out Point Mark and Cue start and end Marks can not be deleted Trim Mark A MARKS is used If the cursor is n M Press DELETE ALL MARKS DELETE CURRENT MARK or CANCEL as required Trim is used to for making precise edits before transferring the material to the Assembly section Select the required Mark Pres...

Page 167: ... the default trim mode Rotate the Softwheels as required e cursor and the audio will be heard TO and PLAY FROM the left hand Nudge keys The Mark will move with th ZOOM IN can be used to increase the resolution PLAY UP an be used to audition the Mark in context c o trim the edit point by one tenth of frame at a time T se U o select a different Mark T sed the right hand Nudge keys U o use Vernier T ...

Page 168: ...Point nd Out Point ure that ReelRock is off he yellow tape that shows the current Cue segment will jump between adjacent The left hand Softwheel w p To exit Trim Press the TRIM or EXIT TRIM SoftKey Rapid Segment Definition Any adjacent pair of Mar S P in quick succession double click the key If the SET SOURCE IN POINT SoftKey was pressed twice then M If Mark will be used as the Out Point and the p...

Page 169: ...age djust the Loop using the Trim functions in the Loop Edit page wards ated looping on a Track E A See the Trim Edits section of Cut and Splice in Assembly for a detailed description of Trim functions page on Press the EXIT EDIT LOOP SoftKey The segment is now ready for repe Spotting Down The SPOT SEG SYNC SEG INS SEG and OVLY SEG functions can be used to place the current segment into the Event ...

Page 170: ...hese are saved on the boot xpanded Access in Source p partition of the primary hard disk E of waveforms and allows the Strip Silence e Cue his is used to control the display T function to be activated on a sourc Waveform Display Options his overrides the settings for waveforms in Display Defaults If LEFT or RIGHT is selected then the COMBINED SPLIT OVERLAID SoftKey will switch to COMBINED and SPLI...

Page 171: ...ate the Strip Silence function on the currently selected Cue shown er silence This allows easy ack laying of the required audio segments using the nudge keys and the marks splay en the Strip Silence operation will start The Strip Silence settings can also be is the Strip Silence Confirmation option is set to Yes then the Strip Silence ettings will be displayed in the Source Window Strip silence wo...

Page 172: ...splay will return to the Expanded Access page The green SoftLED next to the software version number will flash while Strip S Cut and Splice in Assembly To access the Cut and Splice in Assembly page e CUT AND SPLICE in the Main Menu he background of the Assembly Window that shows the Tracks will be black he current Event will be highlighted in the Event List Press th Toggle the SOURCE ASSEMBLY to A...

Page 173: ...the ork being performed n show 8 Tracks 16 Tracks 24 tracks or 48 tracks display operates in 2 modes compact and expanded w The setting for the Track display is retained when switching to other pages he AudioFile SCX system ca T To do this the Compact expanded track display The softkey immediately to the right of the INTERNAL EXTERNAL key switches the tack display between compact mode and expanded...

Page 174: ...acks compact mode 8 or 16 tracks are displayed when the track display is in compact mode Press the 0 key on the numeric keypad This toggle between 8 and 16 tracks To select the range of Tracks in comp Type a number and press E The number typed will become the bottom track in the track display To switch between 2 Press the 0 key on the numeric keypad This d AudioFile SCX user manual 174 Revision 0 ...

Page 175: ...splay before enabling Press the 48T display This key is used to turn the The 48T display zoom in out is controlled by the zoom keys on the lower LH oftkeys per keys control zoom in out on the ertical axis zoom in to 24 16 8 4 or 2 tracks The lower keys control the k key locks together the zoom factor of the 32T display and the AudioFile ssembly display urning lock off will allow the zoom factor fo...

Page 176: ...troller The ulti monitor support is enabled from the 48T DISPLAY DEFAULTS Set to tracks the softwheel and nudge keys below allows selection of th d alter the position of the timeline on the display Multi Monitor Support The AudioFile can now support m p display to be permanently displayed on one monitor whilst vie W This feature require M umber N of Monitors t this to 2 to enable dual monitor supp...

Page 177: ...neously For best results set the default to AUTO This will display short waveforms at high resolution and long waveforms at low resolution thus maximizing the number of waveforms which can be displayed simultaneously Default Tracks The Default Track is used for placement of new Events The Default Tracks are separate for mono and stereo The system default is Tracks 1 and 2 for stereo and Track 3 fo...

Page 178: ...fault Tracks can be changed at any time including immediately before adding a new Event To change the Default Tracks Press the LOCAL DEFS HardKey The Cut and Splice Local Defaults page will be displayed Event is place on the Default Mono Track This happens regardless r the Mono Track or Stereo Tracks are current for editing and selection ns Toggle the MONO STEREO SoftKey to the required type The D...

Page 179: ...n of Events is also controlled in Cut and Splice Local Defaults See page for details Edits An Edit in the Event List is any point at which a change occurs usually the beginning and end of Events An Edit is also used to describe how one Event is joined to the next For instance a Butt Edit is where one Event ends and another starts at precisely the same point on the timeline Multi Level Undo This is...

Page 180: ...e right hand Softwheel Edit operations will be undone redone as the To undo only the most Press the UNDO HardKey again The most recent action will be undone and the screen will return to Cut a Splice To redo only the most recently und Press the Space Redo key The most recent undo will be redone and the screen will return to Cut and Splice To undo one a Press the UNDO SoftKey AudioFile SCX user man...

Page 181: ...ced and setting points that are to be used for a Window arks are also copied down from a Cue segment that includes Marks These MARK SoftKey ress the EXP ACCESS HardKey ress the DELETE MENU SoftKey ress the DEL MARK Trigger key T Press the UNDO ALL SoftKe To redo one action P To redo all actions in Press the REDO To return to Cut and Splice P A M W ReelRock switched off the Timeline cursor will jum...

Page 182: ... and inserted using the timecode they were recorded with cross a selected section ny Marks that occur in a Cue segment will be copied down as part of a new Event To select a Cue segment in the Cue Stack Toggle the SOURCE ASSEMBLY SoftKey to SOURCE Select the required segment of the required Cue Toggle the SOURCE ASSEMBLY SoftKey to ASSEMBLY Or Rotate the Source Select left hand Softwheel to select...

Page 183: ...at follow will be displaced according to the size of the new is inserted The legend above the Softwheel will ch Use the left hand Nudge keys to select the required Cue se To add an Event Position the Timeline at the point where the segment is to start P T The Event will be created at the current Timeline position on the current D T E If muted T Event can be added seamlessly to the Event List T Sel...

Page 184: ...This is so the next o add an Event using the timecode it was recorded against elect the required Cue segment of a Cue recorded against External timecode ed e the Recording chapter ange the Default Track e timecode at the eginning of the Cue or Cue segment xisting Events will not be displaced existing Event then the old Event will be uted The TRK EDIT LIST EDIT SoftKey in Cut an w Event is inserted...

Page 185: ...oints ramp etc is already in the Source Stack then it will be selected to the Source indow uditioning the Event List Press the Play Transport key Or Press the REELROCK Trigger Key Use the left hand Softwheel to ReelRock the Cue or the right hand Softwheel to set the Varispeed rate Or Press the PLAY UP TO SoftKey This will play the Events immediately before the selected Edit or Assembly Mark The am...

Page 186: ...g play whilst the AudioFile is already playing will position where play was last pressed cause playback to be re started from the Cut and Rub Cut is used to split an Event into two smaller Events at the cut point Rub is used to truncate an Event and removes the part of an Event after the selected point IST EDIT plice Local Defaults affects Cut and Rub are both affected by the TRACK EDIT L The TRK ...

Page 187: ... across all Tracks will be uncated lay through the required part of the Event List ress the RUB SEG Trigger key at the required points o confirmation is asked for Position the Time Press the CUT SEG T If a confirmation prompt is displayed press Y or N as required this can be disabled in User De The Event on the current Default Track will be cu th mode is active then all Events under the cursor acr...

Page 188: ...indicate the audio position To Trim an Edit n the t RIM S how the name selected ther Event wil the nearest upstream or downstream Event on the same Track depending on the Timeline position Press the TRIM SoftKey p Trim window All audio upstream of the Assembly cursor remains stationary in the List whatever ad Waveform display is very useful in Trim as it allows th m then ded a Position the cursor ...

Page 189: ... Press the LOCK or SLIP Trigger key as required Lock causes the audio in the Events to be locked to the Timeline or picture while the edit points move along the Timeline Slip causes the audio in the Events to slip back and forth along the Timeline relative to the picture Slip also provides selection of the ripple mode by toggling the relevant SoftKey to NO RIPPLE RIPPLE or TAG RIPP NO RIPPLE leave...

Page 190: ...amount of audio played is controlled by the Pre and Post Roll times L SoftKey as required Type the required number of seconds on the numeric keypad and press ENTER The legend on the selected SoftKey will display the new time To Slip the Pre Edit Select PRE and SLIP P R P time The Event that is played depends on which of the PRE or POST s selected O Press the P The audio will loop around the cu T P...

Page 191: ...ent is moved while the Event s in point remains fixed The Edit can be slipped in either direction Note that the Event s out point moves with the audio Other Events downstream may be affected if RIPPLE or TAG RIPPLE is selected To change the Pre Edit with audio Locked elect PRE and LOCK S As the Edit is adjusted the audio in the Pre Edit Event remains fixed while the Event s out point is moved The ...

Page 192: ...adjusted the audio in the Pre Edit Event and the Event s in point remain fixed while the Event s out point is moved The whole of the Post Edit Event is slipped without changing the in or out point relative to the audio in the Cue The interval or overlap between the Pre Edit Event s out point and the Post Edit Event s in point remains fixed the illustration shows a butt edit The Edit can be moved i...

Page 193: ...l case of Slip If BOTH is pre hen the Trim mode will witch back to Lock me a toggle between GAP and VERLAP ernier mode will be selected selecting ReelRock will switch the Trim mode LIP will also be selected This is so that RIPPLE or TAG RIPPLE can be elect PRE or POST as required otate the left hand Softwheel in the required direction he whole of the selected Event will slip relative to the Timeli...

Page 194: ... selected Event pre or post will jump to the position that gives a ap of the entered size g To specify an exact overlap Toggle the GAP OVERLAP SoftKey to OVERLAP ype the required time value on the numeric keypad T A time entry box will be shown at the top of the screen A value of 0 will make a utt edit b Press ENTER when the value is correct The currently selected Event pre or post will jump to th...

Page 195: ...nd Softwheel to adju U o change the Ramp Length T To ress the RAMP LEN Trigger K P Press either PRE POST or BOTH The corresponding Ramp field s will be highlighted se the left U numeric keypad he left hand Softwheel selects pr T 25ms 50ms etc It will not select a ramp that is longer that the Event hen enteri W first then the entered value will be added to or subtracted from the ramp The Trim Windo...

Page 196: ...ic mode is the normal AudioFile crossfade trim mode where the fade is ramped out starting at the current edit and extending the ramp s back into the event AudioFile SCX user manual 196 Revision 0 91 Jan 2008 ...

Page 197: ...fade using the current edit point as the central power point d with a and opening out the fade either side of this point This allows the crossfade to be adjuste single operation AudioFile SCX user manual 197 Revision 0 91 Jan 2008 ...

Page 198: ...Prefade mode will produce the crossfade by extending the fade backwards into the post fade event and backwards from the end of the pre fade event AudioFile SCX user manual 198 Revision 0 91 Jan 2008 ...

Page 199: ... current position regardless of the location of the trimmed edit beginning of the post edit event To exit from Trim Press the TRIM SoftKey Changes made in Trim will be rendered into the Even The Timeline will jump to the new position of the edit currently being trimmed O P P Changes made in Trim will be rendered into the Even AudioFile SCX user manual 199 Revision 0 91 Jan 2008 ...

Page 200: ... with the eel This also happens the other way round if SET eys Press the SET WINDOW IN POINT SoftKe A vertical line will show the in point on the Assembly Window Position the cursor at the required out Press the SET WINDOW OUT POINT SoftKey vertical line will show the out point on the Assem A ET WINDOW IN S auditioning the Event List i e on the fly The RUB SEG and CUT SEG T UT O hen the right hand...

Page 201: ...ey or the EXIT EXPANDED ACCESS SoftKey to return to Cut and Splice he RUB OUT and T again To Loop a segment Select the required Cue If necessary switch to SOURCE and use EDIT LOOP to adjust the segment a required Edit Loop uses the same functions as Trim Edit except that the same egme s itself overlapping or not and Press the LOOP SEG Trigger key The selected segment will create new Events from on...

Page 202: ...ack together As the in and out points are merged the all T T P The Events within the window will be deleted and the two separated halves L window disappears Cut out is not affected by the status of List or Track Edit mode All Events across l be deleted URCE may also be useful to add a Source Mark at that point witch back to ASSEMBLY osition the cursor at the required synchronisation point within t...

Page 203: ...times L addition to looping a segment acros In s a window a segment can be looped a a required number of times in Assembly d Edit Loop uses the same functions as Trim Edit except that the same segment will repeat op of the screen for numeric entry nt should be looped and press ENTER set number of times from the cursor position o Loop a segment T e sure that no window is defined Mak elect the requi...

Page 204: ...sembly Press the EXPAND ACCESS HardKey while he Expanded Access page will be displayed in Cut and Splice in Assembly T or descriptions of the following fu F nctions see the relevant chapter M is described in Filing and Saving page 1 onwards n Editing page 1 onwards IES is described in Media Utilities page 1 onwards ress the EXPAND ACCESS HardKey again FILING SYSTE EDIT EVENT is described i MEDIA U...

Page 205: ...me Softwheel Nudge Keys or duration a the Edit section the djusted in NAME This is used to change the name of the Cue used by the currently selected Event O P When this Trigger key is selected the current Event can be moved to a different r ck Keypad and press ENTER mber e g if 7 or 8 is entered then the nd Softwheel e up and down the Tracks as the Softwheel is rotated T a To move the current Even...

Page 206: ...L s g ub cue additionally can be S timecode is matched to that of the Event that it is replacing his m T autoconforming package or material recorded in Assembly Record such a alternate takes of dialogue UNDO MENU his provides access to the M T ulti Level Undo function which allows up to 64 bly d Offset ng page isplayed classified by the edit functions and the ed editing operations to be undone or ...

Page 207: ... as they are selected To un Press the UNDO Har The m Access To redo only the most recently undone action Press The m Access To undo one action Press the UNDO SoftKey do only the most recent action dKey ost recent action will be undone and the screen will return to Expanded in Assembly the Space Redo key ost recent undo will be redone and the screen will return to Expanded in Assembly AudioFile SCX...

Page 208: ...y during play se the left hand labelled ADJUST TIME Softwheel to bump the selected Event eel to select the Event to be bumped TAGS E Press the EXPAND ACC Press the START Trigger key U being played into sync with the picture Use the right hand Softwh his is used to tag Events for block operations To tag individual Events Using the Softwheel or Nudge keys to scroll through the List Press the GRABTIM...

Page 209: ... defined window This allows the user ticular track but only events within the tr o MUTE This tags all muted Events FIFOMUTE This tags all Events mu limitations USERMUTE This tags all Events muted by using the STATE Trigge NO AUDIO Tags all Events with no audio SET START This tags all Events located after the cursor position SET END This tags all Events located before the cursor position WINDOW Thi...

Page 210: ... time is entered with an Event tagged that value will be cursor and tagged Events located before after will move accordingly To return to expanded access Press the TAGS SoftKey COPY MOVE When the COPY MOVE SoftKey is toggled to b When the SoftKey is toggled to MOVE the original block will be changed MO is the default mode If program recordings are selected with the SoftKey se Entries of start time...

Page 211: ... tagged Event if after leaving the Expanded Access Page Applying a label name to a series of Events will allocate them the suffix 001 00 003 004 etc aggin T not it will only work on an individual Event The UNDO MENU SoftKey is available in the Expanded Access Page to amend any errors Tagged events remain highlighted ...

Page 212: ...present in imported OMF A function allows you to crossfade to edits associated with tagged events This function is called auto fade and can be accessed from the tags page A typical use for this is to correct incorrect butt edits files Tag the events you wish to globally adjust the fades for then press the AUTO FADE key ...

Page 213: ...You can apply the fade to the in fade up out fade down or both crossfades If you want to change or set the fade time press the FAD TIME key E AudioFile SCX user manual 213 Revision 0 91 Jan 2008 ...

Page 214: ...You can then enter the fade time AudioFile SCX user manual 214 Revision 0 91 Jan 2008 ...

Page 215: ...lume d or transferring the audio used an Event olume Copying a Cue creates a new Cue with the same audio on the s the emains exactly as it was Volume Moving a Cue moves the Cue to the destination Volume it does not reate a new Cue V either by transferring the whole Cue as recorde in V destination Volume the original remains exactly as it wa Volume Copying an Event creates a new Cue with the audio ...

Page 216: ...he Cue Multiple Cues or Events can be Volume copied or Volume Moved by tagging th Cues in the Cue Page then pressing the MULTIPLE Volume COPY SoftKey A prompt is first displayed to choose either Copying the Cues or Moving the Cues followed by the desired destination Volume Enhanced bank copy If multiple volume copy detects matching start time and duration on cues t user has the option to combine t...

Page 217: ...tagged Events ENCE W STRIP SIL This turns on the Strip Silence function according to the strip silence defaults ound task indicated by flashing of the reen SoftLED next to the software version number The current event or the events will be stripped Strip silence works by removing silence separating the remaining audio from a can be applied and strip silence is a on destructive operation ssembly Ma...

Page 218: ...n the Threshold is adjusted it is shown graphically on the Cue by the Event in the Source Window This is most useful when the waveform isplayed d ress the YES P Strip Silence will begin and the display will return to the Expanded Access page This example shows an event that has had the silence removed Cut and Splice Local Defaults The Cut and Splice Defaults are common to Source and Assembly and c...

Page 219: ...au Tracks on lt ly and allowing Events to be selected for Trim on every Track ff the TRIM SoftKey is only active on the Default Tracks When the option is o TRACK EDIT LIST EDIT ZONE EDIT In Track Edit Mode the Cut and Splice operations are performed only on the In List Edit Mode all events forward of the edit point are affected regardless of assigned to same Track s as the selected Event other tra...

Page 220: ...LIST SEARCH TRA oftKey is set to TRK SRCH the cursor only s W T SRCH is selected the cursor will select Events across all tracks TRACK ROCK LIST ROCK ZONE ROCK When the LIST SRCH TRK SRCH S elects Event points on the current Default Track s hen LIS L Reel rocks all 48 tracks Zone rock Reel rocks all tracks within the current zone When in Reel rock you can also switch between these three modes by p...

Page 221: ...etermines the operation of t eelRock the cursor trim If VARISPEED is selected then pressing the Nudge keys or the keys will cause a box to be displayed into which a Varispeed rate can be entered e g 1 6 SPOT SYNC INSERT OVLY Seg key configuration on the numeric keypad in R When NUDGE is selected the Nudge and keys will move position etc by one tenth of a frame The LOCAL DEFS page allows you to tog...

Page 222: ...s Frames sed to put an audio handle after retained sections nds Frames This is used to remove the Event from the Event List after it has had the s stripped out so that the series of Ev in T be changed if Local Defaults are accessed from Cut and Splice in Source T U source stack waveform shows the threshold level in graph Pre Record Handle Seconds Frames Used to put an audio handle in front of reta...

Page 223: ...osite mode from the pre a stereo Cue into tracks set up for mono or vice versa NOT ON SELECTED CHANNEL n attempt is being made to edit an Event that is not positioned on a selected track NOT A REPLAY EVENT n edit of a muted Event is being attempted Record Events are mute in any page except the Record Page NO ACTION MARK POINT OUTSIDE SEGMENT NO ACTION MARK POINT DOW e EVENT LISTSTART WILL BE ZERO ...

Page 224: ...E SELECT POSTION ASSEMBLY TRIM EDIT TRIM VERNIER IN ASSEMBLY ROCK VARI TRIM REELROCK IN SOURCE TRIM MARK TRIM WITH MARK HIGHLIGHTED ROCK TRIM REELROCK IN ASSEMBLY ZONE EDITING s users to link tracks together Zones can ccommodate Stereo 5 1 and 7 1 track format The Stereo format is particularly esented s Twin mono Zones give you the option of linking the twin monos together or n mono clips are actu...

Page 225: ...Setting Alternate assembly layout to yes will enable the FX key and the ZONES key on the main cut splice assembly page AudioFile SCX user manual 225 Revision 0 91 Jan 2008 ...

Page 226: ...AudioFile SCX user manual 226 Revision 0 91 Jan 2008 ...

Page 227: ...n be added by highlighting them and pressing ADD 1 EVENT TO ts and add them to a zone either tag them before grab time tag key to tag events hich will be added to the zone These tagged events can be added to the current zone using this key or added to a new zone by pressing add to empty zone ZONE ZONE To tag add events to zones If you wish to tag even entering the zones page or use the The add 1 e...

Page 228: ...ual 228 Revision 0 91 Jan 2008 To add multip e T ks to a zone press TRACKS o add events on adjacent trac The range of tracks you wish to add to the zone can now be entered in n nn for example to add tracks 1 4 simply type in 1 4 enter the form ...

Page 229: ...widen or narrow the timecode match window Pressing CREATE ZONES will activate the AutoZone system which will then utomatically search through the events list linking together events which fall into the selected criteria Each set of linked events is then considered a zone To remove all the zones use the REMOVE ZONES key A good example of using AutoZone is after importing an OMF file in which some o...

Page 230: ... on the L and R is not AutoZone will automatically link together any such events so that they can b trimmed as though they are stereo This system has an advantage over eo during import as it gives the user the ability to combining mono into ster stereo it can often be two completely unrelated pieces of audio ...

Page 231: ... event To hear the audio on a different track you traverse zone events within the current zone In this way audio fades can easily be applied to linked events Without the zones feature each trim would have to be erformed on each element separately p o unlink an ev T b The event can then be trimmed individually and then linked back to the zone when finished if required Reel Rock within When using re...

Page 232: ...your edit Saving zones Zones are not saved within the events list they are saved within a Project Therefore is you want to save the zone inform li into a projec is then be transferred to Sta Edit Decision List optional software module AudioFile SCX can read and interpret the majority of industry standard video he EDL software can lift off audio from the original source reels and udioFile SCX can b...

Page 233: ...normally communicate the frame rate in use during the video CX ing an EDL from a oppy disk se the left hand Softwheel to move the highlight to Select Frame Rate ropriate frame rate floppy disk or hard disk se both floppy disks and EDLs come in a variety of formats udioFile SCX currently supports the following formats U going where Toggle t F E editing session to AudioFile S Therefore the correct f...

Page 234: ...cordings which are judged too short or too dense to be useful For instance Enter a minimum gap of 5 seconds load up the source reel and ny record Events with less than a 5 second gap between them will be rding covering the same timecode range ds or to equal the on the highlight on Minimum Gap nter a number in seconds using the numeric keypad then press the ENTER e run udioFile SCX can make edits a...

Page 235: ...hannel N SoftKey will now ppear se the right hand Softwheel to select the Track umber using the numeric keypad ion nly edits or any other type of edit U E and press the ENTER key to confirm the choice Highlight Record Post run Type in the required amount up a Post run is not the same as Post roll Track to channel select T T example a CMX List desc A recording made on the video track and also on au...

Page 236: ...d into AudioFile SCX this condition is identified and Select the type of edit to be ignored k Type 0 on the numeric keypad Mark Used to see vision edits in the list i e selects a M Place the highlight over Track to Channel Select Out Position the highlight in the list Press the M key on the numeric keypad MARK will appear in the O m A The program locate facility swaps tracks automatically and stop...

Page 237: ...Key he IGNORE STILL DMCs SoftKey will be highlighted when selected ches during conform EDL name with a new EDL AudioFile SCX would still find matches even if this passes required to find them SoftKey he EDL FILENAME CHECKING SoftKey will be highlighted when selected elete EDL From Memory Used to delete the current EDL from AudioFile SCX ress the DELETE EDL FROM MEMORY SoftKey Press the MINIMUM EVE...

Page 238: ...oftKey in the Main menu opy the EDL file into the allocated Drive A folder on the AudioFile SCX ress the LIST EDL FILES SoftKey A List of available EDLs will be displayed and three SoftKeys will also be DL MERGE and CANCEL d an EDL required EDL using the left hand EDL Files Softwheel EDL SoftKey use Or oftKey to pause the process C P displayed i e LOAD E To loa Select the Press the LOAD A prompt w...

Page 239: ...y into the List already in the memory erge EDLs Select the EDL to be merged using the left hand Softwheel display edit in the List consis mber of fields i e t Rec In Rec Out and Volume Frame lay optional To set volume or frame display Local Defaults If volumes is selected ed and volumes will appear at the far right of each s the timecode In Out points as recorded on the original source tapes on th...

Page 240: ...Key to sor the EDIT ORDER SoftKey to sort Press the PROGRAM ORDER SoftKey to sort by program order the CANCEL SoftKey to quit earching for Edits Three sortin To se Press A prom Press t by reel order Press by edit order Or Press S he right hand Softwheel can be used to scroll though the EDL however with an be more convenient to search the List for particular edits ring file loading AudioFile SCX wi...

Page 241: ...el is selected the corresponding edits are highlighted Press the RENAME Trigger key Rename dialogue box will appear a maximum of five characters using the ress the CANCEL SoftKey to quit Press the ENTER key to confirm the selection ach occurrence of the reel in the EDL List is then renamed using the new e To rename a track Key to TRACK Nudge keys to select the track e corresponding edits are highl...

Page 242: ...C be split into smaller sections To conform audio in several se Using the left hand Softwheel scroll t Press the SET START SoftKey Scroll to the desired end and press the SET END SoftKey restricts further operations to this block Once se The block c To remove the block Users can also use a tagging facility to mark edits Press the TAG REEL TRACK SoftKey when the highlight covers the chosen AGGED ED...

Page 243: ...ss either the ALLOCATE SoftKey to direct the marked edits to selected Making EDL Recordings Recordings are treated as conventional program record Events created ne source reel at a time the current reel is the one selected in the EDL Page ng the Record Page users are prompted to verify that the correct reel is loaded on the appropriate audio video machine s MCS system Allows edits to be recorded t...

Page 244: ...gram Locate Gap Time s the ENTER to continue or CANCEL to quit To access the record facility from EDL Press the RECORD AUDIO HardKey o confirm that machine control is working Toggle the INTERNAL EXTERNAL Transport keys Enables AudioFile SCX to l imespan exists between on t is 20 seconds then AudioFile SCX will come out of PLAY and locate the VT when a gap greater than 20 seconds occurs his is set ...

Page 245: ...e PLAY Key AudioFile SCX now loads up the relevant audio automatically controlling external transport when appropriate Program record pre post run Program Events are recorded with the pre post run specified in the Local Defaults page extra audio is eventually trimmed to the stipulated length by the EDL Detailed description of recording See the Recording chapter for a detailed description of the re...

Page 246: ...d press create edl from events erroneous cue matches from other cues with similar timecodes and names for example other programme episodes To us EDL conform the cues must be added to a chosen FOLDER first Use one of the DEFAULT folders at the bottom of In the EDL page press allocate drive folders ins the audio and enable the conform ss close atching options The conform process will find multiple c...

Page 247: ...G the cues you may wish to use as alternative takes and then press enter For each edit the tagged cues events will be added to the events list as muted events beneath the original AudioFile SCX user manual 247 Revision 0 91 Jan 2008 ...

Page 248: ...apes and Event times defined by the Master VTR SCX can sometimes detect more than one Cue that matches the information described in the EDL If this e edit being conformed with any of the available Cues any of the available Cues During the conforming of a List AudioFile occurs the available Cues will be displayed and the user prompted to select the preferred Cue When prompted with possible Cue matc...

Page 249: ...udioFile SCX will till find the audio If AudioFile SCX doesn t find audio recorded under the current EDL filename automatically makes a second pass without looking for the filename match conforms Record Cues through the EDL system Conform the List and rename Cues with more relevant names Re conform with a new EDL AudioFile SCX will look for Cue names that match the corresponding REEL or TRACK depe...

Page 250: ... EDL REC C Because of butt edited recordings EDL REC is slightly more intelligent than DL SRCE and AudioFile SCX can intelligently guess as to whether it has found the correct matching Cue or not Conform passes does this by making up to five Conform Passes at the List each time lessening the severity of its search criteria The First Pass with EDL REC atches the Cue with the current filename the Cu...

Page 251: ...third pass only looks at the EDL filename and edit points it doesn t check for Cue names and track matches he Fourth Pass with EDL REC he fourth pass only matches Cues with tracks and record In Out points The Fifth Pass with EDL REC d be used because edit points atch een used makes use of the filename for matching Cues will be ss effective herefore it is better to rename the EDL filename prior to ...

Page 252: ...e SCX highlights each edit as it is conformed in the main EDL form LL NO SCROLL SoftKey to NO SCROLL This can be performed at any time during the conform Conformed edits are highlighted in the EDL and are therefore easily distinguishable from un conformed edits If an edits source in out times are not dimmed The audio of the edit currently has associated audio If the recorder in out times are not d...

Page 253: ... conflicting event ompleting the process nce all the reels are recorded and all the audio is conformed the subsequent Event List constitutes a Master Track and this can then be finely edited using AudioFile SCX sing Cue folders with EDL T S Press the DELETE CONFORMED EVENT SoftKey C O U he screen opposite shows an example of the cue folder system T The folder system includes 8 DEFAULT folders Thes...

Page 254: ... use To do this press the allocate volumes key as you would normally to select the EDL record volume This page now includes an additional feature The lo folders can be ou have selected one of the default folders cues recorded against each reel will be allocated into that folder in this contain Next go back into the allocate volumes key and enable conform from folders The conform process will now o...

Page 255: ...onisation The actual synchronisation time is short second however a further delay occurs while the audio pre loaded with data If audio is played out against timecode at crosses the 24 hour threshold AudioFile CX can be wound back to for example 23 hours 59 minutes and 55 ode is entered the VCR starts AudioFile SCX logs on d the audio begins when the timecode start position is Defaults Page and ROL...

Page 256: ...s to any timecode once P To take AudioFile SCX off line STOP must first be commanded The mode of the transport keys is reflected in a status message below the sys th the keys and is displayed as PLAY STOP R he most significant difference between internal and external operation are always initialised to zero In external mode the tart Stop Times are logged from the timecode received during the recor...

Page 257: ...this p ti below T fed to balanced or unbalanced equipment as appropriate When a balanced feed is required the cable screen should be connected to Pin 1 with Pin 3 being fed to the hot connector and Pin 4 to the cold c u In some applications the fact that repeat frame code is issued when in STOP may be a disadvantage but the 25 way connector also contains some relay contacts through which the unbal...

Page 258: ...nce and this is displayed as INT In external the reference is LTC from an external machine In this mode Video is not used and the AudioFile SCX generates the word clock internally List playback System sync status box displays the currently selected external reference VID In this mode the External reference In external mode the External reference must be locked in order to synchronise with external...

Page 259: ...ust re synchronise to the new reference This operation may take a few seconds to complete MACHINE CONTROL SYSTEM MCS TAXI T INT T Introduction MCS is used to control and synchronise multiple 9 pin machines connected by serial interface using a synchronising reference for system lock The system scans the ports for connected transports on the serial ports and then provides a list of available machin...

Page 260: ...aster and any transport can be soloed s current Group allowing it to be independently controlled stem is also able to shuttle and jog transports soloed or as a group a soloed transport is returned to its Group it will cue to the grou n ne Defaults ablish individual machin The MCS Main Page can be accessed in the Main Menu Page the Cut and Splice Page and the Cues and Events Page For MCS to be oper...

Page 261: ...ss the GROUP SETUP SoftKey in the MCS Main Page The Group Setup Page will appear with a split window in the centre of the screen The left hand side will contain a pool of all the available transports The right hand side is where the machines will be placed within the group Along the bottom of the screen will be a row of GROUP SoftKeys Single Machine Lock then toggling the achine If only one machin...

Page 262: ...p can contain any or all of the same transports ress the GROUP SETUP SoftKey in the MCS Main Page ge will appear with a split window in the centre of the creen he right hand side is where the machines will be placed within the group Within the transport pool window are the following headings A group can contain up to a maximum of eight transports To access the Assign Machines Page P The Group Setu...

Page 263: ...ay all the available machines i e the same list of available transports will appear in the pool area of the screen To assign a machine to a group croll through the machines in the list of available machines using the left S hand Machine Softwheel until the highlight covers the desired selection Now press the ASSIGN MACHINE SoftKey the selection will be entered into the Group section of the window ...

Page 264: ...tely below POSITION timecode position STATUS current status e g locked etc ERROR lock error value with reference to the Master machine See page 10 24 for a full explanation of status symbols descriptions OFFSETS C g T T as the Master by default To cancel the default and designate anoth The Master is denoted Access the MCS main page Select a machine by pressing the relevant M C S irst highlight the...

Page 265: ...e keys to change the value Or Auto Offset Press the AUTO OFFSET SoftKey This automatically calculates and applies the offset of the selected machine to the Master machine To Offset a machine Press the machine trigger key Press the SET MACHINE OFFSET SoftKey Apply the offset MACHINE SoftKey To adjust offsets on the fly he NUDGE OFFSET SoftKey can be used to adjust offsets on the fly i e s the trans...

Page 266: ...jog shuttle a group Press the JOG SHUT SoftKey The left hand Softwheel is used to jog the Master and the associated transports in the group and the right hand Softwheel is used to shuttle To jog shuttle an individual transport Press the M C Trigger key for the selected transport Press the SOLO MACHINE SoftKey Press the JOG SHUT SoftKey then use the Softwheels as described above o return to Group S...

Page 267: ... and make fine o set Global Defaults see Machine Defaults Global o access local defaults with locking up then access Machine Loc djustments a T T y for the desired transport Key o Highlight the desired machine for adjustment P ress the M C Trigger ke P Press the LOCAL Hard r ccess the Group Setup page A ress the LOCAL HardKey At the top of the Machine Local Default Page will be the details of the ...

Page 268: ...imecode Source Used to determine the timecode source type Offset Used to set the machine offset from the timeline as described earlier To access additional defaults Press the EXPAND ACCESS HardKey Options will be show The following is only S own internal features to set similar adjustments except Track Arming which supported in all instances o adjust machine local defaults T Using the left han the...

Page 269: ...lts page Servo Parameters This featu machines This can be useful when using multiple machines of the same The MCS defaults are split into t General parameters To adjust additional machine local defaults Using the left hand Softwheel select the parameter to be adjusted then th Used to fine tune the machine for servo into lock Servo Wait frames Wait this number of frames after a play command before ...

Page 270: ...video frame edge However depending upon the situation the g n the timeline is this many frames behind the hen machine synchronisation is begun after the PLAY key has been pressed the system will pre roll by 16 frames and then run the timeline rough the machine position If the machine error is observed to count down slowly from 16 frames to zero adjusting this parameter by 2 frames may If the machi...

Page 271: ...ieved before machine decrease machine lock up time in some hold zero error for some time before actually reporting loc Servo Hold frames Hold servoing for this number of frames before issuing play Once zero error has been achieved the MCS will continue to servo at play peed for the time specified This can help avoid situations where the machine is servoed up from behind and is possibly speeding up...

Page 272: ...re new locate command is issued When locating the machine may overshoot the specified location If the overshoot becomes greater than the value specified in this default the MCS will issue a new locate command rather than allowing the machine to park at the overshot position This is primarily used to cater for devices which have a built in play into park mode for example Tascam DA60 No chase stop 0...

Page 273: ... E input monitor command This parameter is similar to the previous value but applies to the response time to an E to E command Min cue speed Smallest permitted value of shuttle speed command Units 1 64th of play speed i e 4 1 16th 128 2 play speed This value should be used to set the minimum shuttle speed for the machine Higher values will result in the machine moving in response to shuttle wheel ...

Page 274: ...e into the frame d machine position values A typical result of this parameter needing adjustment is persistent and random 1 frame lock Recording Machine record modes Recording to external machines can be achieved by putting the machine into MCS Record mode ach external machine will normally have its record mode disabled until a E record mode is deliberately selected usually Insert mode Assemble re...

Page 275: ...l be highlighted in orange See Assemble Record for information on arming timecode and or video tracks To disarm tracks Press the SoftKeys for the required armed tracks Or Press the ALL SAFE SoftKey Manual Recording ti default to prevent accidental recording to Press the INSERT SoftKey n P Or Press the ALL READY So Manual recording is performed by pressing the record key in external with the MCS pa...

Page 276: ...sert edit on the armed tracks Program Recording Program recording is efining an edit in po used for automatic punch in and out and is performed by int and edit out point at the desired positions Once defined the desired edit can be rehearsed reviewed or performed by ressing the appropriate key with the MCS page active The SoftKey d p corresponding to the last operation performed will be highlighte...

Page 277: ...he GRAB TIME HardKey A dashed line will be shown across the timeline to indicate the in point Position the timeline to the required Timecode Press the SET EDIT OUT POINT SoftKey Press the GRAB TIME HardKey A dashed line will be shown across the timeline to indicate the out point To Rehearse the program edit Press the REHEARSE SoftKey To P AudioFile SCX user manual 277 Revision 0 91 Jan 2008 ...

Page 278: ...the programmed edit to allow the programmed edit to be listened to The machines will then rewind to before the edit in point and stop The EVIEW SoftKey will be shown in yellow on the screen Auto External Record R his allows an external machine to automatically record simultaneously when recordings are made to the AudioFile SCX from an external machine This is on line tape copy of the record sessio...

Page 279: ...safety copy of the recording session Assemble Edit Exit from Local Defaults A O Assemble edit should not normally be used for external machine recording Putting a machine into assemble edit mode will result in the machine s timecode and video tracks being recorded in addition to any audio tracks Programmed assemble recording is not available Assemble edits can only be performed in Manual Record To...

Page 280: ...rming page and if required arm other machines When machines are locked record will perform an assemble edit on the armed machines TRANSPORT CONTROLS nable the ASSEMBL E required machin Once assemble machine will record on all tracks including timecode and video when the cord key is pressed in MCS exte re T F Press th T Press the Trigger key for the required machine Press the ASSEMBLE Tracks can no...

Page 281: ... to the AudioFile MCS as normal Once configured in this way the system will behave as follows On INTERNAL the console automation will run in sync with the AudioFile timeline during play On EXTERNAL the AudioFile will control and synchronise any external machine connected to its MCS ports The console automation will lock and n with the AudioFile playback Slave Machine emulation has been specially t...

Page 282: ...e locked to the Offset Transports can be offset from each other with the accuracy off the offset he connected system Symbols Descriptions dependant on t Status ymbol Status Description S ST Stop Machine is stopped Play Machine is playing remotely Rewind Rewinding Fast Forward Fast Forward LO Locating Locating to specified position SH Shuttle Moving at unspecified speed in unspecified direction PK ...

Page 283: ...up locating to specified position LOCKED Group is playing and is locked to timeline LOCKING Group is playing and is locking to timecode RECORD Group Solo Machine s in record CUEING Master is stopped but group members are cueing to master position ALL STOP The All Stop command has been issued INACTIVE No group has been selected Solo Machine Error Codes Description Error Code ITS Invalid Timecode St...

Page 284: ...isks To access the filing page Press the EXPAND ACCESS HardKey in Cut and Splice then press the ress the FILING SYSTEM SoftKey in Cues and Events ss the FILING SYSTEM SoftKey in the Main Menu To select individual Events Use the right hand Softwheel To select Event Lists Use the left hand Softwheel If the FILES EVENTS SoftKey is toggle to FILES then the right hand Softwheel will select files and th...

Page 285: ...Key Press the DELETE ALL SoftKey prompt will appear as a reminder that this will erase all Events and the A current Source Stack Press the DELETE SoftKey to continue or CANCEL to quit Saving Autosave Used to setup the system so that Event Lists are automatically saved after elect the period required between 1 and 60 minutes using the right hand the numeric pad o disable Autosave Set the interval t...

Page 286: ...eel box will now appear on screen for the new File Name e ENTER Key or CANCEL to quit brary To overwrite an existing Event file with the current Event List Position the highlight over the required Event file Press the SAVE SoftKey A overwritte Press the OVERWRITE SoftKey to continue the new data will be saved nder the current name or CANCEL to quit Position the highlight over the NEW file using nd...

Page 287: ...ce a folder could be created for storing Event Lists for a particular client If that client has a lot of diverse material then sub folders could be used for storing related material such as Event Lists for a series of television rogrammes o create a folder osition the highlight on NEW with the Files Softwheel ress the CREATE FOLDER SoftKey A box will be displayed at the top of the screen for enter...

Page 288: ... turn and delete each one Press the BACK Trigger key ht on the required folder name with the Files ress the DELETE FOLDER SoftKey The file list will n f contain further folder has been opened To move b ress the BACK key P To delete a folder Position the highlight on the require older names start with a tilde F Press the OPEN S osition the highlight on ea P until the folder is empty Re position the...

Page 289: ...rent events list or choose any events list from those present on the system The events list is printed via Windows XP to the current default printer This ter or a network attended printer he Projects Page can be either a locally attached prin T cues events list s automation and any text notes added by the user Projects can contain multiple events lists nd delete local projects These re projects re...

Page 290: ...NEW PROJECT Projects can be deleted from this page if desired Note it is not possible to urrently loaded project To load a local project To load a newly created or existing project press load project The screen shows the currently loaded project Once a project is loaded events list may be loaded from or saved to that project from the Aud filing page To unload a local project Press the unload proje...

Page 291: ...s list within the project are visible Loading and saving events list is performed in the normal manner An events list which is not currently part of a project can be put into a project by selecting fixed loading the events list selecting project and re saving the events list Saving Logic automation into a project If you intend to archive your automation onto DVD or onto a network etc you must firs...

Page 292: ...just as onto the old Exabyte format but instead the ata is saved into the currently loaded local project aved in this way unless the user has loaded a project rst oading Logic automation from a Local Project th t L though they are being backed up d Logic data cannot be s fi L and automation from a project which has just been restored and loaded go into the Logic automation backup page and press sy...

Page 293: ... Manager backup system This backup system allows AudioFile projects to be backed up onto non linear media which is directly connected to the system AudioFile SCX has a built in DVD multidrive Other backup media can be connected to the firewire or USB port on the rear of the system Provided the device is seen by Windows XP it will be possible to use the device for backup To launch the Project Manag...

Page 294: ...ile Spectra The R presen Double the pro Highlighting an events list within a project will display a list of source cues and events SYSTEM DEFAULTS ight hand side of the screen shows the Projects which are currently t on the selected user backup target or Starnet server click a project to open the project to examine the events list s within ject list cues within the events list Jan 2008 ...

Page 295: ...Files The AUDIOFILE SCX needs to be ticked when used with AudioFile SCX e rate to match that of the AudioFile Set the system frame rate to match that of the AudioFile Audio settings et the system sampl S Display AudioFile SCX user manual 295 Revision 0 91 Jan 2008 ...

Page 296: ...Display type hould be set to Timecode ts defaults S Projec AudioFile SCX user manual 296 Revision 0 91 Jan 2008 ...

Page 297: ...e events list summary when interrogating a Project Backup target location Use this setting to choose where you backup your projects to The target can be any device which can be accessed by Windows XP This includes DVD disks firewire drives USB drives USB sticks etc The target you set here will be the root folder shown on the Project Manager Local backup page To set the backup target Click on BROWS...

Page 298: ... backup target location for example DVD burner hen click OK The backup target will be shown at the top of the box Click OK to exit the browse page Miscellaneous T AudioFile SCX user manual 298 Revision 0 91 Jan 2008 ...

Page 299: ... project cues project With Starnet systems is will not result in duplication of data or re copying of the data as the Starnet server software handles all the cue storage With non Starnet projects all project cues will be re copied to the archive even if they already exist within the archive Retry failed automated backups set to work in one of two ways ct manager will only attempt to copy NEW cues ...

Page 300: ...matically added to the source stack Add audio to default import folder on cue picker import This function works with the Cue picker function If this option is enabled any project cues which are imported to the AudioFile via the Cue Picker are automatically added to the default cue folder Copy folder data with Projects urn this default on to automatically copy Project folder data when the project g...

Page 301: ...ombinations for project transfers to AudioFile To select the default drive for each bank click on Select Drives The eed to be pre defined in this way to allow queued projects to be transferred without user intervention multiple projects for transfer hold down either the CTRL key or the SHIFT key whilst using the mouse to click on the projects The selected projects will be highlighted drives n To s...

Page 302: ...AudioFile SCX user manual 302 Revision 0 91 Jan 2008 ...

Page 303: ...Your events list must be saved into a project if you want to back it up Please see the notes regarding project use later A Project may consist of Events list s audio notes and Automation If you want to archive your automation with the project the automation must be transferred into the project first To archive a project Go into the projects page and press project manager The project manager page w...

Page 304: ...er screen T connected to a Starnet network system then you can backup the project to Starnet use To select backup device The box allows you to select either CUE POOL for a Starnet connected system or USER BACKUP TARGET for a local backup to DVD USB stick etc To backup a project To backup a project simply pickup the local project using the mouse drag it over to the backup media and drop it in the d...

Page 305: ...ess as rchiving except that the project is dragged from the storage window ove a the local window Cues already present on the system will not be restored as there is no n After restoring the project it can be loaded from the projects page and the desired events list loaded If the project con p The cue picker system allows project backups to be browsed and cues within the project and auditioned eve...

Page 306: ...om cue pool default is enabled in the project manager defaults o audition a cue T ighlight it and click on the play icon from Starnet or the archived project R select ADD multiple cues can be highlighted for electing with the mouse Cue s selected for import are shown on the right hand side H Or Double click on the cue The cue is auditioned directly To select a cue for import ight click the cue and...

Page 307: ...s can be auditioned directly from the Starnet cue pool and imported This StarNet feature works hand in hand with the cue picker syste c references to deleted audio within the cue folders These deleted cues shown dimmed in the folder s to whic present on the system and will return to full display brightness when the cue is restored back onto the system Cues which are not present on the local system...

Page 308: ...are not present on the AudioFile Pressing PLAY on these cues audition them directly from the Starnet cue pool over the network ort a cue from Starnet press EXPANDED ACCESS IMPORT FROM TARNET from the cue library will To imp S AudioFile SCX user manual 308 Revision 0 91 Jan 2008 ...

Page 309: ...The selected cue will be imported from the Starnet cue pool to the local AudioFile and can be used immediately AudioFile SCX user manual 309 Revision 0 91 Jan 2008 ...

Page 310: ... you can bring all the external elements together beneath the AMS Neve Project umbrella Once the external files have been attached to the project they will be moved around and archived automatically as a part of the project To attach a file to a project On the local window right click on the required project This will bring up the window below Select attach file to Project and then browse to the f...

Page 311: ... you wish to attached these to a project they must be enclosed within a wrapper file Typically for PC systems this can be done by compressing them into a single ZIP file and for MAC systems use Stuffit to generate a sit file Project Seach Facility The Project Manager includes a text based search utility which enables the user to search either network or local projects for a project title To search...

Page 312: ...gured to automatically archive and Starnet projects which are either new or changed to a designated archive target This provides a completely automated update archive system for the facility This feature is provided by a program project monitor If started project monitor sits in the Studio Controller system tray alongside the AudioFile controller To bring the project monitor onto the desktop doubl...

Page 313: ...ng the DISABLE PROJECT MONITORING box Ticking SKIP TODAY S BACKUP will cause the next automatic backup sweep to be skipped but monitoring will continue and subsequent sweeping will be resumed If you wish to manually start a backup sweep to the Starnet server click on Begin Manual Sweep This will trigger the project manager to automatically update all modified and new projects to the Starnet server...

Page 314: ...atic scheduled background sweeping from AudioFiles connected to a Starnet network the Starnet Server can be configured to automatically archive any Starnet project which is either new or has been modified since the last archive This takes place via the server projects software which is also used to manually archive individual projects to a designated archive device As a manual archive system serve...

Page 315: ...lts tab The archive target computer drive folder can be set by clicking on the browse tab Automatic archiving to this target can be configured by ticking the enable box and setting a time Note this archiving is completely independent of any operat d so is a ions which are taking place on any AudioFile connected to Starnet an true background operation AudioFile SCX user manual 315 Revision 0 91 Jan...

Page 316: ...Key in the Cues Page Cut and Splice Asse ccess Page or the Cut and Splice Source Cue Library Page INITIALISE A DISK Used to initialise the audio directory on a disk This erases all audio on a disk and the process cannot be reversed Caution should taken henusing the initialise disk facility o initialise disks _ Select the desired disk using either the DRIVE SoftKey or the right hand Softwheel If th...

Page 317: ...this format On AudioFile SCX can store up to 16384 cues and supports 32 character cue names It is also possible to write protect cues on super Extended drives AudioFile SCX Super extended format has 2 different cue capacity options when initializing The default super extended format can store 16000 cues on the drive This format is not compatible with AudioFile SC systems or any other earlier platf...

Page 318: ...his format can store up to 1024 cues Maximum cue name length is 9 characters Can address maximum of 2 1 Gb drive space Sample rate information is not stored within cue header _ This is the only format compatible with M systems running V11 27 All other previous disk formats have been retained and are still supported for compatibility with Legacy systems It is recommended that super extended 16k cue...

Page 319: ...ead all removable hard disks To re read hard disks _ Press the UNLOCK REMOVABLE MEDIA SoftKey then press the RE READ ALL DRIVES SoftKey _ The RE READ ALL DRIVES SoftKey only becomes available if the UNLOCK REMOVABLE MEDIA SoftKey is pressed Rename a volume Used to rename disks i e volumes in the attached drives To rename volumes _ Press the RENAME VOLUME SoftKey A dialogue box will appear titled V...

Page 320: ...to search for The first Cue that matches will be highlighted _ Press the GRAB TIME HardKey to jump to the next Cue name that matches This allows a partial name to be entered and then the required Cue can be found if the whole name is not known As each drive is selected its name will appear on the key e g DRIVE bank b To sort the Cues _ Press the SORT CURRENT DRIVE SoftKey _ Toggle the NAME DATE So...

Page 321: ...t splice _ To enable the FX key go to the USER DEFAULTS 2 page and set ALTERNATE ASSEMBLY LAYOUT to YES AudioFile SC offers full support for integrated DSP Processes including DFC Capricorn EQ DFC Dynamics Ring Modulation and many other processes The FX key accesses any DSP processes available on the system _ The desired DSP process is then launched by pressing the appropriate key ...

Page 322: ... AMS DSP TOOLS menu can be auditioned but cannot be applied to the events list unless the plug in has been fully activated by entering the appropriate activation key PLUG IN SELECTION CONTROL AMS Neve proprietary plug ins can be configured and controlled from the Spectra surface there is no need to break off from the Editor interface to reach for the mouse This control principal applies to Super T...

Page 323: ...port PLAY key Pressing REC will apply the processing to the cue and update the events list with the processed cue The original event remains in the events list muted and the DSP process can be undone using the undo stack The screen shows 4 band EQ note the new TimeFlex module is used as an input to the processing blocks and should not be removed The current DSP module is highlighted yellow on the ...

Page 324: ... deleted by pressing the appropriate SoftKey It is also possible to move modules and connections around by using the mouse _ Connections can be added via the mouse by holding down the left mouse button on connection nodes on the DSP modules extending the connection to the destination node and the releasing the mouse key This allows you to combine processing blocks to achieve the desired sound very...

Page 325: ...AudioFile SCX user manual 325 Revision 0 91 Jan 2008 With the DSP process page open the Spectra Screen enables control of modules and parameters _ Pressing the OPEN MOD key opens the selected module ...

Page 326: ...module using the mouse CLOSE MODULE disengages control of the module from the Spectra surface The and hide option also hides the module controls on the Studio Controller screen SETUP CYCLE allows the user to setup a number of repetitions useful for auditioning the sound whilst making adjustments Once a cycle value is entered the selected cue can be cycled by pressing the usual cycle key The Highli...

Page 327: ...ursor over the control value display holding down left mouse key and moving the mouse up down _ Once you have designed the layout it can be saved in the LAYOUT page The layout page is a filing system which allows DSP module layouts to be stored and loaded The method of saving loading layouts is much the same as saving loading events lists PROCESSING MULTIPLE EVENTS _ The DSP processes can be appli...

Page 328: ...to select which tagged cue is used during auditioning Once the REC key has been pressed the user can either process the cue being auditioned or press BATCH RECORD to process all of the tagged events ACTIVATING PLUG INS DSP modules which are not activated will appear as grey modules when placed in a layout ...

Page 329: ...he controls are available right click on the dot matrix DSP module name in the top left corner and enter the activation key for the DSP module Contact AMS Neve csd ams neve com to obtain an activation key for any DSP processes you have purchased SUPER TIMEFLEX PITCH SHIFT DSP PROCESSES The TimeFlex Pitch Shift plug in contains a proprietary algorithm giving high quality TimeFlex and pitch shift ef...

Page 330: ...l functions which allow adjustment of controls which effect the TimeFlex pitch shift algorithm TimeFlex is a material dependent effect and by adjusting these controls the user can fine tune the TimeFlex algorithm to suit the type of audio For example a timeflexed female voice may sound better with one set of parameters whereas disco music may sound better with different parameters Once a suitable ...

Page 331: ...f the algorithm normally this should be enabled Data generation determines at what stage correlation data used by the algorithm is generated None prevents any correlation data from being generated During generates correlation whilst the algorithm is being applied This is the normal setting Before generates the data before the algorithm is applied to the audio Multisplice enable disable enables the...

Page 332: ...bell notch and an incredible maximum Q value of 1000 Identical to the 4 band EQ but single band only Triple band ring modulation effect which can be used to create modulation of sounds The effect produces a tone like the ring of a bell providing effects such as a cosmic sound or a robot voice Groovy Delay with modulation ...

Page 333: ...echo flanging phasing type effects Resonator Containing 2 resonant filters the resonator provides a rich variety of musical and creative special effects Each filter can be low or high pass from six to twelve dB octave roll off or bandpass with variable Q A delay can be introduced between the filters for even more effects DFC Digital Dynamics ...

Page 334: ...der or noise gate DFC users have commented for years on the smooth natural sound of these dynamics Triple band distortion This plug in includes three versatile distortion generators Each has a pre and post filter allowing distortion to be applied over s specific frequency band and for the distortion effect to be filtered if desired Applied distortion can be odd or even harmonic allowing extremely ...

Page 335: ...nningly creative advanced delay system It allows rhythmic delays to be created with variable feedback to create repetitive effects The feedback loop includes two bands of EQ so that analogue type echo effects can be created The delay also includes a variable shape oscillator for flanging effects Multi Delay ...

Page 336: ...effects It consists of two pairs of delay modules configured as left right pairs Delayed signal from the left channel can be fed back into the right channel and vice versa The effects which can be created with this plug in would normally require multiple delay units and a spaghetti of patch cords Multi band resonator ...

Page 337: ... differs from the resonator described previously in that each resonance band can be configured in a fashion similar to the DFC EQ It contains four bands as opposed to the dual resonator s two bands but roll off is not variable Voice code ring modulator for voice DFC Digital Gate ...

Page 338: ...ble delay This is a unique effect which consists of eight variable delays which are tuned across the audio frequency band The gain and delay of each band can be adjusted to give a unique mixture of frequency dependent rhythmic content This effect is superb when combined with the Exciter plug in Exciter multi harmonic generator This plug in creates spiralling pitch change effects which are especial...

Page 339: ...ATION OF PLUG INS _ Build in control oscillator VCO can be used to modulate plug in controls _ Fader _ Feedback fader _ Dynamic fader _ Built in time pitch frequency calculator 3RD PARTY DSP PROCESSES Integrated support for 3rd party DSP processes comprise of CEDAR _ declick _ decrackle _ dehiss 3rd party processes require activation before they can be used Please Contact AMS Neve csd ams neve com...

Page 340: ...iginal event will also remain in the events list but muted in case the original event needs to be reverted to in future CEDAR AUTO DECRACKLE CEDAR auto decrackle provides a fast effective method of removing crackles from audio _ To launch CEDAR auto decrackle press the new FX key of the AudioFile _ From the FX page the CEDAR plug in is launched by pressing the appropriate SoftKey The CEDAR plug in...

Page 341: ...tenuation Sets the amount of attenuation applied to the noise Brightness Allows the user to compensate for the noise reduction process if necessary The parameters can be adjusted whilst auditioning and the processed sound can be heard in real time When you are satisfied with the process click on Render to apply the process to the events list After the process has finished the selected audio in the...

Page 342: ...rt directly from cue library Wav bwav files can now be exported directly from the cue library allowing easy export of events list audio Cues can be tagged in the CUE LIBRARY and then exported _ Press the EXPANDED ACCESS key in CUE LIBRARY This allows you to for example tag all events list cues and export them all quickly easily The Export Tagged Cues key allows the user to export all of the tagged...

Page 343: ...ther aif or aiff by a user preference in the user defaults2 page _ Choose the file format you wish to export The system will then launch Windows explorer _ Browse to the desired export location of the files and right click the mouse _ Amongst the usual Windows options select the Export Audio Here option ...

Page 344: ...AudioFile SCX user manual 344 Revision 0 91 Jan 2008 The AudioFile will now export the tagged cues to the selected location Progress is indicated by a progress bar on the Spectra screen ...

Page 345: ...AudioFile SCX user manual 345 Revision 0 91 Jan 2008 AUDIO EXPORT TO DEFAULT TARGET The user defaults 2 page includes a default which determines how the Audio Export ...

Page 346: ...udio Here All audio exports from the cue library expanded access page will now be automatically directed towards this folder WAVE FILE EXPORT FROM ASSEMBLY TIMELINE This allows tagged assembly events to be exported as broadcast wave files from the events list How to export tagged events _ Tag the events you want to export as wave files in EXPANDED ACCESS and then press MULTIPLE VOLUME COPY The EXP...

Page 347: ...ate broadcast wave files in this directory which consist solely of the audio from the tagged events not the entire cue These are saved as broadcast wave files in order to retain the timecode information SOUND EFFECT IMPORT DIRECT TO TIMELINE AudioFile SCX can import sound effects from supported applications direct into the assembly timeline This feature works in conjunction with supported 3rd part...

Page 348: ...key is pressed the track range and import track can be set via the bottom SoftKeys In the example above the imported sound effect will be placed on track 6 _ For more details of supported sound effects servers please contact AMS Neve BATCH IMPORT OF WAV BWAV AIFF AUDIO Multiple audio files can be browsed and tagged via Windows and then imported in a single operation _ From the cue library expanded...

Page 349: ...manual 349 Revision 0 91 Jan 2008 Pressing this key will launch Windows explorer on the AudioFile SCX desktop Use explorer to browse to the audio files you wish to import WAV BWAV or AIFF then select them using the mouse ...

Page 350: ...50 Revision 0 91 Jan 2008 Right click on the selected files and select Send to AudioFile SCX The system will ask you to select the audio drive you wish to import to _ Select the drive and the files will be imported to that drive ...

Page 351: ...into mono cues during import The AMS Deva option determines whether these files are names according to the AMS naming convention or the Deva FILE EXCHANGE MEDIA EDIT INFORMATION AudioFile SCX can exchange media and composition data with other digital editing systems via the following interchange formats _ OMF1 _ OMF2 AAF _ AES31 import ...

Page 352: ...work gives compatibility with Video network storage systems such as Avid Unity _ OMF 1 OMF 2 compatible _ Bank copy takes place during import It is not necessary to bank copy audio from OMF disk after file import saves even more time _ Can generate UIDs from Avid cookies prevents unnecessary duplication of the same clips _ Removes the need for removable drives if OMF transfer performed via Network...

Page 353: ... before continuing There are 3 options available FILING SYSTEM allows you to access the events list filing system to save the current events list MERGE will retain the current list and merge the OMF composition into the events list CLEAR will clear the current events and source stack Choose the appropriate option and continue The OMF import page will now appear on the screen ...

Page 354: ...ser manual 354 Revision 0 91 Jan 2008 To set or change the defaults _ Click on Defaults on the main OMF import screen ä Check the defaults These may need to be set according to the type of OMF file you wish to import ...

Page 355: ...the editor has to find alternative takes of a recording during the sweetening process However in many instances it may be undesirable to import audio not used in the events list as this will increase the time taken to import the file If this is the case make sure the ignore box is ticked For fastest OMF import speed enable this option Convert Single Mono Events To Dual Mono Some OMF files from Ste...

Page 356: ...n 0 91 Jan 2008 To exit the defaults page click on OK To begin an OMF import click NEXT from the main OMF import page _ Click on OPEN A windows browser will open _ Browse to the location of the desired OMF file Double click on the OMF file ...

Page 357: ...mation on the screen _ Current OMF file path _ OMF revision OMF1 or OMF2 _ Number of cues within the OMF file _ Number of events which will be created by importing the OMF file _ Number of tracks within the OMF file _ Start timecode _ Duration of file frames _ Frame edit rate To continue the import procedure click NEXT ...

Page 358: ...ption Auto drive select imports audio to the first available drive until it is full and then continues on the next available drive To continue click Next The next page shows the media files which are going to be imported and the sample rate If Sample rate conversion is to be applied the page will show the original sample rate and the target sample rate ...

Page 359: ...rt times of the events so that the timeline is correct at the new sample rate To activate SRC during OMF import you must tick the SRC box in the OMF import defaults page see below and specify the target sample rate If you wish to SRC the OMF file you must set the target sample rate required in the defaults and then tick the SRC box After doing so click on SET AS DEFAULT and then click OK Once you ...

Page 360: ...ents list is recalculated as it is built To continue click Next To begin the 2nd phase of the import procedure click on Import The import process will begin Audio is imported first then the events list is built from the OMF composition Note For convenience all cues used within the events list are added to ...

Page 361: ..._ Supports all native AudioFile disk formats including Super Extended _ Removes the need for removable drives if OMF transfer performed via Network HOW TO USE OMF EXPORT OMF files can only be exported from projects Therefore a project must be loaded created on the AudioFile and the events list you wish to export as an OMF file must be present within the project You can do this by creating loading ...

Page 362: ...ct format of the OMF file It is important that they are set to the correct value _ ProTools can only import OMF2 files via Digitranslator If you care exporting an OMF for Protools do not select Version 1 0 If you are generating an OMF file for an audio editor enable the Sample Accurate default If the OMF file is for a picture editor system do not enable this Click Next ...

Page 363: ...t page will show the events list s which are within the Project An OMF file can only contain one composition file so choose the project events list you want to use Click Next to continue Click on Save to define the target file location for the Exported OMF file ...

Page 364: ...ting to the file The OMF specification allows for symmetrical overlaps on the same track crossfades but does not accommodate asymmetrical overlaps If an events list contains asymmetrical overlaps on the same track then the overlaps will be checkerboarded during export onto the nearest available adjacent track within the exported OMF file AES31 IMPORT AudioFile SC includes an import plug in which s...

Page 365: ...ormat was not supported by Avid and Digidesign and hence has not been widely adopted within the industry AES31 import is launched from the Projects page in the same way as OMF import AES31 defaults page Import Rendered Fades And State OFF Rendered fades within the AES31 file will be converted into AudioFile real time fades ON Rendered fades will be converted to real time fades as above but the ren...

Page 366: ...per extended drives only OFF Each AES31 import will generate a new set of cues whether or not the media files AES31 media files have previously imported into the system ON AES31 media unique identifiers are used to create AudioFile Cue unique identifiers during import This means that subsequent imports will not import media where the media is already present on the system this will avoid unnecessa...

Page 367: ...he location of the desired AES31 adl file highlight it and click OPEN note the file can be browsed via a network The system will open the adl file and check the location of the media _ Next select the target bank drive _ Once you have selected the drives click on NEXT ...

Page 368: ...ll be prompted to browse to the location of these files If this happens it is because the media files are not located where they should be according to the adl file this would happen if the media files had been copied to a drive after the adl file had been generated _ Browse to the known location of the media files and click on OK At the end of this part of the import the system will present a sum...

Page 369: ...ext Import of media files will then continue Once finished exit the AES31 import page by pressing Exit on the Spectra screen The imported file will now be present on the system as the currently loaded events list This must be saved if you wish to refer to it later ...

Page 370: ...dings from the Zaxcom Deva or Deva II portable digital recorder The native audio format for the Deva recorder is broadcast wave and the track placement is derived from the file name s of these files The audio can be imported from a firewire USB DVD disk or over a network Deva Import Defaults Show Additional Info On Cues ON The import software will display the embedded timecode value for each media...

Page 371: ...t time is potentially problematic for example 23 50 00 Set Start Time To Allows the user to set an alternative overall events list start time for the whole import _ If the options are correct exit the options page and click on NEXT Media directory page This page allows the users to select the folder s in which the Deva media files exist The folder s can be on any media which windows can access for...

Page 372: ... on cues option not set the system will show The SELECT ALL key will tag all the media files for import the TOGGLE KEY will toggle the tagged files Individual media files can be tagged or untagged by ticking or unticking the desired box With the Show additional info on cues option set the display will look like this ...

Page 373: ...s option allows you to tag media files within a specified timecode range _ Start by untagging all the media files select all toggle then enter the required start stop times The system will then tag the media files which fall within the specified range This can be repeated as an additive process allowing the user to selectively import files _ When finished click on CLOSE and then NEXT ...

Page 374: ...he imported media auto drive select will cause the imported media to span multiple drives starting at the first available drive _ To begin importing click IMPORT Media importing will begin and continue until all the selected media files have been imported and the events list generated ...

Page 375: ...saved by the user if it is required for later reference PROTOOLS FILE IMPORT This feature allows you to import ProTools 5 0 or 4 0 session files into the AudioFile Version5 1 session files onwards are encrypted by Digidesign and are impossible to import However if the session is saved as a 4 0 or 5 0 format file AudioFile can import it The software allows you to browse to a windows MAC folder and ...

Page 376: ...ed fades Ticked Generate an events for each rendered fade Import unused audio Unticked Do not import audio not used by the session timeline Ticked Import all audio even if it is not used Apply automation fader moves Determines whether Fader moves within the ProTools session are interpreted or ignored Apply automation mutes Determines whether ProTools automation mutes are applied to the audio _ Cli...

Page 377: ... the ProTools file contents Select the AudioFile drives you wish to import the audio to using the Target audio drive s menu _ Click on Import to AudioFile The system will import the file Audio is imported first then the events list is built from the ProTools session file Note For convenience all cues used within the events list are added to the source stack ...

Page 378: ... user to save the media as SDII doesn t make a lot of sense If you select the SAVE AS Version 5 1 option Protools allows you to keep the audio in its original format but unfortunately the session file data in version 5 1 files is deliberately encrypted so the file cannot be read anyway _ To read ProTools files from MAC disks you will need to install MAC Opener software onto the Studio Controller S...

Page 379: ...om the Mac disk A normal copy will not achieve this We recommend the use of MacDisk for Windows software to do this Hhttp www macdisk com mden php3H Copying the ProTools session file The operation of copying the file can be performed on any PC It doesn t have to be specifically done on the AudioFile SCX A suggestion is to do this on a computer which is running the Media Toolbox software You must h...

Page 380: ...n the above example you can see that the session file contains 0 bytes in the Data fork but 103kb in the resource fork _ Go to options and select Expert Menu The main page will now contain an extra menu Expert _ Go into the Expert menu and select Copy Mode ...

Page 381: ...windows file containing the session file data Use this file as the session file when importing via the AudioFile ProTools import page _ It is not necessary to copy the Audio files or fade files You can locate these on the source drive during the import process AAF IMPORT EXPORT AAF Advanced Authoring Format is a multimedia file format that enables content creators to easily exchange digital media ...

Page 382: ...1 Jan 2008 systems and applications The AAF simplifies project management saves time and preserves valuable metadata AAF Import The import mechanism for AAF is much the same as for OMF etc and is launched from the PROJECTS EXPANDED ACCESS page ...

Page 383: ...composition If this unused media is not required this option will import only the media which is actually used within the composition thus saving import time Generate new UID s on import AAF import will normally use the media Unique Identifier UID to generate the AudioFile UID This means that existing media will be recognised during subsequent AAF imports Thus composition only AAF files can be imp...

Page 384: ... For example track 1 may be defined as mono and track 2 may be defined as stereo Hence a configuration may be designed with a stereo clip across tracks 2 3 AudioFile allows mono and stereo sounds to be placed on the same track and hence has a linear track structure During import any events which span illegal track pairs can be moved either up or down depending upon this default Sample rate edit ra...

Page 385: ...AudioFile SCX user manual 385 Revision 0 91 Jan 2008 To select the AAF file click OPEN browse to the file and double click the file ...

Page 386: ...will commence and continue until the AAF file has been imported At the end of the import the AudioFile screen will show an events list This is the events list which has been created from the AAF import To clear off the AAF import page press the EXIT CUT SPLICE KEY You should now save this events list before continuing The imported project can be edited and stored in exactly the same way as any oth...

Page 387: ... file format AAF exports To export an AAF file you need to have the AudioFile Project loaded on the system first To do this go into the Projects page and LOAD the project containing the events list you want to export Once you have loaded the project press expanded access and then press the AAF EXPORT key The AAF export defaults can be set by clicking on NEXT from the AAF export main page ...

Page 388: ...AudioFile SCX user manual 388 Revision 0 91 Jan 2008 ...

Page 389: ... contain the composition only and will not contain any media or any media folder This is useful if the target system already has the media as it should be able to link the media back to the composition Click NEXT when the export options are correct The next page shows the event list or lists which are contained within the Project If the project contains more than one events list you should select ...

Page 390: ...ect have export into the target AAF file A summary page is generated as shown below The VIEW LOG page will show a log of the activity which took place during the AAF export REAL TIME SAMPLE RATE CONVERSION DURING AUDIO IMPORT The AudioFile SCX can convert the sample rate of audio to match the current system sample ...

Page 391: ...v bwav AIFF ProTools OMF AAF and AES31 import The SRC mode can be selected from the User Defaults Page 2 None Sample rate conversion during import is disabled Auto Media files are automatically converted to the current system sample rate during import Prompt User is prompted to SRC media file during import ...

Reviews: