background image


9


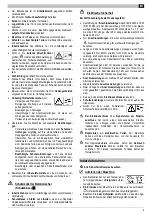
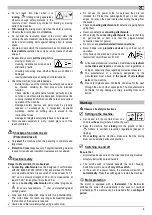
Mixing 


Mixer setting:


To make concrete or mortar, the mixing drum must be locked in a 

specific position. Only the proper mixer setting ensures optimal 

mixing results and smooth operation. 


Hold rotating lever or handwheel tightly while rotating. 


Loosen the rotating mechanism. 


Rotate the mixing drum up to the appropriate recess for the 

material you are mixing. 


  allow rotating mechanism to lock into place. 


Additional safety instructions 


Only fill or empty the mixing drum when the motor is running. 


Check the stability of the mixer. 


Preparing material for mixing:


1.  Pour in water and few shovels full of aggregate (sand, gravel, 

...). 

2.  Add a few shovels full of binding agent (cement, lye, ...). 
3.  Repeat steps 1 and 2 until you reach the proportions required 

for mixing. 

4.  Allow material to mix thoroughly. 


Have a professional advise you regarding the composition 

and quality of the material being mixed. 


Emptying the mixing drum:


  Hold the rotating lever or handwheel tightly 

1.  Unlock rotating mechanism or step on brake 

2.  Slowly tilt mixing drum 


Transport 


Pull plug each time before transport. 


Point the opening of the mixing drum downwards during 

    transport or storage


Storage 


In order to increase the service life of the concrete mixer 


and operate it without glitches, the rotating mechanism 


should be treated with an environmentally compatible spray 


oil before the mixer is put into storage for unusually long 


periods. 


Cleaning 


  Additional safety instructions 


Pull plug each time before cleaning. 


Switch off machine and pull plug  if you have to touch the 

machine (with hand, brush, scraper, rag, etc.) while cleaning 

it. 


Protective devices  removed for cleaning must be properly 

remounted before starting the machine. 


Do not spray water directly on the motor or the switch, nor on 

the ventilation apertures in the motor housing. 


Notes on cleaning:


Before taking a break  and after finishing work, clean the 

concrete mixer inside and out. 


Do not pound on the mixing drum with hard objects 

(hammer, shovel, etc.). A dented mixing drum impairs mixing 

operations and is difficult to clean, besides. 


To clean the inside of the drum, put in some water and a few 

shovels full of gravel and set the drum to revolving. 


Remove any concrete or mortar left sticking to the teeth of 

the axle-drive bevel gear or the crown gear segments 

immediately. 


Maintenance 


The concrete mixer requires practically no maintenance. 

The mixing drum and drive shaft are bedded on ball bearings with 

permanent lubrication.  


Never grease the ring gear! 

To preserve the value of the mixer and increase its service life, 

handle it as described in "Transport and storage". Furthermore, 

the concrete mixer should be checked regularly for signs of wear 

and tear or functional deficiencies. This applies especially to 

moving parts, screw connections, protective devices and 

electrical parts. 


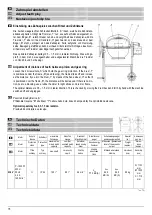
 Concrete  

 Mortar 

 Emptying


Summary of Contents for Lescha BX 135

Page 1: ...BX 135 Originalbetriebsanleitung Seite 1 6 und 15 18 Original instructions Page 1 2 7 10 and 15 18 Origin ln n vod k pou it Str 1 2 a 11 18...

Page 2: ...Technische nderungen vorbehalten Technical modifications reserved Technick zm ny vyhrazeny...

Page 3: ...rning Observe direction of rotation Rotating mixing apparatus Keep hands away from rotating mixing drum Observe enough safety distance to the concrete mixer Prevent any contact to rotating or moving p...

Page 4: ...r die Gefahren un terrichtet sind Instandsetzungsarbeiten d rfen nur durch uns bzw durch von uns benannte Kundendienststellen durchge f hrt werden Restrisiken Auch bei bestimmungsgem em Gebrauch k nne...

Page 5: ...ischer Schutzklasse Inbetriebnahme nur mit vollst ndiger und fest verschlossener Verkleidung Schutzklasse II bleibt nur erhalten wenn bei Reparatur Originalisolierstoffe teile verwendet und Isolations...

Page 6: ...ln bet tigen 2 Mischtrommel langsam kippen Transport Vor jedem Transport Netzstecker ziehen Stellen Sie die ffnung der Mischtrommel beim Trans portieren oder Lagern nach unten Lagerung Um die Lebensda...

Page 7: ...fachmann Motor abk hlen lassen und m gliche Ausl seursa che finden und beseitigen Motor brummt l uft aber nicht an Zahnkranz blockiert Kondensator defekt Maschine abschalten Netzstecker ziehen und die...

Page 8: ...ir works may only be carried out by us or by a customer service agent nominated by us Residual risks Even if used properly residual risks can exist even if the relevant safety regulations are complied...

Page 9: ...ber plug device for severe requirements that is protected against spraying water Long and thin connection lines result in a potential drop The motor does not reach any longer its maximal power the fun...

Page 10: ...mpatible spray oil before the mixer is put into storage for unusually long periods Cleaning Additional safety instructions Pull plug each time before cleaning Switch off machine and pull plug if you h...

Page 11: ...inate whatever caused the thermostat to respond Motor hums but does not start up blocked crown gear defective condenser switch off machine pull plug and clean or replace the crown gear segments send m...

Page 12: ...pr vn m pou it m cha ky z hlediska jej ho okruhu pou it a p i dodr en v ech bezpe nostn ch podm nek a pokyn nelze vzhledem ke konstrukci stroje a jeho elu vylou it ur it zbytkov rizika Tato rizika lze...

Page 13: ...maxim ln d lky kabelu 25 m P i d lce kabelu p es 25 m je t eba volit kabel s p n m pr ezem nejm n 2 5 qmm P vodn veden mus b t odoln proti tlakov vod a spoje proveden v gum pro zt en podm nky P li dlo...

Page 14: ...ortem nebo p ed uskladn n m stroje sklopte buben otvorem kolmo k zemi Skladov n Abyste udr eli Va i m cha ku dlouhodob v dobr m stavu a zachovali snadn jej ovl d n je t eba pouze p ed del m uskladn n...

Page 15: ...alezen mo nou p inu odstranit Motor bru ale neb Zubov v nec je zablokov n Po kozen kondens toru Vypnout stroj odpojit od porudu a jednotliv segmenty v nce vy istit nebo vym nit nechat opravit v autori...

Page 16: ...H so that it is positioned over the frame B the distance will be decreased If there is no mo tion due to a blocking use a rubber hammer for light strokes on drum or frame The optimal distance is 0 5...

Page 17: ...sm rnic m rovn ustanoven m n sledn ch sm rnic 2014 30 EU 2011 65 EU 2000 14 EG Folgende harmonisierte Normen wurden angewandt Les normes harmonis es suivantes ont t appliqu es De volgende geharmonise...

Page 18: ...ged to the orderer Zdrojem je v robce resp import r Pro snadn a rychl dod n u ijte n sledn ch pokyn Objednac slo pojmenov n d lu po et rok v roby slo serie a n zev typu m cha ky Dod vka n hradn ch d l...

Page 19: ......

Page 20: ...401767...

Reviews: