background image

C613-04067-00 REV B

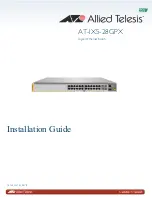
AT-IX5-28GPX

Gigabit Ethernet Switch

Installation Guide

S2/28

S1/27

26

25

CONSOLE

2661

IX5-28GPX

FDX

HDX           COL

1000 LINK

ACT

10/100 LINK

ACT

SFP+

Summary of Contents for AT-IX5-28GPX

Page 1: ...C613 04067 00 REV B AT IX5 28GPX Gigabit Ethernet Switch Installation Guide S2 28 S1 27 26 25 CONSOLE 2661 IX5 28GPX FDX HDX COL 1000 LINK ACT 10 100 LINK ACT SFP ...

Page 2: ...respective owners Allied Telesis Inc reserves the right to make changes in specifications and other information contained in this document without prior written notice The information provided herein is subject to change without notice In no event shall Allied Telesis Inc be liable for any incidental special indirect or consequential damages whatsoever including but not limited to lost profits ari...

Page 3: ...tes uses and can radiate radio frequency energy and if not installed and used in accordance with this instruction manual may cause harmful interference to radio communications Operation of this equipment in a residential area is likely to cause harmful interference in which case the user will be required to correct the interference at his own expense Note Modifications or changes not expressly app...

Page 4: ... Translated Safety Statements Important Safety statements that have the symbol are translated into multiple languages in the Translated Safety Messages document at alliedtelesis com support documentation ...

Page 5: ... 21 Speed 21 Duplex Mode 21 Wiring Configuration 21 Maximum Distance 22 Cable Requirements 22 Port Pinouts 22 Power Over Ethernet 23 PoE Standards 23 Powered Device Classes 24 Cable Requirements 24 Power Budget 25 Port Prioritization 26 Wiring Implementation 27 SFP Slots 28 Stacking SFP Slots 29 eco friendly Button 30 LEDs 31 LEDs for the Twisted Pair Ports 31 LEDs for the SFP Slots 32 LEDs for th...

Page 6: ...the VCStack Feature 81 Specifying Ports in the Command Line Interface for Stand alone Switches 83 Chapter 6 Verifying the Status of VCStack and Activating VCStack 85 Verifying the Status of VCStack 86 Activating the VCStack Feature 87 Activating VCStack 87 Chapter 7 Cabling the Stacking Ports 91 Cabling Switches with AT StackXS 1 0 Transceivers 92 Cabling Switches with AT StackOP 0 3 or AT StackOP...

Page 7: ... 26 Mounting the Switch Horizontally in an Equipment Rack 69 Figure 27 Mounting the Switch Vertically in an Equipment Rack 69 Figure 28 Power Cord Retaining Clip in the Up Position 70 Figure 29 Connecting the AC Power Cord 70 Figure 30 Connecting the Management Cable to the Console Port 72 Figure 31 Switch Initialization Messages 74 Figure 32 Switch Initialization Messages Continued 74 Figure 33 S...

Page 8: ...re 58 Positioning the Handle in the Upright Position 99 Figure 59 Connecting the Fiber Optic Cable to the Stacking Transceiver 100 Figure 60 SHOW STACK Command 106 Figure 61 Moving to the Global Configuration Mode with the CONFIGURE TERMINAL Command 107 Figure 62 Returning to the Privileged Exec Mode 107 Figure 63 Saving the Priority Values with the WRITE Command 108 Figure 64 Removing the Dust Pl...

Page 9: ... Stacking Transceivers 42 Table 8 Operating Distances of the AT StackOP 0 3 Transceiver 58 Table 9 Physical Specifications 123 Table 10 Environmental Specifications 123 Table 11 Power Specifications 124 Table 12 Product Certifications 124 Table 13 Pin Signals for 10 and 100 Mbps 125 Table 14 Pin Signals for 1000 Mbps 126 Table 15 RJ 45 Style Serial Console Port Pin Signals 127 Table 16 Fiber Optic...

Page 10: ...Tables 10 ...

Page 11: ...thernet switch This preface contains the following sections Document Conventions on page 12 Contacting Allied Telesis on page 13 Note You can install AT IX5 28GPX switches as stand alone devices or in a stack configuration with Virtual Chassis Stacking VCStack This guide explains both options ...

Page 12: ...ntions Note Notes provide additional information Caution Cautions inform you that performing or omitting a specific action may result in equipment damage or loss of data Warning Warnings inform you that performing or omitting a specific action may result in bodily injury ...

Page 13: ...about RMAs and to contact Allied Telesis technical experts USA and EMEA phone support Select the phone number that best fits your location and customer type Hardware warranty information Learn about Allied Telesis warranties and register your product online Replacement Services Submit a Return Merchandise Authorization RMA request via our interactive support center Documentation View the most rece...

Page 14: ...Preface 14 ...

Page 15: ...Ports on page 21 Power Over Ethernet on page 23 SFP Slots on page 28 Stacking SFP Slots on page 29 eco friendly Button on page 30 LEDs on page 31 USB Port on page 36 Console Port on page 37 Power Supplies on page 38 Note You can install AT IX5 28GPX switches as stand alone devices or in a stack configuration with Virtual Chassis Stacking VCStack This guide explains both options ...

Page 16: ...nnectors Power Over Ethernet Here are the basic features of Power over Ethernet PoE on the twisted pair ports Supported on ports 1 to 24 Supports PoE 15 4 watts maximum and PoE 30 watts maximum powered devices Supports powered device classes 0 to 4 Maximum power budget of 720 watts Port prioritization Mode A wiring SFP Slots Here are the basic features of the four SFP slots on the switches Support...

Page 17: ...pplies Stacking Slots Two SFP slots can be used with special stacking transceivers to create a VCStack of up to four switches that operate as a virtual switch Here are the basic features of the stacking slots on the AT IX5 28GPX switch Two stacking ports per switch 40Gbps stacking bandwidth LEDs Here are the port LEDs PoE and link activity LEDs for the twisted pair ports Link activity LEDs for the...

Page 18: ...rfaces AlliedWare Plus Management Software Command line interface Web browser interface Management Methods Here are the methods for managing the switches Local management through the Console port Remote Telnet and Secure Shell management Remote HTTP and HTTPS web browser management SNMPv1 v2c and v3 ...

Page 19: ...ure 2 on page 19 shows the back panel Figure 2 Back Panel of the Switch 10 100 1000Base T Ports SFP Slots Management Panel SFP or Stacking Slots S2 28 S1 27 26 25 CONSOLE 2661 IX5 28GPX FDX HDX COL 1000 LINK ACT 10 100 LINK ACT SFP Power Supply Module Bay 1 2001 100 240VAC 5A MAX DC PWR FAULT AT PWR800 100 240VAC 5A MAX DC PWR FAULT AT PWR800 Power Supply Module Bay 2 ...

Page 20: ...view 20 Management Panel Figure 3 identifies the components in the management panel on the AT IX5 28GPX switch Figure 3 AT IX5 28GPX Management Panel Console eco friendly Button Switch Port ID LED Management USB Port ...

Page 21: ...se Auto Negotiation to set its duplex mode if it is connected to a network device that does not support Auto Negotiation for 10 or 100 Mbps operation and has a fixed duplex mode of full duplex Otherwise a duplex mode mismatch may occur in which a switch port and a network device operate at different duplex modes The duplex modes of switch ports that are connected to network devices that do not sup...

Page 22: ...aximum Distance The ports have a maximum operating distance of 100 meters 328 feet Cable Requirements For the cable requirements for the ports refer to Table 2 on page 24 Port Pinouts Refer to Table 13 on page 125 and Table 14 on page 126 for the port pinouts of the 10 100 1000Base T twisted pair ports ...

Page 23: ... 28GPX switch acts as a PSE unit by adding DC power to the network cable thus functioning as a central power source for other network devices Devices that receive their power from a PSE are called powered devices PD Examples include wireless access points IP telephones webcams and even other Ethernet switches The switch automatically determines whether or not a device connected to a port is a powe...

Page 24: ... to 25 5W Table 2 Twisted Pair Cable Requirements for the 10 100Base TX Ports at 10 or 100Mbps Cable Type 10Mbps 100Mbps Non PoE PoE PoE Non PoE PoE PoE Cat 3 Standard TIA EIA 568 B compliant Category 3 shielded or unshielded cabling with 100 ohm impedance and a frequency of 16 MHz Yes Yes No Yes Yes No Cat 5 Standard TIA EIA 568 A compliant Category 5 shielded or unshielded cabling with 100 ohm i...

Page 25: ... switch can supply power to all the devices But if the total power requirements exceed the power budget the switch denies power to one or more ports using a mechanism referred to as port prioritization To determine whether the power requirements of the PoE devices you plan to connect to the switch exceed its power budget refer to their Table 3 Twisted Pair Cable Requirements for the 10 100 1000Bas...

Page 26: ...d power before any of the ports assigned to the other two priority levels Ports assigned to the other priority levels receive power only if all the Critical ports are receiving power Ports that are connected to your most critical powered devices should be assigned to this level If there is not enough power to support all the ports set to the Critical priority level power is provided to the ports b...

Page 27: ...power from the PSE to a PD Twisted pair cabling typically consists of eight wires With 10Base T and 100Base TX devices the wires connected to pins 1 2 3 and 6 on the RJ 45 connectors carry the network traffic while the wires connected to pins 4 5 7 and 8 are unused With 1000Base T devices all eight wires are used to carry network data It takes four wires to deliver DC power to a PD With Mode A the...

Page 28: ...ver large distances build high speed backbone networks between network devices or connect high speed devices such as servers to your network The switches support a variety of short and long distance SFP and SFP modules For a list of supported SFP modules contact your Allied Telesis representative or visit our web site Note SFP slots 27 and 28 are initially configured as stacking slots for the VCSt...

Page 29: ...are You can manage multiple units simultaneously which can simplify network management You have more flexibility in how you configure some of the features For instance a static port trunk on a stand alone switch has to consist of ports from the same switch In contrast a static trunk on a stack may consist of ports from different switches in the same stack The slots for the stacking transceivers ar...

Page 30: ... with the network operations of the device The Switch ID LED is always on but it displays different information depending on whether the LEDs are on or off When the LEDs are on the ID LED displays the switches ID number When the switch is operating in the low power mode with the LEDs off the LED indicates whether the switch is a stand alone unit or the master or member switch of a VCStack as detai...

Page 31: ...0Base T Ports LED State Description Link Activity LED Solid Green A port has established an 1000 Mbps link to a network device Flashing Green A port is transmitting or receiving data at 1000 Mbps Solid Amber A port has established a 10 or 100 Mbps link to a network device Flashing Amber A port is transmitting or receiving data at 10 or 100 Mbps Off A port has not established a link with another ne...

Page 32: ...as shutdown PoE on the port because of a fault condition Flashing Amber The switch is detecting a PD on the port but is not delivering power to it because the maximum power budget has been reached Off This LED state can result from the following conditions The port is not connected to a PD The PD is powered off The port is disabled in the management software PoE is disabled on the port The LEDs on...

Page 33: ... off To turn on the LEDs use the eco friendly button Solid green The SFP or SFP transceiver has established a link at 1000 Mbps or 10 Gbps to a network device Flashing green The SFP transceiver is receiving or transmitting packets to a network device at 10 Gbps The LED does not flash for activity at 1000 Mbps Table 6 Stacking Slot LEDs LED State Description Link Activity Off The slot is empty the ...

Page 34: ...nd if necessary changing the ID number of the switch Figure 6 Switch ID LED The states of the LED when the switch is not operating in the low power mode are shown in Figure 7 Figure 7 Switch ID LED Switch ID LED The switch is booting up The switch has encountered a fault condition The switch is operating as a stand alone unit with the ID number 0 The switch has an ID number of 1 to 4 as part of a ...

Page 35: ...of the switch has exceeded the normal operating range and the switch may shut down Note You can use the SHOW SYSTEM ENVIRONMENT command in the command line interface to identify the source of the problem The states of the LED when the switch is operating in the low power mode are shown in Figure 8 Figure 8 Switch ID LEDs in the Low Power Mode The switch is the master switch of a VCStack The switch...

Page 36: ...to store configuration files on flash drives and to restore the files to switches whose settings have been lost or corrupted or to quickly configure replacement units You may also use the port and flash drives to update the management firmware on the switches The port is USB2 0 compatible ...

Page 37: ...the management cable included with the switch To establish a local management session with the switch connect a terminal or a personal computer with a terminal emulation program to the Console port which has an RJ 45 style 8P8C connector using the provided management cable The cable has RJ 45 RJ style 8P8C and DB 9 D sub 9 pin connectors The Console port is set to the following specifications Defa...

Page 38: ...ations in the event one of the power supplies loses power or fails The switch has a PoE budget of 720 watts when both power supplies are active and 370 watts when only one power supply is active For further information refer to Power Budget on page 27 Refer to Technical Specifications on page 123 for the input voltage range Warning Power cord is used as a disconnection device To de energize equipm...

Page 39: ...rs on page 42 Stacking Port Topologies on page 44 Master and Member Switches on page 48 Specifying Ports in the Command Line Interface on page 50 For more information on the VCStack feature refer to the Stacking Introduction and Stacking Commands chapters in the Software Reference AlliedWare Plus Operating System for IX5 28GPX Switches ...

Page 40: ...mber of IP addresses you have to assign to network devices The one address gives you management access to all the units Adds feature flexibility and resiliency A stack gives you more flexibility in how you can configure some features For instance you can create port aggregators of ports from different switches in the stack rather than from only one switch If you distribute the ports of an aggregat...

Page 41: ...to the slots as S1 and S2 when the VCStack feature is enabled and the slots are used with the special stacking transceivers to create a stack When you disable the VCStack feature to use the slots with regular SFP or SFP transceivers on a stand alone switch the slots are referred to as slots 27 and 28 See Chapter 5 Configuring the Switch for Stand alone Operations on page 57 for instructions for di...

Page 42: ...n situations where the switches are in the same equipment rack or on the same table The fiber optic transceivers are used to build stacks across large distances Table 7 Stacking Transceivers Stacking Transceiver Model Cable Type Operating Distance AT StackXS 1 0 Twinax cable 1 meter AT StackOP 0 3 62 5 125 µm multi mode fiber optic cable 33 meters 108 feet 50 125 µm multi mode fiber optic cable 30...

Page 43: ... transceivers as regular networking ports The AT StackOP 0 3 and AT StackOP 9 0 transceivers must be connected to other AT StackOP 0 3 and AT StackOP 9 0 transceivers The transceivers do not work with other types of network devices You may use different types of transceivers to connect the switches of a stack and so build stacks of switches that are at various distances from each other ...

Page 44: ...ions must crossover to different stacking slots on the switches The stacking transceiver in the S1 slot in one switch must connect to the stacking transceiver in the S2 slot in the next switch Figure 11 is an example of a stack of two switches in the linear topology The transceiver in the S1 slot on the top switch is connected to the transceiver in the S2 slot on the bottom switch Figure 11 Stack ...

Page 45: ...ing ports on the end switches of the stack are connected to form a physical loop This topology is more resilient than the linear topology because there are two pathways through the stack If one pathway fails the switches can maintain communications through the alternate pathway The example in Figure 13 on page 46 shows a ring topology of two switches S2 28 S1 27 26 25 CONSOLE SFP S2 28 S1 27 26 25...

Page 46: ...hassis Stacking 46 Figure 13 Stack of Two Switches in the Ring Topology Figure 14 on page 47 is an example of a stack of four switches in the ring topology S2 28 S1 27 26 25 CONSOLE SFP S2 28 S1 27 26 25 CONSOLE SFP 2696 ...

Page 47: ...stack against the loss of communications due to a failure of a stacking port cable or switch The examples in the previous figures showed the twinax AT StackXS 1 0 stacking transceiver But the same rules apply to the fiber optic AT StackOP 0 3 and AT StackOP 9 0 stacking transceivers A fiber optic transceiver in the S1 slot must crossover to a fiber optic transceiver in the S2 slot of another switc...

Page 48: ...itch The devices compare the following numbers to choose the master switch when the stack is reset or powered on Stack priority numbers MAC addresses The stack priority number is an adjustable value of 0 to 255 where the lower the number the higher the priority Typically the switch with the lowest priority number highest priority becomes the master switch of a stack The default priority value is 1...

Page 49: ...er information refer to Specifying Ports in the Command Line Interface on page 50 The ID numbers are also used to identify the parameter settings that are stored in the configuration file When the stack is reset or power cycled the ID numbers identify the devices to which the parameter settings belong Caution You should not change the ID numbers of the switches after you have started to configure ...

Page 50: ...ue is used with multi module products This value does not apply to the x510 Series switches and should always be 0 The third value is a port number on the switch You may specify only one port number in a PORT parameter but you may specify more than one PORT parameter in many of the commands where the parameter is supported Here is an example of the PORT parameter It uses the INTERFACE command to e...

Page 51: ...Beginning the Installation The chapter contains the following sections Reviewing Safety Precautions on page 52 Choosing a Site for the Switches on page 56 Planning a Stack on page 57 Unpacking the Switch on page 59 ...

Page 52: ... stare into the laser beam L2 Warning Do not look directly at the fiber optic cable ends or inspect the cable ends with an optical lens L6 Warning Class 1 LED product L3 Warning To prevent electric shock do not remove the cover No user serviceable parts inside This unit contains hazardous voltages and should only be opened by a trained and qualified technician To avoid the possibility of electric ...

Page 53: ... E5 Caution Air vents must not be blocked and must have free access to the room ambient air for cooling E6 Warning Operating Temperature This product is designed for a maximum ambient temperature of 50 degrees C E57 Note All Countries Install product in accordance with local and National Electrical Codes E8 Warning Only trained and qualified personnel are allowed to install or replace this equipme...

Page 54: ...ch that a hazardous condition is not created due to uneven mechanical loading E25 Note Use dedicated power circuits or power conditioners to supply reliable electrical power to the device E27 Warning This unit might have more than one power cord To reduce the risk of electric shock disconnect all power cords before servicing the unit E30 Note If installed in a closed or multi unit rack assembly th...

Page 55: ... power strips E37 Warning To reduce the risk of electric shock the PoE ports on this product must not connect to cabling that is routed outside the building where this device is located E40 Caution The unit does not contain serviceable components Please return damaged units for servicing E42 Warning When you remove an SFP module from this product the case temperature of the SFP may exceed 40 C 158...

Page 56: ...t of the switches so that you can easily connect and disconnect cables and view the port LEDs The site should allow for adequate air flow around the units and through the cooling vents on the front and rear panels The ventilation direction is from front to back with the fan on the back panel drawing the air out of the unit The site should not expose the switches to moisture or water The site shoul...

Page 57: ...ms of speed but the ring topology adds wiring redundancy You can use combinations of AT StackXS 1 0 AT StackOP 0 3 and AT StackOP 9 0 cables when the individual switches of the stack are at various distances from each other The switches do not need any additional software for stacking However they do need stacking transceivers You may not install a networking device such as a media converter or Et...

Page 58: ...er Type Minimum Modal Bandwidth 850 nm MHz km Operating Range 62 5 125 µm multi mode fiber optic cable 160 2 to 26 meters 7 to 85 feet 200 2 to 33 meters 7 to 108 feet 50 125 µm multi mode fiber optic cable 400 2 to 66 meters 7 to 217 feet 500 2 to 82 meters 7 to 269 feet 2000 2 to 300 meters 7 to 984 feet ...

Page 59: ...u should retain the original packaging material in the event you need to return the unit to Allied Telesis After checking the contents of the shipping containers go to Chapter 4 Installing the Switch and its Power Supplies on page 61 1947 Two rack mounting brackets One 2 m 6 6 ft local management cable with RJ 45 8P8C and DB 9 D sub 9 pin connectors 2047 Twelve rack mounting bracket screws AT PNL8...

Page 60: ...Chapter 3 Beginning the Installation 60 ...

Page 61: ...ing Clip on page 62 Installing Power Supply Modules on page 63 Installing the Switches on a Table or Desktop on page 66 Installing the Switch in an Equipment Rack on page 67 Connecting AC Power to a Power Supply Module on page 70 Starting a Local Management Session on page 72 Monitoring the Initialization Processes on page 73 ...

Page 62: ...ord retaining clip shown in Figure 17 Figure 17 Power Cord Retaining Clip 2 Install the clip on the AC power connector on the power supply module With the u of the clip facing down press the sides of the clip toward the center and insert the short ends into the holes in the retaining bracket as shown in Figure 18 Figure 18 Inserting the Retaining Clip into the Retaining Bracket You are now ready t...

Page 63: ...you only install one power supply The installation procedure is identical for each power supply Installing a Power Supply To install a power supply perform the following procedure 1 Remove the module from the shipping package Note Store the packaging material in a safe location You must use the original shipping material if you need to return the unit to Allied Telesis 2 Remove the blank panel fro...

Page 64: ...needed to seat the module on the connector on the rear panel of the chassis Caution Do not force the power supply module into place Doing so may damage the connector pins on the backplane inside the chassis If there is resistance remove the module and reinsert it after verifying that the edges of the card are properly aligned in the guides in the chassis module slot Figure 20 Installing the AT PWR...

Page 65: ...erate the switch with a single power supply module install the supplied blank panel over the second power supply module bay as shown in the following figure This is necessary for correct airflow Figure 22 Installing the Blank Panel on the Power Supply Slot 6 See Connecting AC Power to a Power Supply Module on page 70 for the power cord installation 2264 100 240VAC 12A MAX DC PWR FAULT AT PWR8000 1...

Page 66: ... direction is from front to back with the fan on the back panel drawing the air out of the unit The site should not expose the switches to moisture or water The site should be a dust free environment The site should include dedicated power circuits or power conditioners to supply reliable electrical power to the network devices The rubber feet on the bottom of the switches should be left on for ta...

Page 67: ...es on page 56 Here is the procedure for installing the switch horizontally or vertically in a 19 inch equipment rack Caution The chassis may be heavy and awkward to lift Allied Telesis recommends that you get assistance when mounting the chassis in an equipment rack E28 1 Place the unit upside down on a level secure surface Figure 23 Turning the Switch Upside Down 2 Using a flat head screwdriver p...

Page 68: ... the four possible bracket positions Figure 25 Attaching the Equipment Rack Brackets 2672 S2 28 S1 27 26 25 CONS OLE IX5 28GPX FDX HDX COL 1000 LINK ACT 10 100 LINK ACT SFP S2 28 S1 27 26 25 CONS OLE IX5 28GPX FDX HDX COL 1000 LINK ACT 10 100 LINK ACT SFP 2672 S2 28 S1 27 26 25 CON SOLE IX5 28GPX FDX HDX COL 1000 LINK ACT 10 100 LINK ACT SFP S2 28 S1 27 26 25 CONS OLE IX5 28GPX FDX HDX COL 1000 LI...

Page 69: ...unting the Switch Horizontally in an Equipment Rack Figure 27 Mounting the Switch Vertically in an Equipment Rack 6 If required repeat this procedure to install the remaining switches in the stack 7 Apply power to the switch or switches as described in the following procedures S2 28 S1 27 26 25 CO NS OL E IX5 28GPX FDX HDX COL 1000 LINK ACT 10 1 00 LINK ACT SFP 2674 S2 28 S1 27 26 25 CONSOLE IX5 2...

Page 70: ...in the up position as shown in Figure 28 Figure 28 Power Cord Retaining Clip in the Up Position 2 Plug the power cord into the AC power connector on the rear panel of the unit as shown in Figure 29 Lower the power cord retaining clip to secure the power cord to the unit Figure 29 Connecting the AC Power Cord Warning Power cord is used as a disconnection device To de energize equipment disconnect t...

Page 71: ... Specifications on page 124 Warning This unit might have more than one power supply To reduce the risk of electric shock disconnect all power cords before servicing the unit E30 4 Repeat the above procedure for the second PSU if necessary 5 Start a local management session on the unit by performing the procedure in Starting a Local Management Session on page 72 ...

Page 72: ... Connecting the Management Cable to the Console Port 2 Connect the other end of the cable to an RS 232 port on a terminal or PC with a terminal emulator program 3 Configure the terminal or terminal emulator program as follows Baud rate 9600 bps The baud rate of the Console Port is adjustable from 1200 to 115200 bps The default is 9600 bps Data bits 8 Parity None Stop bits 1 Flow control None Note ...

Page 73: ...aster switch You will see the messages in Figure 31 here to Figure 33 on page 75 Bootloader 2 0 15 loaded Press Ctrl B for the Boot Menu Reading filesystem Loading flash x510 5 4 3 3 7 rel Verifying release OK Booting Starting base first OK Mounting virtual filesystems OK ______________ ____ ______ _ __ ______ ______ ____ ______ ____ ____________ Allied Telesis Inc AlliedWare Plus TM v5 4 2A Curre...

Page 74: ...net OK Starting base modules OK Received event modules done Received event board inserted Received event hardware done Starting network startup OK Starting network stackd OK Starting network election timeout OK Received event network enabled Initializing HA processes openhpid hostd cntrd nsm auth epsr hsl imiproxyd irdpd lldpd loopprot mstp rmon sflowd udldd vrrpd imi lacp pdmd Received event netw...

Page 75: ...tive Workload to HA processes hsl nsm rmond sflowd vrrpd irdpd lacpd lldpd loopprotd mstpd authd epsrd imi imiproxyd Received event network activated Loading default configuration Warning flash default cfg does not exist loading factory defaults done Received event network configured awplus login ...

Page 76: ...Chapter 4 Installing the Switch and its Power Supplies 76 ...

Page 77: ...ish to operate the switch as a single stand alone switch instead of stacking it with other switches This chapter contains the following procedures Configuring the Switch for Stand alone Operations on page 78 Specifying Ports in the Command Line Interface for Stand alone Switches on page 83 ...

Page 78: ...e VCStack feature Some network traffic may be lost if the device is already connected to a live network Note The initial management session of the switch must be from the Console port To disable the VCStack feature to use the switch as a stand alone unit perform the following procedure Caution Disabling the VCStack feature requires resetting the switch If the switch is already connected to a live ...

Page 79: ... active on the unit You must disable it by performing the steps in the rest of this procedure before you can use the SFP stacking slots with regular SFP or SFP transceivers The reason the status says standalone is because the switch considers itself a stack of one switch 5 Move to the Global Configuration mode by entering the ENABLE and CONFIGURE TERMINAL commands as shown in Figure 36 Figure 36 M...

Page 80: ...ter the WRITE command to save your change in the configuration file The switch displays the confirmation prompt in Figure 39 on page 80 Figure 39 Saving the Changes with the WRITE Command 10 Enter the REBOOT command to reboot the switch 11 At the confirmation prompt type Y for yes 12 Wait for the switch to initialize its management software and afterwards examine the Switch ID LED The switch is re...

Page 81: ...c mode or Privileged Exec mode enter the SHOW INTERFACE command to display the status of one of the last two SFP slots on the switch For example enter this command to view the status of slot 27 show interface port1 0 27 If VCStack is disabled the switch displays the status of the designated slot An example is shown in Figure 40 on page 81 Figure 40 Status of a Stacking Slot When VCStack is Disable...

Page 82: ... message in Figure 41 on page 82 if VCStack is not disabled in which case you need to disable it by performing the commands in Disabling VCStack on page 78 Figure 41 Status of a Stacking Slot When VCStack is Enabled awplus show interface port1 0 51 Can t find interface port1 0 51 awplus ...

Page 83: ...on stand alone switches The module ID value is used with multi module products This value does not apply to the x510 Series switches and should always be 0 The third value is a port number on the switch You may specify only one port number in a PORT parameter but you may specify more than one PORT parameter in many commands where the parameter is supported Here is an example of the PORT parameter ...

Page 84: ...Chapter 5 Configuring the Switch for Stand alone Operations 84 ...

Page 85: ...85 Chapter 6 Verifying the Status of VCStack and Activating VCStack The procedures in this chapter are Verifying the Status of VCStack on page 86 Activating the VCStack Feature on page 87 ...

Page 86: ...ds to be enabled To test the status of VCStack perform the following procedure 1 Power on one of the switches Connect a power cord to one of the power connectors on the back panel and to an AC power source The unit has two power connectors but you do not need to connect both power cords for this procedure 2 Wait one minute for the switch to initialize its management software 3 View the ID LED and ...

Page 87: ...d to log on the switch If this is the initial management session of the switch enter manager as the user name and friend as the password The user name and password are case sensitive The local management session starts when the User Exec mode prompt shown in Figure 43 is displayed Figure 43 User Exec Mode Prompt Note The User Exec mode is the first level in the command mode interface For complete ...

Page 88: ...vileged Exec Mode with the EXIT Command 7 Enter the WRITE command to save your change as shown in Figure 48 Figure 48 Saving the Change with the WRITE Command Note If this is the initial management session of the switch the WRITE command automatically creates in flash memory a new configuration file called DEFAULT CFG in which it stores your configuration change You may change the name of the file...

Page 89: ...ED is displaying the number 1 2 3 or 4 VCStack is now enabled on the switch Power off the switch by disconnecting the power cord and repeat the procedures in this chapter on the next switch If there are no further switches to test go to Chapter 7 Cabling the Stacking Ports on page 91 If the ID LED is still displaying 0 repeat this procedure If the procedure was not successful it might be because y...

Page 90: ...Chapter 6 Verifying the Status of VCStack and Activating VCStack 90 ...

Page 91: ... Cabling the Stacking Ports This chapter contains the following procedures Cabling Switches with AT StackXS 1 0 Transceivers on page 92 Cabling Switches with AT StackOP 0 3 or AT StackOP 9 0 Transceivers on page 97 ...

Page 92: ... electricity Be sure to observe all standard electrostatic discharge ESD precautions such as wearing an antistatic wrist strap to avoid damaging the device 1 Remove the dust plug from the S1 slot on the top switch of the stack as shown in Figure 50 Figure 50 Removing the Dust Plug from the S1 Slot 2 Remove the transceiver from its shipping container and store the packaging material in a safe locat...

Page 93: ...IX5 28GPX Installation Guide 93 3 Remove the dust cap from one end of the transceiver as shown in Figure 51 on page 93 Figure 51 Removing the Dust Cover from the AT StackXS 1 0 Transceiver ...

Page 94: ...4 4 Position the transceiver with the release tab on top and slide the transceiver into the slot as shown in Figure 52 on page 94 Figure 52 Installing the AT StackXS 1 0 Transceiver in Slot S1 S2 28 S1 27 26 25 CONSOLE SFP 2683 Release tab ...

Page 95: ... Figure 53 on page 95 Note The cable must crossover to different slots on the switches The stack will not work if you connect two S1 or S2 slots together Figure 53 Removing the Dust Plug from the S2 Slot 6 Remove the dust cover from the connector on the other end of the transceiver S2 28 S1 27 26 25 CONSOLE SFP 2684 ...

Page 96: ...Slot S2 8 Repeat this procedure to connect additional switches to the stack with AT StackXS 1 0 transceivers 9 To create the redundant path with the ring topology shown in Figure 13 on page 46 and Figure 14 on page 47 connect a stacking cable to the empty stacking slots on the top and bottom switches 10 After connecting the stacking cables to all the switches go to Chapter 8 Powering On the Stack ...

Page 97: ...ing a Stack on page 57 To cable switches with fiber optic transceivers perform the following procedure 1 Remove a dust cover from either the S1 or S2 slot on the switch 2 To install the transceiver in the S1 slot position it with the handle on top as shown in Figure 55 To install it in the S2 slot position it with the handle on the bottom Figure 55 Handle on the AT StackOP 0 3 and AT StackOP 9 0 T...

Page 98: ...8 3 Slide the transceiver into the slot until it clicks into place as shown in Figure 56 on page 98 Figure 56 Installing the AT StackOP 0 3 or AT StackOP 9 0 Transceiver S2 28 S1 27 26 25 CONSOLE SFP 2687 S2 28 S1 27 26 25 CONSOLE SFP 2688 ...

Page 99: ... Verify the position of the handle on the transceiver If the transceiver is in the S1 slot the handle should be in the upright position as shown in Figure 58 If the transceiver is in the S2 slot the handle should be in the down position Figure 58 Positioning the Handle in the Upright Position S2 28 S1 27 26 25 CONSOLE SFP 2689 S2 28 S1 27 26 25 CONSOLE SFP 2690 SFP Handle ...

Page 100: ...ber Optic Cable to the Stacking Transceiver 7 Repeat this procedure if the switch is to have two stacking transceivers 8 Repeat this procedure on the other switches of the stack to install their stacking transceivers The connections must crossover such that a transceiver in slot 1 connects to a transceiver in slot 2 9 After you connect the stacking cables to all the switches go to Chapter 8 Poweri...

Page 101: ... The numbers are assigned in the order in which you power on the units Otherwise perform Powering On the Switches Simultaneously on page 104 to have the switches assign the numbers automatically After the ID numbers are assigned you may change them with the STACK RENUMBER command described in the Software Reference AlliedWare Plus Operating System for IX5 28GPX Switches Caution You should not chan...

Page 102: ...signments the configuration of the switches or the manner in which you manage the stack This procedure assumes the following This is the initial power on sequence of the stack You verified that VCStack is enabled on the switches as explained in Chapter 6 Verifying the Status of VCStack and Activating VCStack on page 85 You connected the switches with stacking transceivers as explained in Chapter 7...

Page 103: ...ng up twice once with the ID number 1 and again with its new ID number 2 which is why it takes two minutes before the device becomes a full member of the stack 5 If there is a third switch power it on and wait another two minutes for it to join the stack as a member with the ID number 3 6 If there is a fourth switch power it on and wait two minutes for it to join the stack as a member with the ID ...

Page 104: ...enabled on the switches as explained in Chapter 6 Verifying the Status of VCStack and Activating VCStack on page 85 You connected the switches with stacking transceivers as explained in Chapter 7 Cabling the Stacking Ports on page 91 All the switches are powered off If you want to monitor the power on sequence you may connect a terminal or PC with a terminal emulator program to the Console port on...

Page 105: ...IX5 28GPX Installation Guide 105 switches and are retained by the devices even if you reset or power cycle the stack 3 To continue with the installation go to Verifying the Stack on page 106 ...

Page 106: ...broken when the switches are connected in the linear topology The priority values will be 128 the default value if they have not been changed on the switches Given that there is no relationship between the ID numbers and the selection of the master switch the active master in the SHOW STACK command might not have the ID number 1 3 Do one of the following If you want to change the priority values o...

Page 107: ...AL Command 2 Use the STACK PRIORITY command to set the priority numbers The command has this format stack ID_number priority priority The ID_NUMBER parameter is the ID number of the switch whose priority value you are setting The range is 1 to 4 The PRIORITY parameter is the new priority value for the switch The range is 0 to 255 The default is 128 Here are a couple of examples To assign the prior...

Page 108: ...The switch displays the confirmation prompt in Figure 63 Figure 63 Saving the Priority Values with the WRITE Command 5 To end the management session enter the EXIT command 6 Go to Chapter 9 Cabling the Networking Ports on page 109 to continue with the installation awplus write Building configuration OK awplus ...

Page 109: ...109 Chapter 9 Cabling the Networking Ports This chapter contains the following procedures Cabling the Twisted Pair Ports on page 110 Installing SFP and SFP Transceivers on page 112 ...

Page 110: ...work device are connected with straight through or crossover cable If you are using straight through twisted pair cable the wiring configurations of a port on the switch and a port on a network device must be opposite each other such that one port uses MDI and the other MDI X For example if a network device has a fixed wiring configuration of MDI you must disable auto MDI MDI X on the correspondin...

Page 111: ... manually to avoid the possibility of duplex mode mismatches A switch port using Auto Negotiation defaults to half duplex if it detects that the end node is not using Auto Negotiation which can result in a mismatch if the end node is operating at a fixed duplex mode of full duplex Do not attach cables to ports of static or LACP port trunks until after you have configured the trunks on the switch O...

Page 112: ...ivers are dust sensitive Always keep the plug in the optical bores when a fiber optic cable is not installed or when you store the transceiver When you do remove the plug keep it for future use Unnecessary removal and insertion of a transceiver can lead to premature failure Warning A transceiver can be damaged by static electricity Be sure to observe all standard electrostatic discharge ESD precau...

Page 113: ... is enabled on the switch slots S1 27 and S2 28 are reserved as stacking ports and may not be used for regular SFP or SFP transceivers 2 Remove the transceiver from its shipping container and store the packaging material in a safe location 3 If you are installing the transceiver in a top slot position the transceiver with the Allied Telesis label facing up If you are installing the transceiver in ...

Page 114: ... If you are ready to attach the fiber optic cable to the transceiver continue with the next step Otherwise repeat steps 1 to 4 to install the remaining SFP or SFP transceivers in the line cards 5 Remove the dust cover from the transceiver as shown in Figure 66 Figure 66 Removing the Dust Cover from an SFP or SFP Transceiver S2 28 S1 27 26 25 CONSOLE SFP 2676 S2 28 S1 27 26 25 CONSOLE SFP 2677 ...

Page 115: ...e down position Figure 67 Positioning the SFP or SFP Handle in the Upright Position 7 Connect the fiber optic cable to the transceiver as shown in Figure 68 The connector on the cable should fit snugly into the port and the tab should lock the connector into place Figure 68 Connecting a Fiber Optic Cable to an SFP or SFP Transceiver 8 Repeat this procedure to install additional transceivers S2 28 ...

Page 116: ...Chapter 9 Cabling the Networking Ports 116 ...

Page 117: ...sentative for assistance Note The switch may be operating in low power mode which reduces the number of lit LED segments To toggle in and out of low power mode press the eco friendly button on the front panel of the switch Check whether the PSU LED is lit If the PSU LED is green Verify that the PSUs are correctly inserted Each module must be flush with the rear panel of the switch You may need to ...

Page 118: ... the stack Try the following Verify that the stacking transceivers in the S1 and S2 slots of the switches are properly cabled The stacking cables must crossover to different slots on the switches For instructions refer to Chapter 7 Cabling the Stacking Ports on page 91 Verify that the transceivers are fully inserted into the S1 and S2 slots Verify that VCStack is activated on the switches For inst...

Page 119: ...xceed 100 meters 328 feet Verify that you are using the appropriate category of twisted pair cable The cable types are listed in Table 2 on page 24 and Table 3 on page 25 for the 10 100 1000Base T ports Note A 1000Base connection may require five to ten seconds to establish a link Problem 5 The LINK ACT LED for an SFP or SFP transceiver is off Solutions The fiber optic port on the transceiver is u...

Page 120: ...h between the port and the network device This can occur when a twisted pair port using auto negotiation is connected to a remote device that has a fixed speed of 10 or 100 Mbps and a fixed duplex mode of full duplex If this is the cause of the problem adjust the duplex mode of the port on the network device or switch so that both ports are using the same duplex mode You can use either the LEDs or...

Page 121: ...e PD In Mode A the power is carried on pins 1 2 3 and 6 on the RJ 45 port the same pins that carry the network traffic The second mode Mode B defines pins 4 5 7 and 8 as the power carriers The AT IX5 28GPX switch does not support Mode B Most powered devices are designed to accept power by either mode but some legacy devices may only support one mode This can be verified by reviewing the device s d...

Page 122: ...Chapter 10 Troubleshooting 122 ...

Page 123: ...in x 18 9 in Weight 5 4 kg Recommended Minimum Ventilation on All Sides 10 cm 4 0 in Table 10 Environmental Specifications Operating Temperature 0 C to 50 C 32 F to 122 F Storage Temperature 25 C to 70 C 13 F to 158 F Operating Humidity 5 to 90 noncondensing Storage Humidity 5 to 95 noncondensing Maximum Operating Altitude 3 000 m 9 842 ft Maximum Nonoperating Altitude 4 000 m 13 100 ft ...

Page 124: ...T PWR800 PSUs Input Voltage AT PWR800 PSU 100 240 VAC 10 A maximum 50 60 Hz per input Table 12 Product Certifications EMI Emissions FCC Class A EN55022 Class A EN61000 3 2 EN61000 3 3 VCCI Class A CISPR Class A C TICK CE EMC Immunity EN55024 Electrical and Laser Safety EN60950 1 UL EU UL 60950 1 CULUS EN60825 Compliance Marks CE CULUS UL EU C Tick ...

Page 125: ... 45 connectors and ports Figure 69 RJ 45 Socket Pin Layout Front View Table 13 on page 125 lists the pin signals for 10 and 100 Mbps Table 13 Pin Signals for 10 and 100 Mbps Pin MDI Signal MDI X Signal 1 TX RX 2 TX RX 3 RX TX 4 Not used Not used 5 Not used Not used 6 RX TX 7 Not used Not used 8 Not used Not used ...

Page 126: ...Technical Specifications 126 Table 14 lists the pin signals when a port operating at 1000 Mbps Table 14 Pin Signals for 1000 Mbps Pinout Pair 1 Pair 1 2 Pair 1 3 Pair 2 4 Pair 3 5 Pair 3 6 Pair 2 7 Pair 4 8 Pair 4 ...

Page 127: ...t Pinouts Table 15 lists the pin signals of the RJ 45 style serial Console port Table 15 RJ 45 Style Serial Console Port Pin Signals Pin Signal 1 Looped to pin 8 2 Looped to pin 7 3 Transmit Data 4 Ground 5 Ground 6 Receive Data 7 Looped to pin 2 8 Looped to pin 1 ...

Page 128: ...ort Specifications for the AT StackOP 0 3 Module General Maximum Distances 33 m with 62 5 125 µm core cladding multimode fiber optic cable 300 m with 50 125 µm core cladding multimode fiber optic cable Fiber Optic Cable 50 125 µm or 62 5 125 µm core cladding multimode fiber optic cable Transmitter Wavelength 850 nm Output Optical Power 7 3 dBm min Receiver Wavelength 850 nm Maximum Sensitivity 9 9...

Page 129: ...Fiber Optic Port Specifications for the AT StackOP 9 0 Transceiver General Maximum Distances 9 km Fiber Optic Cable 9 125 µm core cladding single mode fiber optic cable Transmitter Wavelength 1310 nm Output Optical Power 8 2 dBm min 0 5 dBm max Receiver Wavelength 1310 nm Maximum Sensitivity 14 4 dBm Maximum Input Power 0 5 dBm ...

Reviews: