


© 2013 Agrowtek Inc.
www.agrowtek.com
| 83 Ambrogio Dr Suite H Gurnee, IL 60031 | [email protected]
63
Network Settings
Changing the IP address
The default IP address as shipped is 192.168.1.99 and assumes a router gateway address of 192.168.1.1 and subnet mask of
255.255.255.0; these are defaults for many standard routers.
To determine the settings to use, log into your router and view the configuration for your network. You may also check the
settings that a computer on the network is using to determine the gateway and subnet mask information.
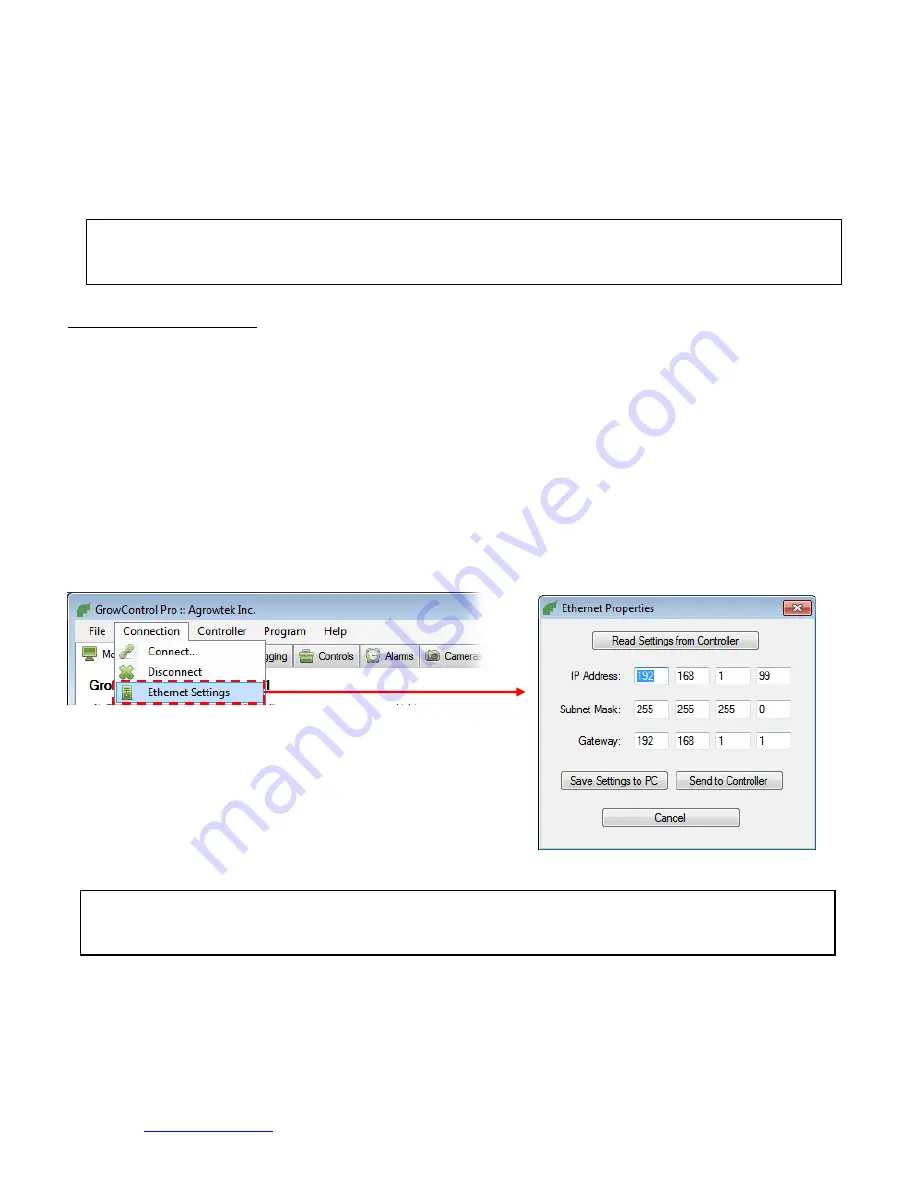
Changing the Ethernet Settings
1.
To change the IP address or Ethernet settings of the controller, you must first connect to the controller via the
standard serial port.
2.
Next, open the “Ethernet Settings” window from the “Connection” menu in the top menu strip. The current settings
as loaded from the configuration file on the computer are shown (these may not match the settings in the controller.)
3.
Update the values from the controller to determine what the settings are in the controller; press the “Read Settings
from Controller” button. Modify the settings as required and then press “Send to Controller.” This will send the
settings to the controller and update the configuration file saved to the PC for future use.
4.
Cycle the power to the controller to set the new Ethernet settings.
NOTE
Each controller must have it’s own unique IP address which is not assigned to any other device on the network.
The subnet mask and gateway must match that of the router that the controller is connected to.
NOTE
It is recommended to assign static IP addresses in the router so that the router
does not automatically assign the controller’s IP to another device.


