


Page 42
Page 41
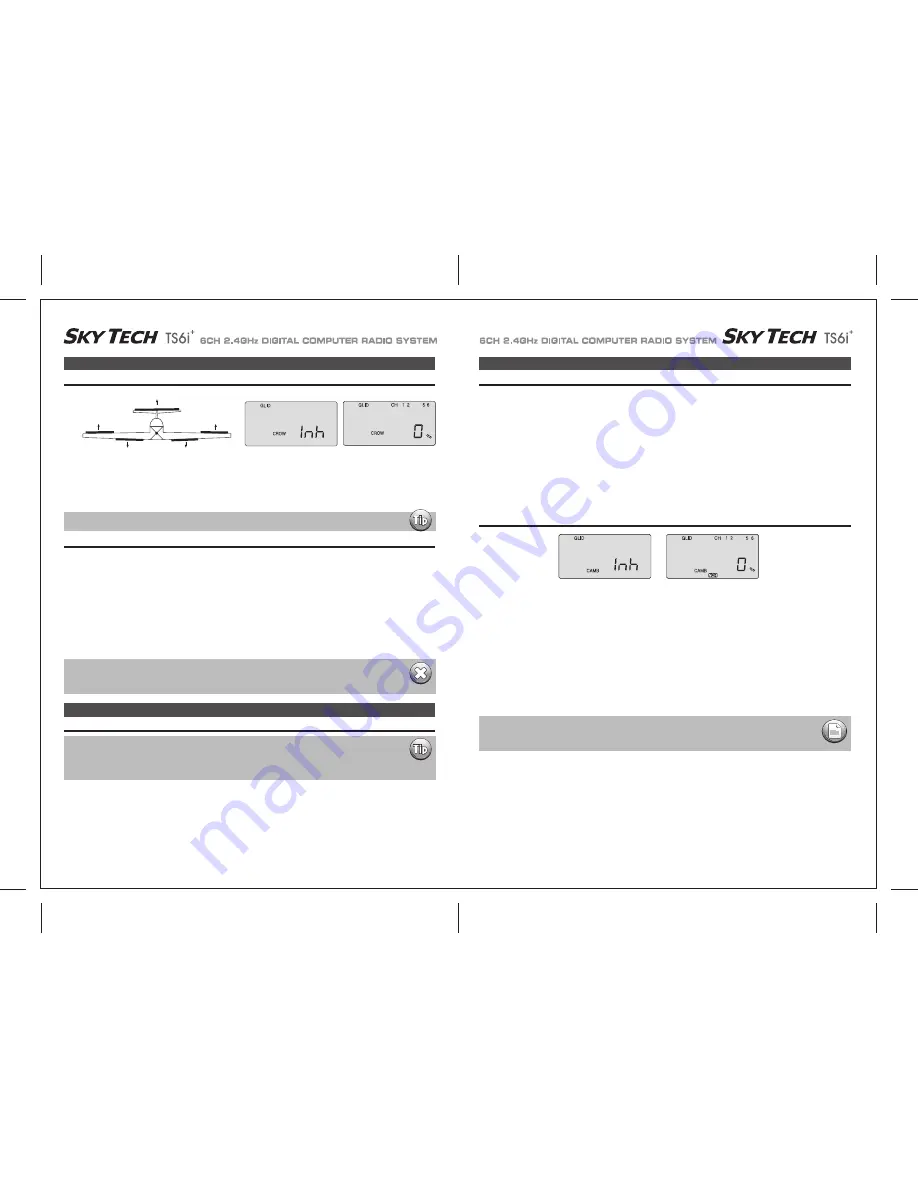
CROW (Glide-Path and Airspeed Control)
CROW (Glide-Path and Airspeed Control)
CAMB (Wing Camber)
In this screen you can activate the CROW air-brake and glide path control function and set the values for the aileron, flap and elevator servo
movements. The more CROW you apply during the landing approach (with the left-hand joystick), the more the glide path steepens and the
glider slows down.
Because you can regulate the amount of CROW, you can precisely control where and how slowly the glider lands-an important factor for
landing on limited-length runways (gliders are generally a lot more "slippery" than power planes!) and in contests where you are rewarded
points for landing on a target.
When flying gliders featuring modern, thin airfoils the ability to change the shape of the airfoil by reflexing (raising) or cambering (lowering) the
trailing edge in combination with making simultaneous, slight changes in elevator trim is crucial to optimizing the performance of the model in
a variety of flight conditions and tasks.
The Sky Tech TS6i
+
offers a selection of up to four flight condition modes in which you can program varying amounts of aileron, flap and
elevator trim (as well as dual-rate and exponential values).
These modes are activated by either switch SW-3 or SW-1.
A typical example for setting up a discus-launched glider for optimum performance would consist of these three flight modes (which are all
assigned to SW-3):
(CROW raises the ailerons and lowers the flaps when you move the left-hand joystick toward the bottom of the transmitter case)
CROW (Glide-Path and Airspeed Control)
CAMB (Wing Camber)
1) Activate the function by pressing both DATA buttons simultaneously.
2) Watching the motion of the control surfaces on your model, set the value for each of the servos with the left-hand joystick pulled all the
way to the bottom of the transmitter case.
Begin with the aileron servos in CH 1 and CH 5: Unless the servos buzz and stall, set both ailerons to rise to approximately 50% of their
travel.
Don't make this value too large, as you still need to control the aircraft's roll rate with the ailerons.
upward (Note that you can go to a negative value % to reverse the direction of the movement of one of the aileron servos if necessary).
3) Set the flap servo on CH 6 to 75% of their travel (If you have two flap servos, they should be connected with a Y-harness to the channel 6
slot on the receiver)
4) Finally, curser to CH 2 and set the elevator travel value so the elevator moves down just a bit for pitch control: 15% is a good starting point,
though in-flight testing is necessary for making true, final adjustments.
Setting Up CROW
Launch:
When switch SW-3 is pulled toward you the ailerons and flaps will rise together slightly to "reflex" the airfoil for high-speed flight and the
elevator will kick up a few degrees to rotate the model vertical in the first 5 seconds or so of flight.
Cruise:
When you push switch SW-3 to the middle position, the ailerons and flaps will come even with the trailing edge and the elevator will move
down very slightly (relative to its normal angle of incidence). This allows the glider to quickly fly between thermals and through areas of sink.
Thermal:
With the SW-3 switch pushed away from you, the ailerons and flaps will droop down 3/6-in. and the elevator will come up a few degrees from
its normal angle of incidence.
This is the mode to be in when you suspect you have hooked into a thermal. The glider is now at its lowest sink rate and can fly just above a
stall to allow you to turn tightly and keep in the small core of the thermal.
1. The first step is to leave this screen and move down to the Flight Condition (FLT C) screen in order to put the wing camber and elevator
action of each mode on the three-position SW-3 "FLT Mode" switch on the upper right-hand top of the transmitter case.
Use the Right EDIT button to move down to the FLT C screen.
2. Now activate what will be the "launch" mode by moving the switch position toward you and then hitting both DATA buttons. The "Inh"
symbol will change to "On" and ST2 will be blinking.
Move the switch all the way back and, in the same way, activate switch position ST1 which will become our "thermal" mode.
The middle, normal position (NOR) is "cruise".
You can, of course, reverse the launch and thermal positions to what feels intuitive to you.
3. Now scroll back up to the CAMB screen with an EDIT button and move the switch SW-3 toward you to the "launch" mode position.
Turn your model on so you can watch the control surfaces move.
4. With CH 1 blinking, change the servo's travel value with a DATA button until the right wing's aileron comes up to the airfoil's reflex position.
5. Using the right-hand CURSOR button, move to CH 2 and adjust the travel of the elevator upward a few degrees.
CURSOR to CH 6 and reflex the left wing's aileron.
If your trailing edge also has flaps, CURSOR to CH 5 and change their value to match that of the ailerons.
6. Now move switch SW-3 to the center, normal position and follow the same process to set the trailing edge control surfaces and the elevator
to the appropriate values for the "cruise" mode.
7. Finally, move SW-3 to the thermal position and adjust all the values there.
When done, move away from this screen and/or turn off the transmitter.
As always, plan on adjusting the trailing edge and elevator settings in the CAMB screen after flight testing to optimize their affect on
performance.
ADIF (Aileron Differential)
Setting Up Flight Mode Wing Camber and Elevator Compensation
NOTE:
Ask the manufacturer of your glider for their recommendation for reflex-and thermal-trailing
edge positions.
You must have A.DIF activated for ch. 5 to appear on the CROW screen
SAFETY WARNING:
When checking out the in-flight response of your model to the crow settings, be sure to first gain at
least 200 feet of altitude to allow time for you to recover from any loss of control.
While the Camber function also appears in the ACRO menu, the use of this feature is significantly
different for Sailplanes than it is with Power planes. Please refer to the instructions below to understand
how to make the most effective use of Camber on your Sailplane.
A solid understanding of the Flight condition feature will help when programming wing Camber.


