Appendix C
SA7
C-2
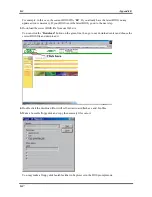
Step 5:
Now you can choose the folder for the
destination location you want. We suggest that
you use the default folder as the destination
location. When you are sure of the folder, click
“
Next>
” to go on.
Step 6:
Now you can select the program folder.
The setup wizard will add program icons to those
program folders listed. Click “
Next>
” to go on.
Step 7:
When the “
File Association
” dialogue
shows up, you can choose the file type you like
to associate with the C-Media chip. When you
finish selecting, click “
Next>
” to go on.
Step 8:
Setup program has enough information to
coping the program files, click “
Next>
” to go on.
Step 9:
Setup complete dialogue box show up,
Click “
Finish>
” to complete setup.
Step 10:
Now starting the installation procedure.


