background image

1.

Set the port for IEC use on the local HMI under 

Main menu /

Configuration /Communication /Station communication/Port
configuration/SLM optical serial port/PROTOCOL:1

. When the

communication protocol is selected, the IED is automatically restarted, and
the port then operates as an IEC port.

2.

Set the 

SlaveAddress

 and 

BaudRate

 for the rear IEC port on the local HMI

under 

Main menu/Configuration/Communication/Station

communication/IEC60870-5-103/OPTICAL103:1

. Use the same settings

for these as is set in the SMS system for the IED.

6.2 

Verifying the communication

M11735-77 v1

To verify that the rear communication with the SMS/SCS system is working, there
are some different methods. Choose one of the following.

6.2.1 

Verifying SPA communication

M11735-81 v5

Procedure

1.

Use a SPA-emulator and send “RF” to the IED. The answer from the IED
should be the type and version of it, for example, “REL650 2.1...”.

2.

Generate one binary event by activating a function, which is configured to an
EVENT block where the used input is set to generate events on SPA. The
configuration must be made with the PCM600 software. Verify that the event
is presented in the SMS/SCS system.

During the following tests of the different functions in the IED, verify that the
events and indications in the SMS/SCS system are as expected.

6.2.2 

Verifying IEC communication

M11735-91 v2

To verify that the IEC communication with the IEC master system is working,
there are some different methods. Choose one of the following.

Procedure

1.

Check that the master system time-out for response from the IED, for
example after a setting change, is > 40 seconds.

2.

Use a protocol analyzer and record the communication between the IED and
the IEC master. Check in the protocol analyzer’s log that the IED answers the
master messages.

3.

Generate one binary event by activating a function that is configured to an
event block where the used input is set to generate events on IEC. The
configuration must be made with the PCM600 software. Verify that the event
is presented in the IEC master system.

Section 6

1MRK 506 383-UEN A

Establishing connection and verifying the SPA/IEC communication

50

Line distance protection REL650 2.2 IEC

Commissioning manual

Summary of Contents for REL650 series

Page 1: ...RELION 650 SERIES Line distance protection REL650 Version 2 2 Commissioning manual...

Page 2: ......

Page 3: ...Document ID 1MRK 506 383 UEN Issued October 2017 Revision A Product version 2 2 1 Copyright 2017 ABB All rights reserved...

Page 4: ...rms of such license This product includes software developed by the OpenSSL Project for use in the OpenSSL Toolkit http www openssl org This product includes cryptographic software written developed b...

Page 5: ...roduct failure would create a risk for harm to property or persons including but not limited to personal injuries or death shall be the sole responsibility of the person or entity applying the equipme...

Page 6: ...d concerning electrical equipment for use within specified voltage limits Low voltage directive 2006 95 EC This conformity is the result of tests conducted by ABB in accordance with the product standa...

Page 7: ...up protection functions 24 Control and monitoring functions 25 Communication 28 Basic IED functions 30 Section 4 Starting up 33 Factory and site acceptance testing 33 Commissioning checklist 33 Checki...

Page 8: ...col 54 Hardware and software modules 54 Optical budget calculation for serial communication with LON 56 Section 8 Testing IED operation 57 Preparing for test 57 Requirements 57 Preparing the IED to ve...

Page 9: ...PSB 78 Verifying the settings 79 Testing the power swing detection function ZMRPSB 80 Testing the tR1 timer 80 Testing the block input interaction between FDPSPDIS or FRPSPDIS and ZMRPSB 81 Completing...

Page 10: ...alues 109 Completing the test 114 Breaker failure protection phase segregated activation and output CCRBRF 114 Checking the phase current operate value IP 114 Checking the residual earth fault current...

Page 11: ...erate as expected 131 Measuring the operate value for the negative sequence function 131 Measuring the operate value for the zero sequence function 133 Measuring the operate value for the dead line de...

Page 12: ...overcurrent protection ECPSCH 153 Testing the directional comparison logic function 153 Completing the test 154 Current reversal and weak end infeed logic for residual overcurrent protection ECRWPSCH...

Page 13: ...rifying the settings 168 Completing the test 170 Station communication 170 Multiple command and transmit MULTICMDRCV MULTICMDSND 170 Basic IED functions 170 Parameter setting group handling SETGRPS 17...

Page 14: ...cause of an internal failure 183 Self supervision HMI data 183 General IED status 183 Fault tracing 184 Internal fault indications 184 Using front connected PC 185 Diagnosing the IED status via the LH...

Page 15: ...hapters are organized in the chronological order in which the IED should be commissioned The relevant procedures may be followed also during the service and maintenance activities 1 2 Intended audienc...

Page 16: ...roject structure The manual also recommends a sequence for the engineering of protection and control functions LHMI functions as well as communication engineering for IEC 60870 5 103 IEC 61850 DNP3 LO...

Page 17: ...g parameters and technical data sorted per function The manual can be used as a technical reference during the engineering phase installation and commissioning phase and during normal service The comm...

Page 18: ...ual IEC 61850 Edition 2 1MRK 511 415 UEN Communication protocol manual LON 1MRK 511 417 UEN Communication protocol manual SPA 1MRK 511 418 UEN Point list manual DNP3 1MRK 511 419 UUS Accessories guide...

Page 19: ...may result in degraded process performance leading to personal injury or death It is important that the user fully complies with all warning and cautionary notices 1 4 2 Document conventions GUID 96DF...

Page 20: ...diagram and continue in another diagram have the suffix cont Illustrations are used as an example and might show other products than the one the manual describes The example that is illustrated is sti...

Page 21: ...CALH INDCALH INDCALH ITBGAPC IB16FCVB ITBGAPC L4UFCNT L4UFCNT L4UFCNT LCPTTR LCPTTR LCPTTR LD0LLN0 LLN0 LLN0 LDLPSCH LDLPDIF LDLPSCH LFPTTR LFPTTR LFPTTR LMBRFLO LMBRFLO LMBRFLO LOVPTUV LOVPTUV LOVPTU...

Page 22: ...C SP16GAPC SP16GGIO SP16GAPC SPC8GAPC SPC8GGIO SPC8GAPC SPGAPC SPGGIO SPGAPC SSCBR SSCBR SSCBR SSIMG SSIMG SSIMG SSIML SSIML SSIML SXCBR SXCBR SXCBR SXSWI SXSWI SXSWI T3WPDIF T3WPDIF T3WGAPC T3WPDIF T...

Page 23: ...s ZCPSCH ZCPSCH ZCPSCH ZCRWPSCH ZCRWPSCH ZCRWPSCH ZCVPSOF ZCVPSOF ZCVPSOF ZMFPDIS ZMFLLN0 PSFPDIS ZMFPDIS ZMFPTRC ZMMMXU PSFPDIS PSFPDIS ZMFPDIS ZMFPTRC ZMMMXU 1MRK 506 383 UEN A Section 1 Introductio...

Page 24: ...18...

Page 25: ...4 1 v2 Observe the warnings during all types of work related to the product GUID C9B6638A 57E7 4E05 9A33 A60E359C54AF v1 Only electrically skilled persons with the proper authorization and knowledge o...

Page 26: ...iguration This is class 1 equipment that shall be earthed M2367 2 v1 Never disconnect the secondary connection of current transformer circuit without short circuiting the transformer s secondary windi...

Page 27: ...cuitry may be damaged M2697 2 v2 Always use a conductive wrist strap connected to protective earth when replacing modules Electrostatic discharge ESD may damage the module and IED circuitry M2698 2 v2...

Page 28: ...22...

Page 29: ...3 option quantities 3 A03 optional function included in packages A03 refer to ordering details IEC 61850 or function name ANSI Function description Line Distance REL650 A11 REL650 A12 Impedance protec...

Page 30: ...nt and power protection 1 LCPTTR 26 Thermal overload protection one time constant Celsius 1 1 LFPTTR 26 Thermal overload protection one time constant Fahrenheit 1 1 CCRBRF 50BF Breaker failure protect...

Page 31: ...8 signals 5 5 AUTOBITS Automation bits command function for DNP3 0 3 3 SINGLECMD Single command 16 signals 4 4 I103CMD Function commands for IEC 60870 5 103 1 1 I103GENCMD Function commands generic fo...

Page 32: ...transgression and overflow supervision 12 12 INTCOMP Comparator for integer inputs 30 30 REALCOMP Comparator for real inputs 30 30 Table 3 Total number of instances for basic configurable logic block...

Page 33: ...gical signal status report 3 3 RANGE_XP Measured value expander block 66 66 LMBRFLO Fault locator 1 1 I103MEAS Measurands for IEC 60870 5 103 1 1 I103MEASUSR Measurands user defined signals for IEC 60...

Page 34: ...P DNP3 0 for TCP IP communication protocol 1 1 DNPFREC DNP3 0 fault records for TCP IP and EIA 485 communication protocol 1 1 IEC 61850 8 1 IEC 61850 1 1 GOOSEINTLKRCV Horizontal communication via GOO...

Page 35: ...1 P24 PTP Precision time protocol 1 1 FRONTSTATUS Access point diagnostic for front Ethernet port 1 1 SCHLCCH Access point diagnostic for non redundant Ethernet port 4 4 RCHLCCH Access point diagnosti...

Page 36: ...lock function SMBI Signal matrix for binary inputs SMBO Signal matrix for binary outputs SMAI1 SMAI12 Signal matrix for analog inputs 3PHSUM Summation block 3 phase ATHSTAT Authority status ATHCHCK Au...

Page 37: ...PCM600 LEDGEN General LED indication part for LHMI OPENCLOSE_LED LHMI LEDs for open and close keys GRP1_LED1 GRP1_LED15 GRP2_LED1 GRP2_LED15 GRP3_LED1 GRP3_LED15 Basic part for CP HW LED indication mo...

Page 38: ...32...

Page 39: ...as New IED type New configuration Modified configuration Site acceptance testing SAT or commissioning testing is typically done to verify that the installed IED is correctly set and connected to the p...

Page 40: ...4 4 1 Checking the IED operation M11726 2 v7 Check all connections to external circuitry to ensure correct installation before energizing the IED and carrying out the commissioning procedures Energiz...

Page 41: ...US Figure 2 Typical IED start up sequence 1 IED energized Green LED instantly starts flashing 2 LCD lights up and IED startup is displayed 3 The main menu is displayed A steady green light indicates...

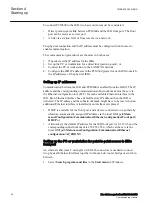
Page 42: ...e in the IED Each Ethernet interface has a default factory IP address when the IED is delivered The IP adress and the subnetwork mask might have to be reset when an additional Ethernet interface is in...

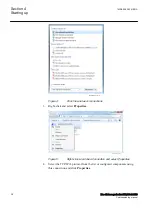
Page 43: ...1 EN US Figure 3 Select Search programs and files 2 Type View network connections and click on the View network connections icon 1MRK 506 383 UEN A Section 4 Starting up Line distance protection REL65...

Page 44: ...13000059 1 en vsd IEC13000059 V1 EN US Figure 5 Right click Local Area Connection and select Properties 4 Select the TCP IPv4 protocol from the list of configured components using this connection and...

Page 45: ...dress and define IP address and Subnet mask if the front port is used and if the IP address is not set to be obtained automatically by the IED see Figure 7 The IP address must be different from the IP...

Page 46: ...connecting to the front port The PC and IED must belong to the same subnetwork for this set up to work 4 6 Writing an application configuration to the IED M11734 2 v6 When writing a configuration to...

Page 47: ...ce measurement to confirm that the current transformer secondary loop DC resistance is within the specification for the connected protection functions When the measured loop resistance is near the cal...

Page 48: ...equipment care shall be exercised to isolate the VT from the circuit being tested to avoid backcharging the VT from the secondary side 4 9 Using the RTXP test switch GUID F1E29C06 7FE8 44D8 AD5A EE899...

Page 49: ...cuits M11722 2 v4 Do not insert anything else to the female connector but the corresponding male connector Inserting anything else such as a measurement probe may damage the female connector and preve...

Page 50: ...pped with optical connections has an minimum space requirement of 180 mm for plastic fiber cables and 275 mm for glass fiber cables Check the allowed minimum bending radius from the optical cable manu...

Page 51: ...to be established before the settings can be written to the IED Make sure that the DC supply is not turned off when the IED saves the written configuration The IED uses a FLASH disk for storing config...

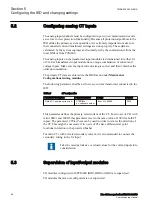
Page 52: ...very current transformer connected to the IED Table 6 CT configuration Parameter description Parameter name Range Default Rated CT primary current in A CTPRIMn n channel number from 0 to 99999 3000 Th...

Page 53: ...r module failure The error flag is also set when the physical I O module of the correct type is not detected in the connected slot 1MRK 506 383 UEN A Section 5 Configuring the IED and changing setting...

Page 54: ...48...

Page 55: ...cation Port configuration SLM optical serial port PROTOCOL 1 When the communication protocol is selected the IED is automatically restarted and the port then operates as a SPA port 2 Set the SlaveAddr...

Page 56: ...used input is set to generate events on SPA The configuration must be made with the PCM600 software Verify that the event is presented in the SMS SCS system During the following tests of the different...

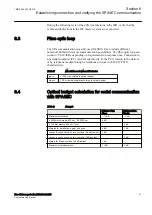
Page 57: ...istances between IEDs nodes glass 1000 m according to optical budget plastic 25 m inside cubicle according to optical budget 6 4 Optical budget calculation for serial communication with SPA IEC M11736...

Page 58: ...52...

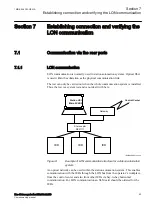
Page 59: ...Center IED IED IED Gateway Star coupler RER 111 Station HSI MicroSCADA IEC05000663 1 en vsd IEC05000663 V2 EN US Figure 8 Example of LON communication structure for a station automation system An opti...

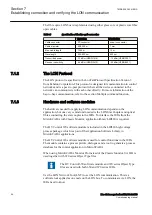
Page 60: ...pplication but one very central unit needed is the LON Star Coupler and optical fibres connecting the star coupler to the IEDs To interface the IEDs from the MicroSCADA with Classic Monitor applicatio...

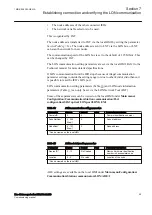
Page 61: ...information parameters Table 11 can only be set via the LON Network Tool LNT Some of these parameters can be viewed on the local HMI under Main menu Configuration Communication Station communication P...

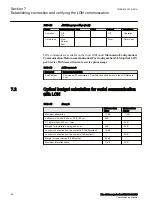
Page 62: ...s to the LON Network Tool 7 2 Optical budget calculation for serial communication with LON M11737 4 v2 Table 14 Example Distance 1 km Glass Distance10 m Plastic Maximum attenuation 11 dB 7 dB 4 dB km...

Page 63: ...guration of all the binary inputs and outputs Therefore before testing check that the available terminal diagram corresponds to the IED The technical manual contains application and functionality summ...

Page 64: ...t be interpreted as analog values received from merging units MU via IEC UCA 61850 9 2LE communication protocol analog values received from the transformer input module or analog values received from...

Page 65: ...ude analog information and so on Check the disturbance report settings to ensure that the indications are correct For information about the functions to test for example signal or parameter names see...

Page 66: ...743 2 v8 The IED can be equipped with a test switch of type RTXP8 RTXP18 or RTXP24 The test switch and its associated test plug handle RTXH8 RTXH18 or RTXH24 are a part of the COMBITEST system which p...

Page 67: ...to the IED M11744 2 v8 Connect the test equipment according to the IED specific connection diagram and the needed input and output signals for the function under test An example of a connection is sho...

Page 68: ...output contacts including logic must be activated Before starting a new test mode session scroll through every function to ensure that only the function to be tested and the interconnected ones have...

Page 69: ...ule can be verified as follows Apply input signals as needed according to the actual hardware and the application configuration 1 Inject a symmetrical three phase voltage and current at rated value 2...

Page 70: ...e set to a value i e active or not active selected by the user while the IED is in test mode For inputs this is true regardless of the actual signal voltage present on the input For outputs any output...

Page 71: ...IED test mode 8 8 3 How to change binary input output signals using forcing GUID 7DF9FAF1 68B1 49AF 9DE4 2A8D6F6FAEFE v1 Once the IED is in IED test mode the LHMI PCM600 menus can be used to control i...

Page 72: ...rrow is pressed i e there is no need to press the Enter key to effectuate the change When navigating away from a LHMI forcing menu for an I O board the user is prompted to either leave the signals for...

Page 73: ...F9 943E 42039015D05B v1 In PCM600 the concept is a bit different compared to LHMI The forcing is accomplished by entering a forcing session Within such a session multiple signals on multiple I O board...

Page 74: ...that can be edited IEC15000025 V1 EN US 5 Select and edit the values 6 Click Acknowledge and send IEC15000026 V1 EN US This commits the values to the IED and exits the editing session 7 Click Cancel...

Page 75: ...state which can be potentially dangerous 8 8 4 1 Undo forcing by using TESTMODE component GUID CA5CCA57 DFFF 4362 AC1D 08738D2BA45F v2 If the IED test mode was entered through the test mode function b...

Page 76: ...es will immediately take effect again This may change both binary input values and output relay states and will undo any forcing done by using the LHMI If the IED is left in test mode then it is still...

Page 77: ...de the disturbance report can be made active or inactive If the disturbance recorder is turned on during test mode recordings will be made When test mode is switched off all recordings made during the...

Page 78: ...ed from PCM600 Disturbance files can be analyzed by any tool reading Comtrade formatted disturbance files It could be useful to have a printer for hard copies The correct start criteria and behavior o...

Page 79: ...ed in section Requirements and section Preparing for test in this chapter Measure operating characteristics during constant current conditions Keep the measured current as close as possible to its rat...

Page 80: ...e valid Test points 5 6 and 7 are not valid for this measurement X1Zx X R Ohm phase 50 80 1 2 3 4 5 6 7 8 9 10 11 80 of RLdFw 40 of RLdFw 12 13 120 20 a c IEC05000368 4 en vsdx 0 5 x RFPPZx IEC0500036...

Page 81: ...tan ArgNegRes 30 R 0 37 x X1 set 12 X 0 5 x X1set R 0 5 x R1set 13 X 0 R 0 5 x RFPPZx Table 15 is used in conjunction with figure 12 X1Zx XNZx X R Ohm loop 50 80 1 2 3 4 5 6 7 8 9 10 11 80 of RLdFw 4...

Page 82: ...Dir 20 R 0 8 x RLdFwset 9 X 0 8 x RLdFwset x tan ArgDir 20 0 8 x RLdFwdset x tan ArgDir 20 R 0 8 x RLdFwset 10 X 0 17 x 2 x X1set X0 set Exact 0 5 x 2 x X1set X0 set 3 R 0 36 x 2 x X1set X0set Exact 0...

Page 83: ...pedance zones set with directionality forward or reverse 9 3 1 2 Measuring the operating time of distance protection zones GUID BB93C603 F43E 40CB 8EFA 3B0F280C011D v5 Procedure 1 Subject the IED to h...

Page 84: ...X1InRv See figure 14 The corresponding resistive border for the inner resistive boundary and outer resistive boundary is calculated automatically from the setting of kLdRFw and kLdRRv The inner zone o...

Page 85: ...here RLdInFw RLdOutFw kLdRFw RLdInRv RLdOutRv kLdRRv X1OutFw X1InFw RLdOutFw RLdInFw X1OutRv X1InRv RLdOutFw RLdInFw 9 3 2 1 Verifying the settings M13888 11 v6 Preconditions The following output sign...

Page 86: ...g detection 1 Slowly decrease the measured impedance in all three phases until the START signal gets activated 2 Increase the measured voltages to their rated values 3 Decrease instantaneously voltage...

Page 87: ...swing 9 3 2 5 Completing the test M13888 99 v5 Continue to test another function or end the test by changing the TESTMODE setting to Off Restore connections and settings to their original values if th...

Page 88: ...tripping zone needs to be detected and confirmed The test may be performed by taking into account the following key points that are shown in Figure 15 the point RE RE Receiving End the intersection be...

Page 89: ...ReachZ1 12 then corresponding primary value of the reactance is X ReachZ ForwardX ZBase RZ1 1 100 100 12 100 59 33 100 0 9522 0 0 068 EQUATION14044 V1 EN US Equation 4 The calculation of the test vol...

Page 90: ...jections by a test set Primary values are transferred to secondary values by taking into account the CT ratio and the VT ratio respectively 9000 1 A and 13 8 0 1 kV in the example The magnitude of the...

Page 91: ...1 and 2 of the R X plane arctan ReverseX ReverseR 180 for tests in the quadrant 3 and 4 of the R X plane Symmetric three phase current where the current is the summation of two currents that have the...

Page 92: ...ct three phase voltage channels of the test set to the appropriate IED terminals 3 Connect in parallel two groups of three phase currents of the test set to the appropriate IED terminals 4 Connect the...

Page 93: ...ic even if it is close to the point RE Neither START nor TRIP is issued Execution of the dynamic test GUID 0B73C849 107D 40DC 80BB 31CD441BF69A v1 The test may be performed by using two states of a se...

Page 94: ...5 Hz Expected result the protection function does not issue either start or trip The trajectory of the impedance traverses the lens characteristic in zone 2 GUID 9F0FE404 6D83 4308 9FE4 13259CE7D07A...

Page 95: ...zone 2 that is close to the point RE The START is issued but no TRIP is performed Execution of the dynamic test GUID 028D7D67 B61A 4A7F 9978 4A0A41231B04 v1 The test may be performed by using two stat...

Page 96: ...otection function and trip in zone 2 when trip conditions are fulfilled 9 3 3 3 Test of the boundary between zone 1 and zone 2 which is defined by the parameter ReachZ1 GUID BE180E07 7D4B 4842 81FB 24...

Page 97: ...Note that these values identify a point inside the lens characteristic in the Zone 2 that is close to the boundary between zone 1 and zone 2 The START is issued but no TRIP is performed Execution of t...

Page 98: ...1 9000 1 162 EQUATION14062 V1 EN US Equation 46 Itfs 180 frequency of Itfs 49 5 Hz Expected result start of the protection function and trip in zone 2 when trip conditions are fulfilled The trajector...

Page 99: ...Note that these values identify a point inside the lens characteristic in zone 1 that is close to the boundary between zone 1 and zone 2 The START is issued but no TRIP is performed Execution of the...

Page 100: ...R ts arctan arctan 59 33 8 19 82 14 EQUATION14058 V1 EN US Equation 54 frequency of Vts 50 Hz I I I I A s CTs CTp 50 50 10459 1 9000 1 162 EQUATION14059 V1 EN US Equation 55 I50s 0 frequency of I50s 5...

Page 101: ...arctan 180 90 56 0 29 ts ReverseX V ReverseR EQUATION14068 V1 EN US Equation 58 frequency of Vts 50 Hz I I I I A s CTs CTp 50 50 10459 1 9000 1 162 EQUATION14059 V1 EN US Equation 59 I50s 0 frequency...

Page 102: ...s ReverseX V ReverseR EQUATION14068 V1 EN US Equation 62 frequency of Vts 50 Hz I50s 0 A Itfs 0 A State 2 main test step Define the following three phase symmetrical quantities the phase angle is rela...

Page 103: ...60 arctan 180 arctan 180 90 56 0 29 ts ReverseX V ReverseR EQUATION14068 V1 EN US Equation 68 frequency of Vts 50 Hz I I I I A s CTs CTp 50 50 10459 1 9000 1 162 EQUATION14059 V1 EN US Equation 69 I5...

Page 104: ...s ReverseX V ReverseR EQUATION14068 V1 EN US Equation 72 frequency of Vts 50 Hz I50s 0 A Itfs 0 A State 2 main test step Define the following three phase symmetrical quantities the phase angle is rela...

Page 105: ...onent 9 3 4 Automatic switch onto fault logic ZCVPSOF M13850 2 v9 Prepare the IED for verification of settings outlined in Section Preparing the IED to verify settings The automatic switch onto fault...

Page 106: ...ult at approximately 45 of the line or with impedance at 50 of the used zone setting and current greater than 30 of IBase The ZACC input is activated 5 Check that the correct TRIP output external sign...

Page 107: ...ction In the test one of the current inputs one of the faulted phases is disconnected The remaining current is the fault current out on the protected line All combinations of two phase to earth faults...

Page 108: ...2 and 3 The Signal Monitoring in PCM600 shows the same signals that are available on the local HMI To verify the settings the following fault type should be tested Phase to earth fault Ensure that the...

Page 109: ...s Current protection PhaseOverCurrent4Step 51_67 4 3I OC4PTOC 51_67 4 3I x where x instance number The Signal Monitoring in PCM600 shows the same signals that are available on the local HMI 9 4 2 1 Ve...

Page 110: ...re it to the set value 3 3 Decrease the current slowly note the reset value and compare it to the reset ratio 95 4 If the test has been performed by injection of current in phase L1 repeat the test in...

Page 111: ...rent supplied from the current source used for the test of the IED does not exceed four times the rated current value of the IED 9 4 3 1 Measuring the operate limit of set values SEMOD52967 11 v9 1 In...

Page 112: ...ltage by an angle equal to RCA 180 3 Increase the injected current and note the value at which the studied step of the function operates 4 Decrease the current slowly and note the reset value 5 If the...

Page 113: ...and voltages to the appropriate CT and VT inputs of the IED 2 Inject pure negative sequence current that is phase currents with exactly same magnitude reversed sequence and exactly 120 phase displaced...

Page 114: ...nally check that start and trip information is stored in the event menu 9 4 5 1 Completing the test SEMOD53296 122 v4 Continue to test another function or end the test by changing the TESTMODE setting...

Page 115: ...I0 i e RCADir Change to for example 45 degrees Increase the injected current until the function operates 4 Compare the result with the set value and make sure that the new injected 3I0 cos is equal to...

Page 116: ...CADir 0 3I j 0 3 j I cos 0 3 ref U U IEC06000650 V2 EN US Figure 18 Characteristic with ROADir restriction Section 9 1MRK 506 383 UEN A Testing functionality by secondary injection 110 Line distance p...

Page 117: ...N setting for the set directional element Note that for operation both the injected current and voltage must be greater than the set values INRel and UNRel respectively The function activates the STAR...

Page 118: ...is equal to the INDir setting for the set directional element Note that for operation both the injected current and voltage must be greater than the set values INRel and UNRel respectively The functi...

Page 119: ...esidual overvoltage release and protection SEMOD175060 131 v6 Procedure 1 Measure that the operate voltage is equal to the UN setting The function activates the START and STUN signals 2 Measure the op...

Page 120: ...e checked by single phase injection where the return current is connected to the summated current input The value of residual earth fault current IN set lower than IP is easiest checked in back up tri...

Page 121: ...9 4 7 4 Verifying the re trip mode M12104 36 v6 Choose the mode below which corresponds to the actual case In the cases below it is assumed that FunctionMode Current is selected Checking the case with...

Page 122: ...ipMode 1 out of 3 should have been verified in the tests above In applicable cases the modes 1 out of 4 and 2 out of 4 can be checked Choose the mode below which corresponds to the actual case Checkin...

Page 123: ...ontact M12104 237 v6 To be made only when FunctionMode Current Contact is selected It is suggested to make the tests in one phase only or at three phase trip applications for just three phase tripping...

Page 124: ...reparing the IED to verify settings 9 4 8 1 Verifying the settings SEMOD55625 63 v8 1 External detection logic Contact function selection ContSel setting equals CCPDSC signal from CB Activate the EXTP...

Page 125: ...D NO TRIP signal should appear 9 4 8 2 Completing the test SEMOD55625 106 v4 Continue to test another function or end the test by changing the TESTMODE setting to Off Restore connections and settings...

Page 126: ...0 UBase Restrain voltage StartCurr IBase CT CTprim 100 sec IECEQUATION2434 V1 EN US Equation 82 Example rated secondary current 1A CT ratio 10 000 1A VT ratio 10 kV 100 V StartCurr 100 VDepFact 25 UHi...

Page 127: ...n order to stop the injection and measure the trip time 8 If definite time delay is used for the overcurrent step set the setting Characterist IEC Def Time Apply the voltages related to the last part...

Page 128: ...eal in it is necessary to first inject sufficient current to activate the STOC signal before the under voltage step is allowed to operate In order to achieve that apply symmetric three phase voltages...

Page 129: ...de 2 Supply the IED with three phase voltages at their rated values 3 Slowly decrease the voltage in one of the phases until the START signal appears 4 Note the operate value and compare it with the s...

Page 130: ...erse time characteristic at different voltage levels 11 Repeat the above described steps for Step 2 of the function Extended testing M13796 35 v8 The tests above can be repeated for 2 out of 3 and for...

Page 131: ...lay by injecting a voltage corresponding to 1 2 U1 8 Repeat the test to check the inverse time characteristic at different over voltage levels 9 Repeat the above described steps for Step 2 of the func...

Page 132: ...a time corresponding to the equation t s k U U 1 1 1 IECEQUATION2429 V1 EN US Equation 90 where t s Operate time in seconds k1 Settable time multiplier of the function for step 1 U Measured voltage U...

Page 133: ...ng it for a time that is at least 10 longer than tDelay 100ms 9 Measure the time delay of the TRIP signal and compare it with the set value tDelay Note that the measured time consists of the set value...

Page 134: ...Decrease the frequency to rated operating conditions 6 Check that the START signal resets 7 Set the frequency to 20 mHz under the operate value 8 Increase the frequency with a 40 mHz step applying it...

Page 135: ...a rather small negative value 2 Supply the IED with three phase voltages at their rated values 3 Slowly decrease the frequency of the applied voltage with an increasing rate of change that finally exc...

Page 136: ...hree phases by injecting current one phase at a time The output signals shall reset with a delay of 1 second when the current exceeds 1 5 IBase 3 Inject a current 0 1 IBase to the reference current in...

Page 137: ...al 6 Disconnect one of the phase voltages and observe the logical output signals on the binary outputs of the IED BLKU and BLKZ signals should appear simultaneously wether the BLKU and BLKZ reset depe...

Page 138: ...erating voltage consider that the set value 3U2 is in percentage of the base voltage UBase 5 Repeat steps 1 and 2 Then slowly increase the measured current in one phase until the BLKU signal disappear...

Page 139: ...ed current in one phase until the BLKU signal disappears 6 Record the measured current and calculate the corresponding zero sequence current according to the equation observe that the currents in the...

Page 140: ...s if the remaining voltage levels are lower than the set UDLD of the dead line detection function 3 Apply normal conditions as in step 1 The BLKU BLKZ and 3PH signals should reset if activated see ste...

Page 141: ...ation of the voltage selection function if applicable The tests explained in the test procedures below describe the settings which can be used as references during testing before the final settings ar...

Page 142: ...inputs on the IED UP3BB1 Bus1 voltage input on the IED Testing the frequency difference M2377 116 v11 The frequency difference test should verify that operation is achieved when the frequency differen...

Page 143: ...he voltage difference M2377 194 v8 Set the voltage difference to 0 15 p u on the local HMI and the test should check that operation is achieved when the voltage difference UDiffSC is lower than 0 15 p...

Page 144: ...activated for a phase difference lower than the set value It should not operate for other values See figure 22 dj dj U Bus U Line operation U Bus No operation en05000551 vsd IEC05000551 V1 EN US Figu...

Page 145: ...out changing the setting on the local HMI Check that the two outputs are not activated 9 8 1 3 Testing the energizing check M2377 262 v6 During the test of the energizing check function for a single b...

Page 146: ...can be repeated with different values on the U Bus and the U Line Testing both directions DLLB or DBLL M2377 306 v7 1 Verify the local HMI settings AutoEnerg or ManEnerg to be Both 2 Apply a single ph...

Page 147: ...M2377 1042 v5 Continue to test another function or end the test by changing the TESTMODE setting to Off Restore connections and settings to their original values if they were changed for testing purpo...

Page 148: ...n of the operating gear condition CBREADY of either the type ready for a Close Open CO cycle or the type ready for an Open Close Open OCO cycle The CB condition CBREADY of a type CO shall be high true...

Page 149: ...79 5 0 x If any timer settings are reduced to speed up or facilitate the testing they shall be set to normal after testing A temporary label on the IED can be a reminder to restore normal settings af...

Page 150: ...single shot auto reclosing two shot reclosing single phase and three phase single shot auto reclosing Below a case with single phase and three phase single shot auto reclosing is described 1 Set Oper...

Page 151: ...ndition fulfilled When the condition signal is removed and a new sequence is run it indicates that the result was due to the changed condition In case of a blocking signal the procedure should be simi...

Page 152: ...Off for example by external control The output READY shall be low and PREP3P shall be high 2 Apply a single phase fault and thereby a START signal 3 Check that a definitive three phase trip and no au...

Page 153: ...mplete cycle of block unblock operations to align the statuses The complete apparatus control function is not included in this product 9 8 4 Single command 16 signals SINGLECMD SEMOD172444 5 v3 For th...

Page 154: ...signal in the IED 7 Check that the trip time complies with the zone timers and that correct trip outputs external signals and indications are obtained for the actual type of fault generated 9 9 1 2 Te...

Page 155: ...Deactivate the receive CR signal of the IED 2 Apply healthy normal load conditions to the IED for at least two seconds 3 Apply a fault condition within the forward directed zone used for scheme commun...

Page 156: ...ngs outlined in Section Preparing the IED to verify settings Values of the logical signals for ZCRWPSCH are available on the local HMI under Main menu Tests Function status Scheme communication ZCRWPS...

Page 157: ...5 Restore the forward and reverse zone timer to its original setting 9 9 2 2 Weak end infeed logic M14947 37 v2 Weak end infeed logic at permissive overreach schemes M14947 39 v5 1 Check the blocking...

Page 158: ...utlined in Section Preparing the IED to verify settings The logic is checked during the secondary injection test of the impedance measuring zones 9 9 3 1 Verifying the settings M11758 37 v4 1 Provide...

Page 159: ...e current reversal and weak end infeed functions shall be tested together with the permissive scheme 9 9 4 1 Testing the directional comparison logic function M13926 7 v2 Blocking scheme M13926 9 v6 1...

Page 160: ...vate the CR binary input 6 Switch the fault current on 110 of the set operating current and measure the operating time of the ECPSCH logic Use the TRIP signal from the configured binary output to stop...

Page 161: ...ds the voltage 2 Inject current 180 AngleRCA in one phase to about 110 of the set operating current of the four step residual overcurrent protection IN Dir 3 Check that the IRVL output is activated in...

Page 162: ...ting 3U0 operating voltage 2 Activate the CRL binary input No ECHO CS and TRWEI outputs should appear 3 Increase the injected voltage to about 110 of the setting 3U0 operating voltage 4 Activate the C...

Page 163: ...nnections and settings to their original values if they were changed for testing purposes 9 10 Logic SEMOD53577 1 v1 9 10 1 Tripping logic common 3 phase output SMPPTRC SEMOD54375 102 v10 Prepare the...

Page 164: ...for each separate fault and only one of the trip outputs TRLn should be activated at a time Functional outputs TRIP and TR1P should be active during each fault No other outputs should be active 3 Init...

Page 165: ...g two trip outputs TRLn should be activated at a time Functional outputs TRIP and TR2P should be active at each fault No other outputs should be active 4 Initiate a three phase fault Take an adequate...

Page 166: ...uit breaker lockout CLLKOUT signal is set 4 Activate shortly thereafter the reset lockout RSTLKOUT signal in the IED 5 Check that the circuit breaker lockout CLLKOUT signal is reset 6 Initiate a three...

Page 167: ...24F6 v3 1 Connect binary inputs to consider gas pressure and gas density to initiate the alarms 2 Consider the analogue pressure input SENPRES and set SENPRES to a value lower than PresAlmLimit or act...

Page 168: ...heir original values if they were changed for testing purposes 9 11 2 Liquid medium supervision SSIML GUID 6426FDDA B949 4FE7 BF42 B52014A9344B v3 Prepare the IED for verification of settings as outli...

Page 169: ...fter a set time delay of tTempLockOut 4 Activate BLOCK binary input and check that the outputs TEMPALM TEMPLO ALARM and LOCKOUT disappear 5 Reset the BLOCK binary input 6 Make sure that temperature lo...

Page 170: ...POSCLOSE to 1 5 3 Check the OPENPOS output by changing the POSOPEN to 1 and POSCLOSE to 0 and also inject the current in the selected phase slightly lower and higher than AccStopCurr set value Only fo...

Page 171: ...xceeds the set OperAlmLevel value The actual value can be read on the output NOOPER 8 4 OPERLO is activated when NOOPER value exceeds the set OperLOLevel value 9 Test of CB spring charge monitoring 9...

Page 172: ...proper binary start and phase selection signals are connected and voltage and current signals are configured parameter settings The result is displayed on the local HMI or via PCM600 Distances to faul...

Page 173: ...quence reactance of a line X1 set positive sequence reactance of a line XM set mutual zero sequence impedance of a line 9 11 5 2 Completing the test M14955 84 v6 Continue to test another function or e...

Page 174: ...GUID 4FC03017 93BD 4B30 A874 487BF89971D5 v1 Prepare the IED for verification of settings as outlined in section Overview and section Preparing for test in this chapter 9 12 2 1 Verifying the settings...

Page 175: ...e MAXPAFD and MAXPRFD whether it is showing the last 1 minute average power value as maximum 6 Next 1 minute cycle reduce the current or voltage below previous value 7 Check after 1 minute whether the...

Page 176: ...ration of different built in functions must be tested at the same time as their corresponding functions 9 14 Basic IED functions SEMOD52026 1 v1 9 14 1 Parameter setting group handling SETGRPS M11369...

Page 177: ...connections and settings to their original values if they were changed for testing purposes 9 15 Exit test mode SEMOD53244 3 v5 The following procedure is used to return to normal operation After exi...

Page 178: ...172...

Page 179: ...v4 The test is performed by looking at the information given by the Distance protection ZMFPDIS function Procedure 1 Make sure that all control and protection functions that belong to the object that...

Page 180: ...a wrong setting for the pre processing blocks 3PhaseAnalogGroup under the HMI menu Main menu Configuration Analog modules connected to the CTs VTs and serving the distance protection verify that no wr...

Page 181: ...y be compared with the indication given by external equipment measuring the same power flow 1MRK 506 383 UEN A Section 10 Checking the directionality Line distance protection REL650 2 2 IEC 175 Commis...

Page 182: ...176...

Page 183: ...import of power available Finally final trip tests must be performed This involves activation of protection functions or tripping outputs with the circuit breaker closed and the tripping of the breake...

Page 184: ...ary circuit de energized The IED cannot protect the circuit during testing Trained personnel may test one IED at a time on live circuits where redundant protection is installed and de energization of...

Page 185: ...d for each protection function If the discrepancy between obtained value and requested set value is too big the setting should be adjusted the new value recorded and a note should be made in the test...

Page 186: ...EMOD56528 30 v4 After a maintenance test it is recommended to measure the service currents and service voltages recorded by the protection IED The service values are checked on the local HMI or in PCM...

Page 187: ...rminal with a removed fuse or open miniature circuit breaker with an open connection wrong setting and so on Thus a list should be prepared of all items disturbed during test so that all can be put ba...

Page 188: ...182...

Page 189: ...ng table shows the general IED status signals M11656 1 v2 Table 20 Signals from the General menu in the diagnostics tree Indicated result Possible reason Proposed action Internal fail Off No problem d...

Page 190: ...dications regarding the faulty unit are outlined in table 21 Table 21 Self supervision signals on the local HMI HMI Signal Name Status Description INT Fail OFF ON This signal will be active if one or...

Page 191: ...cted to binary output contacts for signalling to a control room In the IED Status Information the present information from the self supervision function can be viewed Indications of failure or warning...

Page 192: ...event INT RTC Off Real Time Clock RTC status INT RTC reset event INT RTC INT RTC set event INT TSYNC Off External time synchronization status INT TSYNC reset event INT TSYNC INT TSYNC set event INT S...

Page 193: ...locked SyncLostMode is set to BlockOnLostUTC but there is no UTC capable synch source GPS IRIG B used Unless a UTC capable time source is selected the function dependent on high time accuracy will be...

Page 194: ...t short circuiting the transformer s secondary winding Operating a current transformer with the secondary winding open will cause a massive potential build up that may damage the transformer and may c...

Page 195: ...rd rail are connected to the corresponding metallic area on the circuit board when the new module is inserted 10 Reassemble the IED If the IED has been calibrated with the system inputs the calibratio...

Page 196: ...190...

Page 197: ...can Wire Gauge standard BBP Busbar protection BFOC 2 5 Bayonet fibre optic connector BFP Breaker failure protection BI Binary input BIM Binary input module BOM Binary output module BOS Binary outputs...

Page 198: ...bance recorder according to IEEE ANSI C37 111 1999 IEC 60255 24 Contra directional Way of transmitting G 703 over a balanced line Involves four twisted pairs two of which are used for transmitting dat...

Page 199: ...formance architecture ESD Electrostatic discharge F SMA Type of optical fibre connector FAN Fault number FCB Flow control bit Frame count bit FOX 20 Modular 20 channel telecommunication system for spe...

Page 200: ...60870 5 103 Communication standard for protection equipment A serial master slave protocol for point to point communication IEC 61850 Substation automation communication standard IEC 61850 8 1 Commun...

Page 201: ...e data link layer 2 Ingression protection according to IEC 60529 IP 20 Ingression protection according to IEC 60529 level 20 IP 40 Ingression protection according to IEC 60529 level 40 IP 54 Ingressio...

Page 202: ...MIP Mezzanine card standard PMC PCI Mezzanine card POR Permissive overreach POTT Permissive overreach transfer trip Process bus Bus or LAN used at the process level that is in near proximity to the m...

Page 203: ...ware clocks in every embedded system in a network Each embedded node can instead synchronize with a remote clock providing the required accuracy SOF Status of fault SPA Str mberg Protection Acquisitio...

Page 204: ...lt applied to the balance point that is the set reach The relay does not see the fault but perhaps it should have seen it See also Overreach UTC Coordinated Universal Time A coordinated time scale mai...

Page 205: ...the residual or the earth fault current 3UO Three times the zero sequence voltage Often referred to as the residual voltage or the neutral point voltage 1MRK 506 383 UEN A Section 13 Glossary Line di...

Page 206: ...200...

Page 207: ...201...

Page 208: ...AB Grid Automation Products 721 59 V ster s Sweden Phone 46 0 21 32 50 00 abb com protection control Copyright 2017 ABB All rights reserved Specifications subject to change without notice 1MRK 506 383...

Reviews: