


2000-OSM, F1
4-54
3. On the Pres and Temp Control screen, cursor to PRES CONTROL and press F3 (Pressure
Config).
4. On the Pressure Config Table screen (see Figure 4-48), select the desired field using the cursor
keys.
****
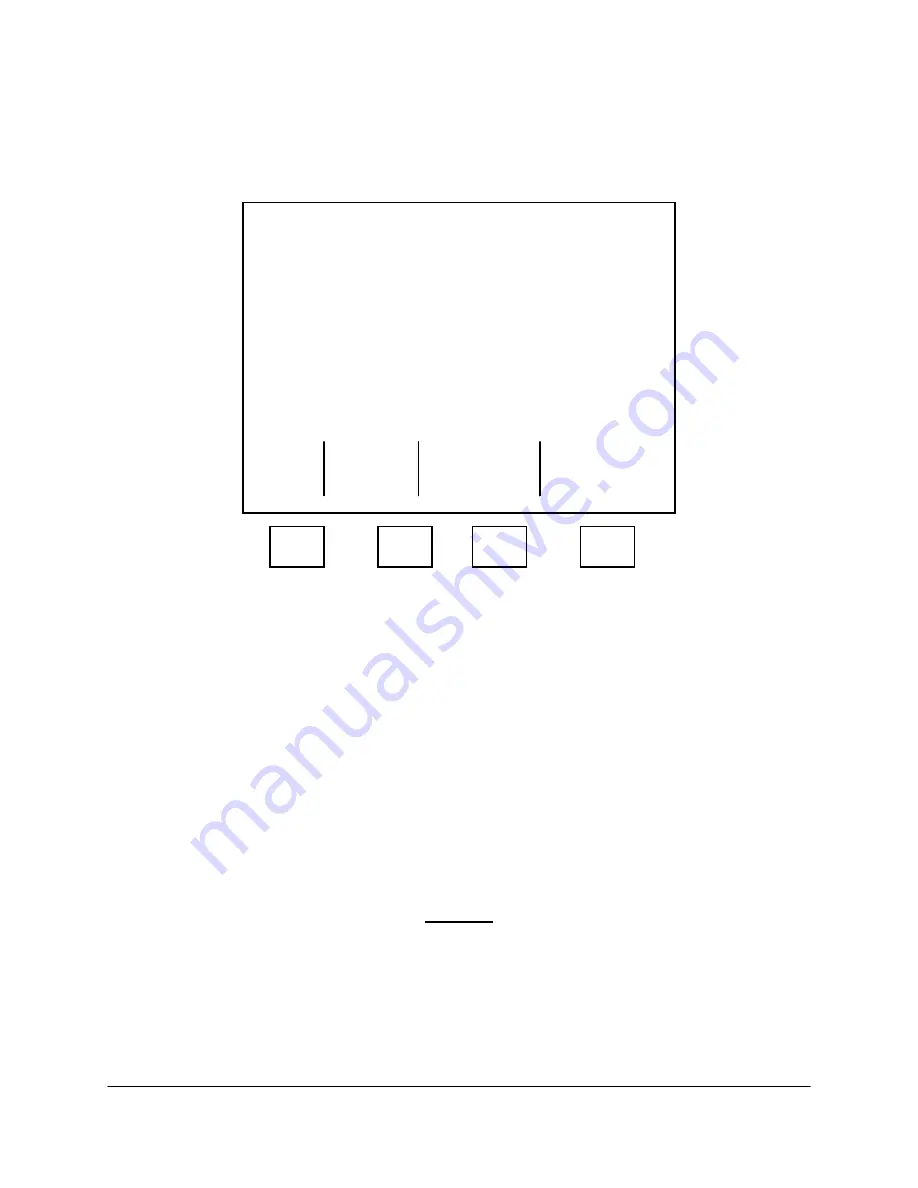
Pressure Config Table
****
Zone
Num Name
Config
Range
1
COLUMN
ISO
30
2
ANALYSIS
ISO
30
3
SELECTOR
ISO
50
4
ANALYSIS
ISO
50
5
COLUMN
PROG
100
Exit
F1
F2
F3
F4
Figure 4-48. PRESSURE CONFIGURATION TABLE SCREEN
5. In the Name field you can change the zone name by typing a new name, up to a maximum of ten
characters long. When you have completed the name, cursor to another field.
6. In the Config field, you can change the pressure configuration by scrollling through the list of titles
and selecting the appropriate one for this zone, then cursor to another field.
7. In the Range field, type the range value and then cursor to another field.
8. After you complete and verify the changes, press F1 (Exit).
9. On the next screen press F2 (Accept Control Point) to save the changes, or press F1 (Escape) to
retain the original values.
10. “Hold Switch on Pres Board” will appear on the screen.
CAUTION
Before opening any analyzer doors, ensure the area is safe and hazard-free, and
will remain so the entire time the analyzer is open. If the analyzer has X Purge,
operate the override function as described in "X Purge Override Option."
11. Open the GCC Front Panel and hold down the switch on the Electronic Pressure Control PCB.
12. The screen will display the message, “Are You Sure? Y or N.” Continue holding the switch down
and press “Y” on the GCC keyboard to accept the change.