Chapter 2 Hardware
WX Series User’s Guide
27
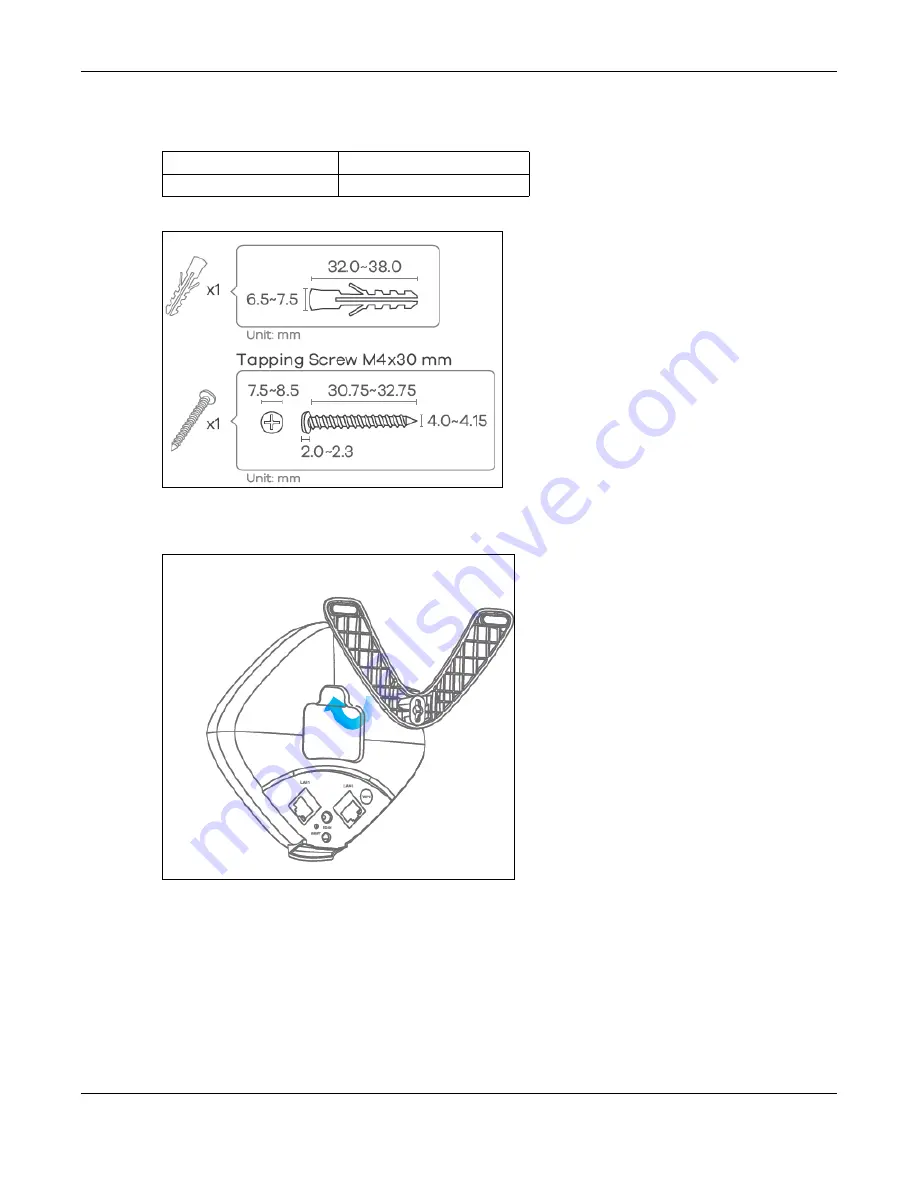
Figure 22
The WX3100 Screw Specifications
1
Attach the bracket to the back of the WX3100-T0 as shown.
Figure 23
Attach the bracket
2
Drill a hole in the wall. Insert the screw anchor and screw into the hole.
3
Place the WX3100-T0 so the wall mount hole lines up with the screw. Slide the WX3100-T0 down gently to
fix it into place.
Table 8 The WX3100 Wall Mounting Information
M4 Screws
One
Screw anchors (optional)
One
Содержание WX3100-TO
Страница 10: ...10 PART I User s Guide ...
Страница 37: ...37 PART II Technical Reference ...
Страница 149: ...Chapter 17 Backup Restore WX Series User s Guide 149 Figure 82 Maintenance Reboot ...


