


Chapter 17 Link Aggregation
GS2200 Series User’s Guide
138
1
Make your physical connections - make sure that the ports that you want to belong to the trunk
group are connected to the same destination. The following figure shows ports 2-5 on switch A
connected to switch B.
Figure 88
Trunking Example - Physical Connections
2
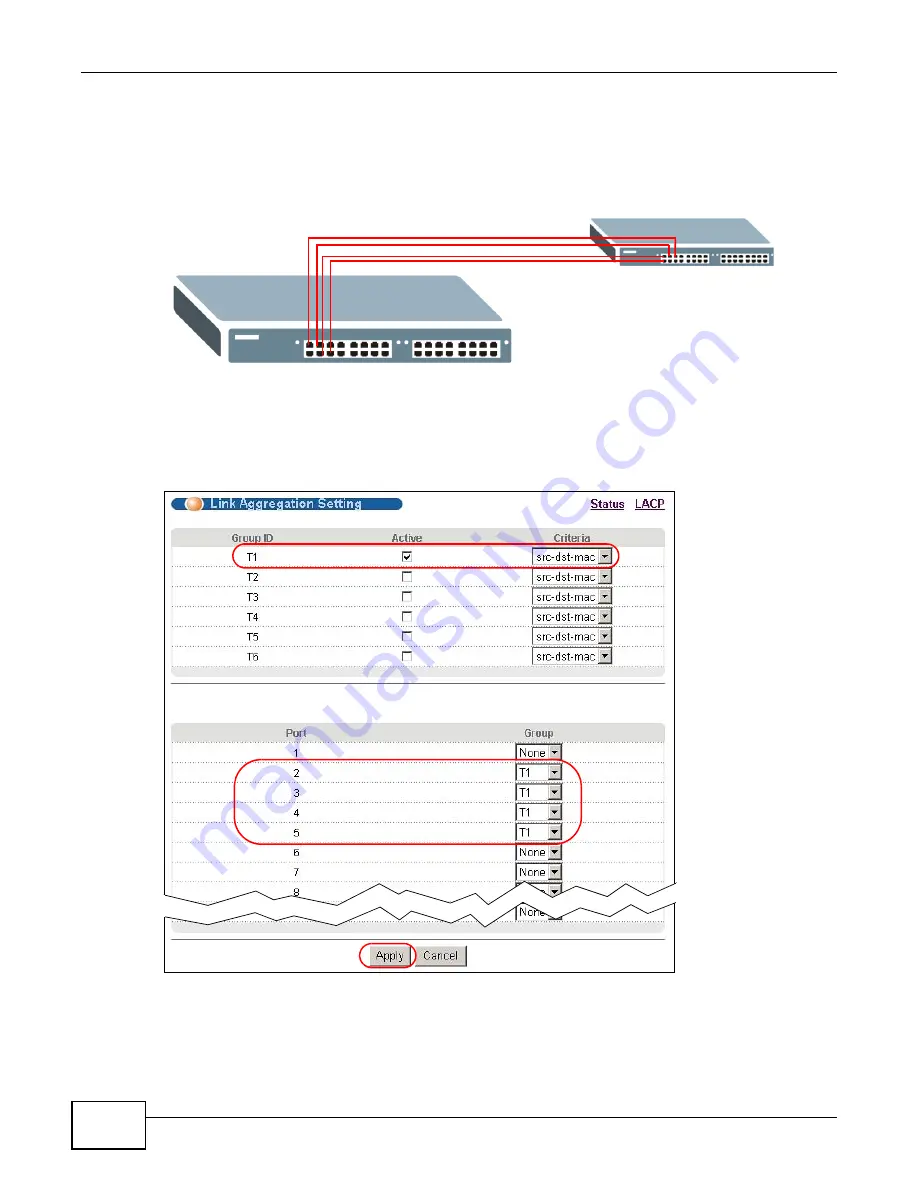
Configure static trunking - Click Advanced Application > Link Aggregation > Link
Aggregation Setting. In this screen activate trunk group T1, select the traffic distribution
algorithm used by this group and select the ports that should belong to this group as shown in the
figure below. Click Apply when you are done.
Figure 89
Trunking Example - Configuration Screen
Your trunk group 1 (T1) configuration is now complete.
A
B
Содержание GS2200 Series
Страница 15: ...15 PART I User s Guide...
Страница 16: ...16...
Страница 31: ...31 PART II Technical Reference...
Страница 32: ...32...
Страница 76: ...Chapter 8 Basic Setting GS2200 Series User s Guide 76...
Страница 92: ...Chapter 9 VLAN GS2200 Series User s Guide 92 Figure 60 Port Based VLAN Setup Port Isolation...
Страница 230: ...Chapter 29 Error Disable GS2200 Series User s Guide 230...
Страница 248: ...Chapter 33 ARP Learning GS2200 Series User s Guide 248...
Страница 302: ...Appendix A Changing a Fuse GS2200 Series User s Guide 302...
Страница 306: ...Appendix B Common Services GS2200 Series User s Guide 306...
Страница 309: ...Appendix C Legal Information GS2200 Series User s Guide 309 ROHS...
Страница 310: ...Appendix C Legal Information GS2200 Series User s Guide 310...
Страница 320: ...Index GS2200 Series User s Guide 320...


