


20
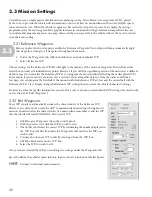
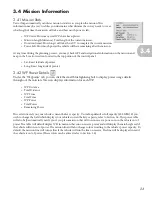
3.3 Mission Settings
VectorMap uses a simple point-and-click mission-planning system. The software uses ‘waypoints’ (WPs), placed
by the user, to provide the vehicle with information on how to behave on mission lines in the survey (depth, speed,
sonar activation, etc.). When the vehicle recognizes it has reached a waypoint, it proceeds to employ the settings
programmed for the next waypoint. This graphic interface in conjunction with georeferenced maps allows the user
to visualize and program a mission on a map, then send the necessary data to the vehicle without the need to convert
visual data into coding.
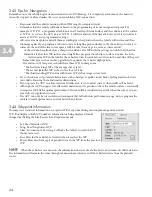
3.31 Reference Waypoints
Before you place the first waypoint, establish a ‘Reference Waypoint.’ VectorMap will then automatically apply
this waypoint’s settings to all waypoints throughout the mission.
1. Under the ‘Waypoints’ tab, click the black arrow on the box labeled ‘WP.’
2. Select ‘Reference WP.’
Choose settings for the Reference WP that will apply to the majority of the mission’s waypoints. This will save time
later when you may edit individual waypoints. However, if you will fly a significant portion of the mission at a different
depth or speed, you can alter the Reference WP as you program the mission without affecting the earlier placed WPs.
For example, if you want to fly a mission over a section of river and gather data sets from the surface and from 5
feet deep, you can program the first half of the mission with the Reference WP at 0 feet and the second half with the
Reference WP at 5 feet. Simply change the Reference WP setting when you want the vehicle’s behavior to change.
In order to gather the specific information you want for a survey you must understand the WP settings discussed in the
next section (3.32 ‘Edit Waypoints’).
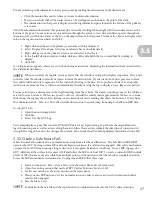
3.32 Edit Waypoints
Every WP you place automatically assumes the characteristics of the Reference WP.
However, you will not often want the AUV to maintain identical settings throughout its
mission. In order to alter the characteristics of a mission line, remember to edit the WP
that the vehicle will travel TOWARDS. First, select a WP.
1. Click the grey ‘Waypoints’ tab in the control panel.
2. With the pointer tool, click the WP you wish to edit.
3. Check that you clicked the correct WP by confirming the number displayed in
the ‘WP’ box (the first box under the ‘Waypoints’ tab) matches the WP you
wish to edit.
4. You may also choose a WP to edit by selecting it from the ‘WP’ box.
5. Click the black arrow on the ‘WP’ box.
6. Select the WP you wish to edit.
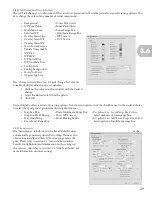
Once you have selected the WP, you can change its settings under the ‘Waypoints’ tab.
Speed
–To define the vehicle’s speed in knots, input a value 0-4 in the box labeled ‘Speed.’
You may use decimal measurements.
NOTE
3.3