E-
37
EDITING
English
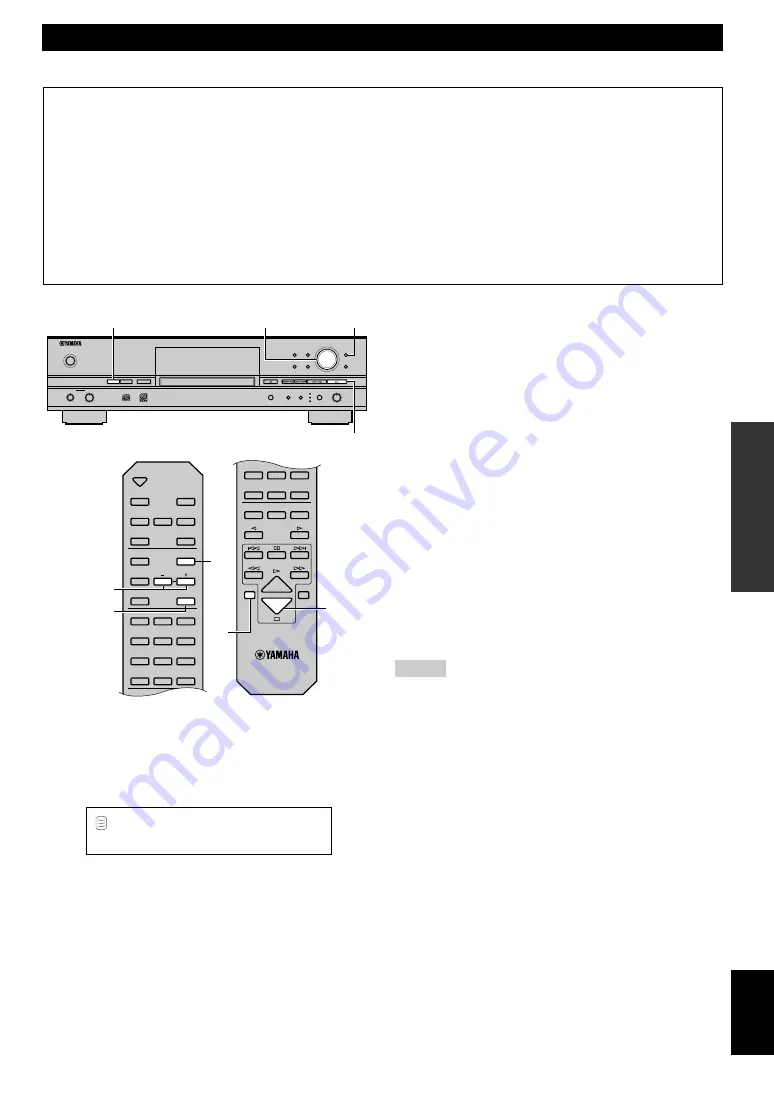
1.
Press HDD to select the HDD.
2.
Press MENU to display the menu item selection while
this unit is in the stop mode.
3.
Select “Track Edit” by rotating the MULTI JOG knob
(pr/– on the remote control).
TRACK EDITING
NATURAL SOUND HDD/CD RECORDER CDR–HD1000
TEXT/TIME
MODE/SET
MULTI JOG
DIGITAL REC LEVEL
PUSH ENTER
TRACK NO.
FINALIZE
ERASE
BOOKMARK
COMPLETE
MENU
CLEAR
MIN
MAX
OPTICAL
ANALOG REC LEVEL
INPUT
REC
COAXIAL
ANALOG
COPY
CDR
HDD
MIN
MAX
LEVEL
PHONES
POWER
1
2
3, 4, 5, 6
8
OPEN/CLOSE
COPY
REC
TEXT/TIME
INPUT
MODE/SET
MENU
CLEAR
1
ABC
2
DEF
3
GHI
4
JKL
5 MNO
6
PQR
7
STU
8 VWX
9
YZ
SPACE
SYMBOL
0
+
10
BOOKMARK
REPEAT
RANDOM
INTRO
ENTER
COMPLETE
FINALIZE
ERASE
TRACK NO.
WRITE
7
STU
8 VWX
9
YZ
SPACE
SYMBOL
0
+
10
BOOKMARK
REPEAT
RANDOM
GROUP SKIP
INTRO
HDD
CDR
2
1
4, 6
3, 5
8
L
R
dB
–30 –10
–6
–2
0
T r a c k
E d i t
4.
Press the MULTI JOG knob (ENTER on the remote
control) to display the editing menu item selection.
5.
Select the menu item by rotating the MULTI JOG knob
(pr/– on the remote control).
The followings are the track editing menu items:
• Track Rename
• Track Adjust
• Track Erase
• Part Erase
• Track Combine
• Track Divide
• Track Pack
• Add Fade In
• Add Fade Out
• Track Title
6.
Press the MULTI JOG knob (ENTER on the remote
control) to confirm the menu item before editing.
7.
Start editing by following the setting details (pages
38—45) for each menu item.
Notes
• If
MENU
is pressed during editing, entry of the selection becomes
ineffective, and the display returns to the previous one.
• If
a
is pressed during editing, all entry of the selection becomes
ineffective, and the display returns to the one when this unit was
in the stop mode.
8.
Press
a
when all editing has been completed.
The display changes to the one when this unit was in the stop
mode.
You can do various editing operations on the tracks that have been recorded on the HDD. The following steps describe how to edit a track.
For details about each editing menu item, refer to the descriptions on the following pages corresponding to your need.
To change a track number ............................................................................................ “Track Rename” (page 38)
To adjust the beginning of a track ............................................................................... “Track Adjust” (page 38)
To erase a track ............................................................................................................ “Track Erase” (page 39)
To erase the part of a track .......................................................................................... “Part Erase” (page 40)
To combine a series of tracks ...................................................................................... “Track Combine” (page 41)
To divide one track into two ........................................................................................ “Track Divide” (page 42)
To eliminate unused track numbers ............................................................................. “Track Pack” (page 43)
To add fade-in to the beginning of a track ................................................................... “Add Fade In” (page 43)
To add fade-out to the end of a track ........................................................................... “Add Fade Out” (page 44)
To assign a track title ................................................................................................... “Track Title” (page 45)


