background image

• For Windows, Page Layout is on the Document Options tab.

• For Macintosh, in the Print window, Layout is on the Preview list.

To print a border around each page, select

Page Borders

.

Printing Booklets

With 2-sided printing, you can print a document in the form of a small booklet. You can create
booklets from any paper size that is supported for 2-sided printing.

The print driver automatically reduces each page image and prints four page images per sheet of
paper, two page images on each side. The pages are printed in the correct order so that you can fold
and staple the pages to create the booklet.

• For Windows, Booklet Layout is on the Page Layout tab. Page Layout is on the Document Options

tab.

• For Macintosh, in the Print window, in Xerox Features, Booklet Layout is on the Paper/Output list.

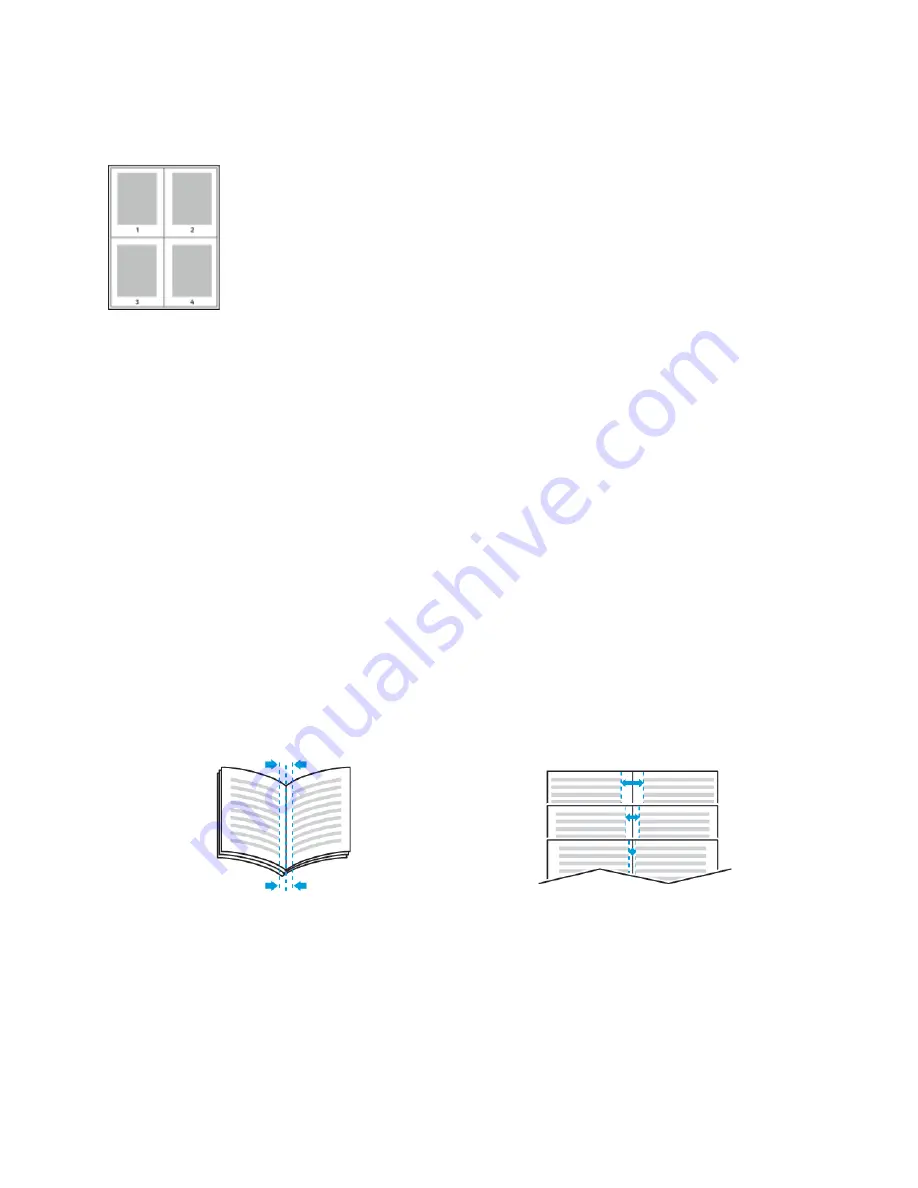
When you print booklets using the Windows PostScript or Macintosh driver, you can specify the gutter
and creep.

Gutter

: Specifies the horizontal distance in points between the page images. A point is 0.35 mm

(1/72 in.).

Creep

: Specifies how much the page images shift outward in tenths of a point. Shifting

compensates for the thickness of the folded paper, which can cause the page images to shift
outward slightly when folded. You can select a value from zero to 1 point.

Gutter

Creep

Using Special Pages

The Special Pages options control how covers, inserts, and exception pages are added to your printed
document.

• For Windows, the Special Pages tab is on the Document Options tab.

• For Macintosh, in the Print window, in Xerox Features, Special Pages is in the Paper field for Paper/

Output.

142

Содержание VersaLink B71 Series

Страница 1: ...Xerox VersaLink B71XX Multifunction Printer User Documentation...

Страница 2: ...de the addition of new functions or connection of external devices can affect the product certification For more information contact your Xerox representative E Elle ec ct tr riic ca all S Sa af fe et...

Страница 3: ...in an area where people can step on the power cord Do not place objects on the power cord Do not plug or unplug the power cord while the power switch is in the On position If the power cord becomes f...

Страница 4: ...e with all the paper trays extended Ozone Release This printer produces ozone during normal operation The amount of ozone produced is dependent on copy volume Ozone is heavier than air and is not prod...

Страница 5: ...use of non Xerox supplies or the use of Xerox supplies not specified for this printer The Total Satisfaction Guarantee is available in the United States and Canada Coverage could vary outside these a...

Страница 6: ...er when handling the waste cartridge Do not touch the part or area of the printer Do not expose the drum cartridges to direct sunlight Do not burn the toner cartridges Do not burn the waste cartridge...

Страница 7: ...ta ac ct t I In nf fo or rm ma at tiio on n For more information on Environment Health and Safety in relation to this Xerox product and supplies contact United States and Canada 1 800 ASK XEROX 1 800...

Страница 8: ...iin nt te er r Front View 1 Document Guides 2 Document Feeder Input Tray 3 Paper Output shown with and without the optional Center Top Tray 4 Front Door 5 Paper Trays Configurations vary from 1 to 4 t...

Страница 9: ...Duplex Automatic Document Feeder 1 Document Feeder Cover 2 Paper Guides 3 Duplex Automatic Document Feeder Input Tray 4 Document Output Tray 9...

Страница 10: ...omatic Document Feeder accommodates the following original size documents Width 49 297 mm 1 9 11 7 in Length 85 431 8 mm 8 5 17 in Weight 38 128 g m Follow these guidelines when loading original docum...

Страница 11: ...Rear View 1 USB Host Port 2 USB Device Port 3 Wi Fi Connectivity Port 4 Ethernet Port 5 Foreign Device Interface 6 Power Connection 11...

Страница 12: ...he Integrated Office Finisher and the Office Finisher with or without the Booklet Maker Integrated Office Finisher 1 Finisher Tray 2 Finisher Tray Extension 3 Integrated Office Finisher 4 Staple Cartr...

Страница 13: ...3 Right Tray 4 Booklet Maker Staple Cartridge optional 5 Finisher Top Cover 6 Creaser Unit optional 7 Staple Cartridge 8 Finisher Front Cover 9 Office Finisher 10 Hole Punch Waste Container optional 1...

Страница 14: ...nter Provides access to print copy and scan features Provides access to reference materials Provides access to Tools and Setup menus Prompts you to load paper replace supplies and clear jams Displays...

Страница 15: ...access to the Home menu for access to printer features such as copy scan and fax 4 NFC Area Optional Near Field Communication NFC is a technology that enables devices to communicate when they are with...

Страница 16: ...can also generate reports listing usage data for individual users and groups For details refer to the System Administrator Guide at www xerox com office VLB71XXdocs Logging In Logging in is the proce...

Страница 17: ...password of GOOD123 is valid because it contains three characters from the previous password Reuse of Password To prohibit the reuse of recent passwords the system administrator can specify the inter...

Страница 18: ...already installed on the device and appear on the Home screen Some Apps are installed as standard but hidden the first time you use the device When you log in the Apps configured for your personal acc...

Страница 19: ...duct information including installed options network settings port setup tray information and more Printing the Configuration Report 1 At the printer control panel press the Home button 2 Touch Device...

Страница 20: ...P address from the Configuration Report 1 At the printer control panel press the Home button 2 Touch Device About Information Pages 3 Touch Configuration Report The IP address appears in the Connectiv...

Страница 21: ...ice VLB71XXdocs 1 At your computer open a Web browser In the address field type the IP address of the printer then press Enter or Return For details about obtaining the IP address of your printer refe...

Страница 22: ...rox com register Xerox Direct online store www direct xerox com S Sp pe ec ciif fiic ca at tiio on ns s P Pr riin nt te er r C Co on nf fiig gu ur ra at tiio on ns s a an nd d O Op pt tiio on ns s Ava...

Страница 23: ...00 x 600 dpi Enhanced Mode 1200 x 1200 dpi Paper Capacity VersaLink B7125 B7130 B7135 Bypass Tray 100 sheets 80 g m2 Tray 1 520 sheets 80 g m2 Single Tray Module 520 sheets 80 g m2 3 Tray Module 520 s...

Страница 24: ...130 B7135 Type Duplex Automatic Document Feeder Capacity 110 sheets Scan resolution 600 x 600 dpi Maximum scan size Document Glass 291 0 x 425 8 mm 11 5 x 16 8 in W x L Automatic Document Feeder 297 x...

Страница 25: ...ity Feeder Envelope Tray Note The Single Tray Module is optional for the base model only and does not include a stand Output Devices Center Tray Integrated Office Finisher Office Finisher Office Finis...

Страница 26: ...s Print Speed Several factors affect the print speed Print mode The fastest mode is Standard Paper size Letter 8 5 x 11 in prints slightly faster than A4 210 x 297 mm Larger paper sizes reduce print s...

Страница 27: ...s Weights and Dimensions Base Model Width 59 0 cm 23 2 in Depth 67 1 cm 26 4 in Height 76 7 cm 30 2 in Weight 54 2 kg 119 4 lb Base Model with Single Tray and Stand Width 61 6 cm 24 2 in Depth 67 1 c...

Страница 28: ...61 6 cm 24 2 in Depth 67 1 cm 26 4 in Height 111 7 cm 44 0 in Weight 85 6 kg 188 7 lb Base Model with 3 Tray Module and Integrated Office Finisher Width 66 6 cm 26 2 in Depth 67 1 cm 26 4 in Height 11...

Страница 29: ...113 4 cm 44 6 in Depth 67 1 cm 26 4 in Height 111 7 cm 44 0 in Weight 106 7 kg 235 2 lb Base Model with 3 Tray Module and Office Finisher with Booklet Maker Width 113 5 cm 44 6 in Depth 67 9 cm 26 7...

Страница 30: ...r Width 145 0 cm 57 0 in Depth 67 9 cm 26 7 in Height 111 7 cm 44 0 in Weight 147 7 kg 325 6 lb Base Model with Tandem Tray Module Office Finisher Booklet Maker and High Capacity Feeder Width 145 0 cm...

Страница 31: ...earance Requirements for Base Model Width 108 6 cm 42 8 in Depth 156 7 cm 61 7 in Height 112 3 cm 44 2 in Clearance Requirements for Single Tray and Stand Width 111 5 cm 43 9 in Depth 166 6 cm 65 6 in...

Страница 32: ...dem Tray Module Width 128 8 cm 50 7 in Depth 166 6 cm 65 6 in Height 147 4 cm 58 0 in Clearance Requirements with 3 Tray Module and Integrated Office Finisher Width 128 8 cm 50 7 in Depth 166 6 cm 65...

Страница 33: ...with Office Finisher Width 167 2 cm 65 8 in Depth 166 6 cm 65 6 in Height 147 4 cm 58 0 in Clearance Requirements for 3 Tray Module Office Finisher and Booklet Maker Width 167 2 cm 65 8 in Depth 166...

Страница 34: ...r and High Capacity Feeder Width 190 9 cm 75 2 in Depth 166 6 cm 65 6 in Height 147 4 cm 58 0 in Clearance Requirements for Tandem Tray Module Office Finisher Booklet Maker and High Capacity Feeder Wi...

Страница 35: ...ensation inside the printer Elevation For optimum performance use the printer at elevations below 2500 m 8200 ft E Elle ec ct tr riic ca all S Sp pe ec ciif fiic ca at tiio on ns s Power Supply Voltag...

Страница 36: ...des are enabled on your device to reduce energy consumption After the last print the device transitions to Ready mode In this mode the device can print again immediately If the device is not used for...

Страница 37: ...nction will reduce the environmental impact of your work However should you require simplex 1 sided printing you may change the print settings in the print driver Paper Types This product can be used...

Страница 38: ...se A est conforme la norme NMB 003 du Canada Certifications in Europe The CE mark applied to this product symbolizes a declaration of conformity by Xerox with the following applicable Directives of th...

Страница 39: ...r Image Projection only and is not intended for use in other applications Eurasian Economic Community Certification Russia Belarus and Kazakhstan are working to establish a common customs union the Eu...

Страница 40: ...of Deposit Paper Money Bonds and Obligations of certain agencies of the government such as FHA and so on Bonds United States Savings Bonds may be photographed only for publicity purposes in connection...

Страница 41: ...ificates may be photographed 9 Badges Identification Cards Passes or Insignia carried by military personnel or by members of the various Federal Departments such as FBI Treasure and so on unless photo...

Страница 42: ...be illegal in your country Penalties of fine or imprisonment may be imposed on those found guilty of making such reproductions Currency notes Bank notes and checks Bank and government bonds and secur...

Страница 43: ...mpany you could also have to quote the codes in the following list Facility Interface Code FIC 02LS2 Service Order Code SOC 9 0Y Caution Ask your local Telephone Company for the modular jack type inst...

Страница 44: ...nes and internal metallic water pipe systems if present must be connected together This precaution could be vital in rural areas WARNING Do not attempt to make such connections yourself Contact the ap...

Страница 45: ...s designated 33 6 kbps and 56 kbps connections are likely to be restricted to lower bit rates when connected to some PSTN implementations Telecom will accept no responsibility for difficulties that ar...

Страница 46: ...14 10 14 CAN CSA C22 2 No 60950 1 07 2nd Edition 2014 10 UL 62368 1 T V Rheinland Europe IEC EN 62368 1 2014 M Ma at te er riia all S Sa af fe et ty y D Da at ta a S Sh he ee et ts s For Material Safe...

Страница 47: ...disposal must be segregated from household waste Private households within EU member states may return used electrical and electronic equipment to designated collection facilities free of charge Plea...

Страница 48: ...ality your waste disposal service or the point of sale where you purchased the items Penalties may be applicable for incorrect disposal of this waste in accordance with national legislation Business U...

Страница 49: ...scan one or both sides of an original document For Copy jobs you can specify 1 Sided or 2 Sided output Paper Supply Use Paper Supply to specify the size type and color of the paper required or the Pa...

Страница 50: ...use the Original Orientation option to specify the layout of the original images The printer uses the information to determine if images require rotation to produce the required output Image Shift Im...

Страница 51: ...nnotations You can add Annotations such as page numbers and the date to your copies Booklet Creation The Booklet Creation feature prints two pages on each side of the paper The pages are reordered so...

Страница 52: ...Contrast feature to adjust the variation between light and dark areas of the image Remove Blank Pages Remove Blank Pages configures the printer to ignore blank pages Book Scanning You can use the Book...

Страница 53: ...dy Exists option to define what action the device takes when the file name is used already File Name Use the File Name option to specify a name for the file containing the scanned images Book Faxing Y...

Страница 54: ...ay Send You can set a time in the future for the printer to send your fax job You can delay the send of your fax job for up to 24 hours Priority Send Use Priority Send to identify urgent faxes Priorit...

Страница 55: ...button can be used to Restart the printer Enter or exit sleep mode Enter or exit low power mode The Power Wake button also flashes when the printer is in low power mode P Po ow we er riin ng g O On n...

Страница 56: ...Slle ee ep p M Mo od de e a an nd d L Lo ow w P Po ow we er r M Mo od de e After the printer is powered on but is in Sleep Mode or Low Power Mode The touch screen appears blank and unresponsive The pr...

Страница 57: ...ides access to the Embedded Web Server For more information refer to the System Administrator Guide at www xerox com office VLB71XXdocs Selecting a Location for the Printer 1 Select a dust free area w...

Страница 58: ...ccess to the settings of the printer using the Embedded Web Server Wireless Network If your environment includes a wireless router or wireless access point you can connect the printer to the network w...

Страница 59: ...ess router must be configured with a service set identifier SSID and any necessary credentials Note Wireless networking is available only on printers with the optional Wireless Network Adapter install...

Страница 60: ...hen touch Power Off b Open the front door then press the main power switch to the Off position Caution To avoid damage to the printer do not unplug the power cord while the printer powers down 2 Remov...

Страница 61: ...ls refer to Removing the Wireless Network Adapter 4 Configure the Wi Fi settings For details about configuring the Wi Fi settings refer to the System Administrator Guide at www xerox com office VLB71X...

Страница 62: ...To release the Wireless Network Adapter from the connection panel on the side of the printer gently grasp the adapter and push the release lever to the side Carefully pull the adapter away from the p...

Страница 63: ...e printer control panel press the Power Wake button If the printer was installed previously in a wireless network environment it could retain setup and configuration information from that environment...

Страница 64: ...i Fi Band then select an option By default the Wi Fi frequency band is set to AUTO d Touch OK 6 To connect manually to a Wi Fi Network a Touch Manual Setup b In the first field type a name for the Wi...

Страница 65: ...ch Restart Now Connecting to Wi Fi Direct You can connect to your printer from a Wi Fi mobile device such as a tablet computer or smartphone using Wi Fi Direct Wi Fi Direct is disabled by default Note...

Страница 66: ...from a Mac an iPhone iPad or iPod touch You can use AirPrint to print from a wired device or a wireless device without using a print driver Not all applications support AirPrint Wireless devices must...

Страница 67: ...System Requirements Windows 7 Windows 8 Windows 8 1 Windows Server 2008 R2 Windows 10 Windows Server 2012 Windows Server 2016 and Windows Server 2019 macOS version 10 15 and later UNIX and Linux Your...

Страница 68: ...tname or IP address field type the printer IP address or hostname d To disable the feature clear the check box for Query the printer and automatically select the device driver to use then click Next 6...

Страница 69: ...ble devices select the device then click Next If the printer does not appear in the list click Cancel To add the printer manually use the IP address of the printer For details refer to Installing the...

Страница 70: ...click Add Note If your printer is not detected verify that the printer is powered on and that the Ethernet cable is connected properly Adding the Printer by Specifying the IP Address To add a printer...

Страница 71: ...tings for each app and save settings for regular jobs You can create 1 Touch Apps to save and simplify lengthy or frequent workflows Once created 1 Touch Apps appear on the Home screen To start a job...

Страница 72: ...ature is hidden the Eye icon appears with a line across it To show a feature for the required feature touch the Eye icon To signify a feature is visible the Eye icon appears with no line across it 6 T...

Страница 73: ...within the Preset feature Deleting a Saved Preset To delete a saved preset 1 At the printer control panel press the Home button 2 Touch the app required 3 Scroll to the bottom then touch Customize 4 T...

Страница 74: ...ick Reset To confirm click Reset All the personalizations configured for your User Account are removed 5 To log out click on your User Account name shown in the top right corner then click Log Out C C...

Страница 75: ...in then enter a valid login name and password 3 Touch the App required 4 Select the job settings 5 Scroll to the bottom then touch Save 6 Touch Save as 1 Touch App 7 Touch Enter App Name then use the...

Страница 76: ...ime 5 Touch Done Using a 1 Touch App To use a 1 Touch App 1 At the printer control panel press the Home button 2 If you are using a personal 1 Touch App touch Login then enter a valid login name and p...

Страница 77: ...n and instructions on using the Xerox App Gallery refer to the Xerox App Gallery User Guide available at www xerox com office VLB71XXdocs Creating a Xerox App Gallery Account With an App Gallery accou...

Страница 78: ...llery 3 To log in touch the Person icon 4 Enter your User Name using the touch screen keypad then touch Enter 5 Enter your Password using the touch screen keypad then touch Enter or OK The Xerox App G...

Страница 79: ...touch Enter or OK 4 Touch Installed The list shows all installed apps and any apps eligible for update You can update apps individually or all apps at once Touch the desired app then touch Update or...

Страница 80: ...option to monitor the status of the components you can replace The supply level and estimated number of impressions or days left for each unit is displayed Billing Usage Use the Billing Usage option t...

Страница 81: ...ies Alerts Setup 2 To enable supplies alerts that appear on the control panel touch the Enable Alerts toggle button 3 To configure the printer to display an alert when an item reaches a specific usage...

Страница 82: ...t Counters This option provides the number of images sent using the Fax Email or Scan features Fax Impressions Counters This option provides the number of images sent using the Fax features Each fax f...

Страница 83: ...on then select Add Contact 4 To enter a name touch the Enter First Name Enter Last Name or Enter Company field then enter the information To move to the next field touch Next When finished touch Enter...

Страница 84: ...vorite touch the Star icon 9 To save the group touch OK 10 To return to the Home screen press the Home button Editing or Deleting Groups in the Address Book at the Control Panel 1 At the printer contr...

Страница 85: ...Web Server click Address Book 3 From the Address Book select a contact 4 To edit contact information perform the following steps a Click the contact name or contact information then edit as needed b T...

Страница 86: ...er to the System Administrator Guide at www xerox com office VLB71XXdocs Creating and Managing Favorites You can mark contacts as Favorites A star next to a contact in the list indicates a Favorite Yo...

Страница 87: ...nd create Personal Favorites from the local Address Book for the device By default there are no Personal Favorites set up Personal Favorites are created when you log in and add one or more addresses t...

Страница 88: ...or single pages or paper that cannot be fed using the duplex automatic document feeder use the document glass Lift the document feeder then place the original document face down in the upper left corn...

Страница 89: ...avorite that you want to delete 6 Touch Done Removing Personalizations using the Embedded Web Server Note Personalizations include your customized Home screen Personal 1 Touch Apps and Personal Favori...

Страница 90: ...n touch the name of the print job 3 Do one of the following To pause the print job touch Pause To resume the print job touch Resume To delete the print job touch Delete At the prompt touch Delete Note...

Страница 91: ...the printable area of the new media can be cut off To delete the print job touch Delete At the prompt touch Delete 5 To return to the Home screen press the Home button Managing Special Job Types Spec...

Страница 92: ...int a Secure Print job refer to Printing a Secure Print Job Printing a Secure Print Job 1 In your software application access the print settings For most software applications press CTRL P for Windows...

Страница 93: ...t or delete a Personal Print job You can print all jobs in the list at once delete an individual job or delete all jobs in the list After a Personal Print job is printed it is deleted automatically To...

Страница 94: ...he job before printing any remaining copies After a Sample Set job is printed it is deleted automatically To print a Sample Set refer to Printing a Sample Set Printing a Sample Set 1 In your software...

Страница 95: ...lowing To pause the print job click Pause To resume the print job click Resume To delete the print job click Delete At the prompt click Delete 5 To return to the Home screen click Home Submitting Jobs...

Страница 96: ...er left corner of the document glass For single multiple or 2 sided pages use the duplex automatic document feeder Remove any staples and paper clips from the pages Insert the original documents face...

Страница 97: ...tton 2 Touch Copy 3 Touch Page Layout 4 Select the required number of pages per side 5 To change the Original Orientation touch Page Layout then touch More Select Portrait or Landscape Note The Origin...

Страница 98: ...or other bound documents use the document glass only Do not place bound original documents in the duplex automatic document feeder To set up book copying 1 At the printer control panel press the Home...

Страница 99: ...ge Shift accordingly Touch the appropriate fields To adjust the image shift move the slider Independent Sides This option allows you to position the images on Side 1 and Side 2 independently of each o...

Страница 100: ...he number of sheets touch Plus icon or Minus icon as needed 11 Touch OK Adding a Front Cover You can print the first page of your copy job on different paper such as colored or heavyweight paper The p...

Страница 101: ...5 To specify the orientation of the original document touch Original Orientation then select an option 6 Touch OK Printing a Sample Copy Sample Copy allows you to print a test copy of a job to inspect...

Страница 102: ...ate a comment touch the edit icon for Not in Use Enter the required text then touch OK c To adjust which pages contain the selected annotation touch Apply To then select the required option d Touch OK...

Страница 103: ...setup The list of features can be customized and some features can be hidden from view For more information about adding and customizing apps refer to Customizing or Personalizing the Feature List For...

Страница 104: ...ng the Feature List For information about all the app features and available settings refer to Apps Features Sending a Scanned Image in an Email To send a scanned image in an email 1 At the printer co...

Страница 105: ...ed format To create a searchable file or to add password protection from the File format select More To change the subject line touch Subject enter a new subject line using the touch screen keypad the...

Страница 106: ...om office VLB71XXdocs To scan an image and send it to an email address 1 Load the original document on the document glass or into the duplex automatic document feeder 2 At the control panel touch the...

Страница 107: ...ach user If you want to scan to a shared folder on the network create a shared folder on your network with read and write access privileges Scanning to a Home Folder Note If LDAP Network Authenticatio...

Страница 108: ...t appear enable the feature or contact the system administrator To save the scanned file to a folder on the USB Flash drive navigate to the desired directory Touch OK 5 To save the scanned document wi...

Страница 109: ...canning from the document glass when prompted to finish touch Done or to scan another page touch Add Page Note If you are scanning a document from the automatic document feeder a prompt does not appea...

Страница 110: ...hare this folder 5 Click Permissions 6 Select the Everyone group and verify that all permissions are enabled 7 Click OK Note Remember the Share name for later use 8 Click OK again 9 Click Close Sharin...

Страница 111: ...rectory or folder For example to save scanned files to a shared folder named scans type scans Document Path Enter the path of the folder on the SMB server For example to save the scanned files to a fo...

Страница 112: ...Microsoft Office 2007 and newer do not support this feature 1 Load the original document on the document glass or in the duplex automatic document feeder 2 At your computer open the application into...

Страница 113: ...you send a fax from the printer control panel the document is scanned and transmitted to a fax machine using a dedicated telephone line You can use the Fax feature to fax documents to a fax number or...

Страница 114: ...nal documents Use the document glass for single pages or paper that cannot be fed using the duplex automatic document feeder Lift the document feeder then place the original document face down in the...

Страница 115: ...If you are scanning from the document glass when prompted do one of the following To complete the job and return to the Fax app touch Done To scan another page load a new original document on the doc...

Страница 116: ...any Name Fax Line setting To send a cover sheet with a fax 1 At the printer control panel press the Home button then touch Fax 2 Add fax recipient names and adjust fax settings as needed For details r...

Страница 117: ...ystem Administrator Guide at www xerox com office VLB71XXdocs To forward a fax to an email address 1 At the printer control panel press the Home button 2 Log in as Admin Note For information on loggin...

Страница 118: ...e fax modem speaker temporarily This feature is helpful to dial international numbers or to use phone systems that require you to wait for a specific audio tone To send a fax manually 1 At the printer...

Страница 119: ...n on your computer Sending a Fax from Windows Applications You can use the print driver to send a fax from Windows applications You can use the fax window to enter recipients create a cover page with...

Страница 120: ...printer 3 To access the fax driver settings click Preview select Xerox Features then from Job Type list select Fax 4 To add a recipient in the Fax window click the Recipients tab then click the Add Re...

Страница 121: ...ll the app features and available settings refer to Apps Features Sending a Server Fax To send a server fax 1 At the printer control panel press the Home button 2 To clear previous app settings touch...

Страница 122: ...touch Cancel then touch Delete Note If you are scanning a document from the automatic document feeder a prompt does not appear 10 To return to the Home screen press the Home button Sending a Delayed...

Страница 123: ...ocument and store the scanned file on a USB Flash drive The Scan to USB function produces scans in jpg pdf pdf a xps and tif file formats If the device is in Power Saver mode press the Power Wake butt...

Страница 124: ...h the Print job to wake the device press the Power Wake button Only USB Flash drives formatted to the typical FAT32 file system are supported 1 Insert the USB Flash drive into the USB memory port on t...

Страница 125: ...ox device control panel press the Home button 3 Touch PrintByXerox 4 Enter your email address then touch Save 5 On the Enter password screen use the onscreen keyboard to enter your password then touch...

Страница 126: ...vyweight paper 81 128 g m2 and a maximum of 85 sheets Note If you are scanning multiple segments use the same input area for each segment Scan all segments using the document glass or scan all segment...

Страница 127: ...ings for Windows select Printer Properties Print Options or Preferences For Macintosh select Xerox Features The title of the button can vary depending on your application 6 Modify the print driver set...

Страница 128: ...ot have to change them every time you print For example if you want to print on both sides of the paper for most jobs specify 2 sided printing in Printing Preferences 1 Navigate to the list of printer...

Страница 129: ...nces window The title of the button can vary depending on your application 3 Click a tab in the Printing Preferences window then make selections 4 To save and close the Printing Preferences window cli...

Страница 130: ...Related settings click Devices and printers Note If the Control Panel icon does not appear on the desktop right click the desktop then select Personalize Control Panel Home Devices and Printers 2 For...

Страница 131: ...installed select finishing options in the Xerox Features of the print driver To select finishing options in the Macintosh print driver 1 Open the Print dialog box then click Show Details Click the app...

Страница 132: ...PD LPR port 515 or lp to port 9100 Xerox printers can communicate using either protocol Xerox Printer Manager Xerox Printer Manager is an application that allows you to manage and print to multiple pr...

Страница 133: ...in the OS package manager refer to the manual included with the package For example man xeroxprtmgr Launching Xerox Printer Manager To launch Xerox Printer Manager do one of the following tasks For U...

Страница 134: ...tion Customization Object is a lookup table that the host print transform HPT uses to translate AS 400 commands to the equivalent PCL code that is specific to a particular printer A WSCO file can modi...

Страница 135: ...can obtain a free download from the Google Play Store Wireless devices must join the same wireless network as the printer The name and location of your printer appears in a list of MOPRIA enabled prin...

Страница 136: ...Delete All For Secure Jobs touch Personal Secure Jobs Touch the folder enter the passcode number then touch OK To print a Secure Job touch the job To print or delete all the jobs in the folder touch...

Страница 137: ...nt a Secure Print job refer to Printing a Secure Print Job Printing a Secure Print Job 1 In your software application access the print settings For most software applications press CTRL P for Windows...

Страница 138: ...int or delete a Personal Print job You can print all jobs in the list at once delete an individual job or delete all jobs in the list After a Personal Print job is printed it is deleted automatically...

Страница 139: ...pies After a Sample Set job is printed it is deleted automatically Printing a Sample Set 1 In your software application access the print settings For most software applications press CTRL P for Window...

Страница 140: ...he page image is cropped If the original size is smaller than the output size extra space appears around the page image Manually Scale scales the document by the amount entered in the percentage box b...

Страница 141: ...rast to produce your document The Windows PostScript print driver and the Macintosh print drivers provide the widest range of controls on the Image Options tab Lightness The Lightness feature allows y...

Страница 142: ...ions tab For Macintosh in the Print window in Xerox Features Booklet Layout is on the Paper Output list When you print booklets using the Windows PostScript or Macintosh driver you can specify the gut...

Страница 143: ...nated pages within a document Adding an insert after designated pages within a document separates sections or acts as a marker or placeholder Ensure that you specify the paper to use for the insert pa...

Страница 144: ...Some combinations of 2 sided printing with certain paper types and sizes can produce unexpected results Printing Watermarks for Windows A watermark is special purpose text that can be printed across o...

Страница 145: ...s the watermark over the text and graphics in the document 7 Click Pages then select the pages to print the watermark Print on All Pages This option prints the watermark on all pages of your document...

Страница 146: ...on the first page of the document in the top left margin Print ID in Margins All Pages This option prints the job identification in the top left margin on every page of the document Printing Mirror Im...

Страница 147: ...s for the Windows V3 print driver perform the following 1 In the print driver click the Printing Options tab 2 For Paper click the arrow then select Other Size Advanced Paper Size Output Paper Size Ne...

Страница 148: ...menu appears at the control panel 4 Touch the current paper size setting then from the list touch Custom 5 In the Custom Paper Size screen enter the height and width of the new paper size 6 To save t...

Страница 149: ...Print then select your printer 3 In the Print dialog box click Printer Properties 4 On the Printing Options tab from the Paper list select Other Size 5 To select a custom paper size select Fit to New...

Страница 150: ...etterhead pre printed cardstock labels and envelopes Ensure that you use the correct media for the tray that you are loading Labels are affixed inside each tray to show the correct orientation for loa...

Страница 151: ...your local representative for details Paper Storage Guidelines Storing your paper and other media properly contributes to optimum print quality Store paper in dark cool relatively dry locations Most...

Страница 152: ...Lightweight Glossy Cardstock Reloaded 106 169 g m2 Cardstock Cardstock Reloaded Glossy Cardstock Glossy Cardstock Reloaded 170 216 g m2 Heavyweight Cardstock Heavyweight Cardstock Reloaded Heavyweight...

Страница 153: ...t Labels 106 169 g m2 170 216 g m2 Envelopes 75 90 g m2 Tray 6 Bond Hole Punched Letterhead Plain Plain Reloaded Pre Printed Recycled Custom 60 105 g m2 Lightweight Cardstock Lightweight Cardstock Rel...

Страница 154: ...in A5 148 x 210 mm 5 8 x 8 3 in A4 210 x 297 mm 8 3 x 11 7 in A4 Oversized 223 x 297 mm 8 8 x 11 7 in 215 x 315 215 x 315 mm 8 5 x 12 4 in A3 297 x 420 mm 11 7 x 16 5 in B6 125 x 176 mm 4 9 x 6 9 in...

Страница 155: ...8 3 x 11 7 in A4 Oversized 223 x 297 mm 8 8 x 11 7 in 215 x 315 215 x 315 mm 8 5 x 12 4 in A3 297 x 420 mm 11 7 x 16 5 in B5 176 x 250 mm 6 9 x 9 8 in B4 250 x 353 mm 9 8 x 13 9 in Statement 140 x 21...

Страница 156: ...y When a paper tray is set to Dedicated mode the control panel prompts you to load a specific paper size type and color Note To configure tray settings log in as the system administrator For details r...

Страница 157: ...the tray configuration no tray adjustment is needed 1 Remove any paper from the tray 2 Pinch the guide lock on the front paper guide then slide the paper guide to the required paper size 3 To lock the...

Страница 158: ...bs at the bottom of the spacer plate into the slots in the bottom of Tray 6 that correspond with the paper size 4 Slide the top of the spacer plate down to engage the peg on the back of the tray into...

Страница 159: ...teps for the spacer plate at the front of Tray 6 7 On the top of the side gate locate the pin 8 Lift the pin then guide it to the desired paper size in the slot 9 Release the pin to lock the side gate...

Страница 160: ...ully Adjustable you can confirm or change the media settings The tray guides automatically detect the size of paper that is loaded When trays are configured as Dedicated the control panel displays the...

Страница 161: ...r guides 4 Flex the sheets back and forth and fan them then align the edges of the stack on a level surface This procedure separates any sheets that are stuck together and reduces the possibility of j...

Страница 162: ...toward the back Load hole punched paper with the holes to the left For short edge feed Insert letterhead and pre printed paper face up with the top edge to the left Load hole punched paper with the h...

Страница 163: ...r size type and color 9 To confirm the settings touch OK To change the paper settings when the tray is set to Dedicated mode refer to Configuring Tray Settings Loading Paper in Trays 3 and 4 of the Ta...

Страница 164: ...reduces the possibility of paper jams Note To avoid paper jams and misfeeds do not remove paper from its packaging until necessary 3 Stack the paper against the left rear corner of the tray Insert le...

Страница 165: ...tray is set to Dedicated mode refer to Configuring Tray Settings Loading Paper in the Bypass Tray The Bypass Tray supports the widest variety of media types It is intended primarily for small quantit...

Страница 166: ...d forth and fan them then align the edges of the stack on a level surface This procedure separates any sheets that are stuck together and reduces the possibility of jams Note To avoid jams and misfeed...

Страница 167: ...d paper with the holes to the right For 2 sided printing load letterhead or pre printed paper face up with the top edge toward the back Load hole punched paper with the holes to the left For short edg...

Страница 168: ...he printer to jam 6 Adjust the width guides until they touch the edges of the paper 7 To change the settings to match the loaded paper at the control panel select the correct options for paper size ty...

Страница 169: ...g it into the paper trays This procedure separates any sheets of paper that are stuck together and reduces the possibility of paper jams Note To avoid paper jams and misfeeds do not remove paper from...

Страница 170: ...epends on the quality and construction of the envelopes If you do not get the desired results try another envelope brand Maintain constant temperatures and relative humidity Store unused envelopes in...

Страница 171: ...y 1 Open the bypass tray 2 Move the width guides to the edges of the tray Note If you do not load envelopes in the bypass tray right after they have been removed from the packaging they can bulge To a...

Страница 172: ...button b Touch Device Paper Trays c In the Paper Trays menu touch the bypass tray icon d To select an envelope size touch the current size setting then select the required size Note When you select a...

Страница 173: ...elopes Ensure that the maximum fill line is visible or that there are no more than 50 envelopes loaded in the tray For C5 envelopes with the flap on a short edge Load envelopes face down with the flap...

Страница 174: ...use Return any unused label sheets to the original packaging and reseal it Do not store labels in extremely dry or humid conditions or extremely hot or cold conditions Storing labels in extreme condi...

Страница 175: ...length or width paper guide 5 Load labels in the tray For long edge feed insert labels face up with the top edge toward the back For short edge feed insert labels face up with the top edge to the left...

Страница 176: ...o change the paper settings when the tray is set to Dedicated mode refer to Configuring Tray Settings 9 To confirm the settings touch OK 10 To return to the Home screen press the Home button Loading L...

Страница 177: ...sure that the paper type is set to Labels Note To change the paper settings when the tray is set to Dedicated mode refer to Configuring Tray Settings 5 To confirm the settings touch OK 6 To return to...

Страница 178: ...imum fill line Overfilling can cause paper jams 4 Adjust the width guides until they touch the edges of the paper 5 At the control panel select the correct paper size type and color Ensure that the pa...

Страница 179: ...p with the top edge toward the back Stack the labels against the right side of the tray as shown Note Do not load paper above the maximum fill line Overfilling can cause paper jams 4 Close the tray do...

Страница 180: ...aning materials only as directed in this documentation Caution Do not place anything on top of the printer Caution Do not open covers and doors during printing Do not leave the covers and doors open f...

Страница 181: ...Xerox Glass Cleaner 5 Wipe the white underside of the document cover until it is clean and dry 6 Close the document cover Cleaning the Second Side Scanning Lens Assembly The second side scanning lens...

Страница 182: ...the cloth with a small amount of neutral detergent then wipe the parts dry with a dry soft cloth Caution To prevent damage to the film around the mirrored glass do not press heavily on the mirrored gl...

Страница 183: ...dust or stains with a clean dry lint free cloth WARNING Never touch a caution labeled area in the fuser You can get burned If a sheet of paper is wrapped around the inside of the fuser do not try to...

Страница 184: ...nt door of the printer 3 Remove the print head LED lens cleaning rod from inside the front door 4 Slowly push the cleaning rod into the printer until it stops then pull it out Repeat this action two m...

Страница 185: ...rgins exactly where you want You can specify the image position on both the front and back sides of the paper for each installed paper tray Verifying Paper Registration 1 At the printer control panel...

Страница 186: ...de 2 10 For Side 2 measure the distance of the printed image from the top bottom left and right edges 11 If the image is centered no adjustment is required If the image is not centered adjust the pape...

Страница 187: ...te the registration corrections 10 To return to the Home screen press the Home button Adjusting the Altitude Use Adjust Altitude to adjust the altitude to match that of the location where the printer...

Страница 188: ...eller or go to www xerox com office VLB71XXsupplies Caution Use of non Xerox supplies is not recommended The Xerox Warranty Service Agreement and Total Satisfaction Guarantee do not cover damage malfu...

Страница 189: ...l then touch Enter Email Address 3 Use the touch screen keyboard to enter an email address or select an entry from the Address Book then touch OK 4 Add more email addresses if necessary 5 To customize...

Страница 190: ...one R Ro ou ut tiin ne e M Ma aiin nt te en na an nc ce e I It te em ms s Routine maintenance items are printer parts that have a limited life and require periodic replacement Replacements can be part...

Страница 191: ...lacing Staples in the Integrated Office Finisher If the printer has an optional finisher installed the control panel displays a message when a staple cartridge is empty and needs replacement Locate th...

Страница 192: ...staple cartridge then push the rear side into the cartridge 6 Grasp the new staple cartridge by the orange handle then insert the cartridge into the stapler until it clicks 7 Close the finisher front...

Страница 193: ...pull the stapler toward you until it stops 3 Push the stapler assembly to the right as shown 4 To remove the staple cartridge grasp the orange handle then pull it firmly toward you 5 Pinch both sides...

Страница 194: ...asp the new staple cartridge by the orange handle then insert the cartridge into the stapler assembly until it clicks 8 Close the finisher front door Replacing Staples in the Booklet Maker of the Offi...

Страница 195: ...finisher 4 Hold the tabs on both sides of the new staple cartridge and insert the cartridge into the original position in the finisher Note If you have trouble inserting the cartridge ensure that the...

Страница 196: ...venience Stapler 1 To open the stapler head rotate the stapler head 180 degrees counterclockwise 2 Grip the staple cartridge and pull it out of the stapler head 3 Unpack the new staple cartridge Remov...

Страница 197: ...stapler head 180 degrees clockwise Emptying the Hole Punch Waste Container When the hole punch waste container is full a message appears on the control panel Emptying the Hole Punch Waste Container in...

Страница 198: ...2 Pull out the hole punch waste container 3 Empty the container 4 Insert the container all the way into the finisher 5 Close the finisher transport top cover 198...

Страница 199: ...at www xerox com office VLB71XXdocs To view the billing information for your printer 1 At the printer control panel press the Home button 2 Touch Device Billing Usage 3 To view more details touch Usa...

Страница 200: ...Agreement or Total Satisfaction Guarantee do not cover damage to the printer caused by improper moving After moving the printer 1 Reinstall any parts that you removed 2 Reconnect the printer to the c...

Страница 201: ...he Error History Report For details refer to Printing the Error History Report If the error persists contact your Xerox representative The printer is connected to an uninterruptible power supply Power...

Страница 202: ...does not flash once after you send a print job check the connection between the printer and the computer There is a network connectivity issue If the printer is connected to a network 1 Verify that t...

Страница 203: ...monstration Print For details refer to Information Pages If the page prints at the rated speed of the printer there could be a network or printer installation issue For more help contact the system ad...

Страница 204: ...T Tr ra ay y D Do oe es s N No ot t C Cllo os se e Probable Causes Solutions The paper tray does not close fully Some debris or an object is blocking the tray Power off the printer then remove the obs...

Страница 205: ...t 40 minutes for the fuser to cool Try to remove the jam after the printer has cooled If the error persists contact your Xerox representative Caution Do not attempt to clear any paper jams using tools...

Страница 206: ...er that is curled torn moist creased or folded To separate the sheets before loading into the tray fan the paper Do not load paper above the maximum fill line After loading paper in the trays adjust t...

Страница 207: ...the lever and open the top cover of the document feeder 2 If the original document is not caught in the entry to the document feeder pull the document straight out in the direction shown 3 Close the t...

Страница 208: ...anel 9 After clearing a paper jam from the Duplex Automatic Document Feeder reload the entire original document including the pages already scanned The printer automatically skips the scanned pages an...

Страница 209: ...rify or change the paper settings To confirm the same paper size type or color touch OK To select a new paper size type or color touch the current setting then select a new setting When finished touch...

Страница 210: ...same paper size type or color touch OK To select a new paper size type or color touch the current setting then select a new setting When finished touch OK 6 To return to the Home screen press the Hom...

Страница 211: ...ner can adhere to the transfer roller This does not affect print quality 4 If paper is jammed in the Fuser remove the paper from areas A1 and A2 as shown Note If the paper is torn remove all torn piec...

Страница 212: ...area Note If the paper is torn remove all torn pieces from the printer 3 For paper jammed in the upper position look inside the printer locate the paper then remove it Note If the paper is inaccessibl...

Страница 213: ...a around the Fuser can be hot Use caution to avoid injury Caution Do not touch the transfer roller Touching the roller can reduce image quality 2 At Door C lift the release lever then open Door C 3 Re...

Страница 214: ...n the edges and then reload the paper The paper is moist from humidity Remove the paper from the paper tray Load new dry paper into the tray Too much static electricity is present Load a new ream of p...

Страница 215: ...Paper The feed rollers are dirty With a clean lint free cloth moistened with water wipe the feed rollers until they are clean For details refer to Cleaning the Printer Label and Envelope Misfeeds Pro...

Страница 216: ...Solutions Using paper of the wrong size thickness or type Use paper of the correct size thickness or type For details refer to Supported Standard Paper Sizes for Automatic 2 Sided Printing Paper is l...

Страница 217: ...he jammed paper Note If the paper is torn remove all torn pieces of jammed paper from the printer 3 Rotate the green knob in the direction shown then carefully remove the jammed paper 4 Close the fini...

Страница 218: ...the Office Finisher Top Cover 1 Pull up the lever on the top cover then open the top cover 2 Remove the jammed paper Note If the paper is torn remove all torn pieces of the jammed paper from the finis...

Страница 219: ...Clle ea ar riin ng g S St ta ap plle e J Ja am ms s iin n t th he e I In nt te eg gr ra at te ed d O Of ff fiic ce e F Fiin niis sh he er r Caution Do not perform this procedure while the printer is...

Страница 220: ...ed staples then push the clamp in the direction shown until the clamp clicks into the locked position WARNING The points of the jammed staples are sharp Remove the jammed staples carefully 6 Grasp the...

Страница 221: ...f fiic ce e F Fiin niis sh he er r Clearing Staple Jams in the Office Finisher Caution Do not perform this procedure while the printer is printing 1 Open the finisher front door 2 Pull the stapler ass...

Страница 222: ...loose staples then remove the staples 6 To open the staple cartridge clamp pull the clamp in the direction shown 7 Remove the jammed staples then push the clamp in the direction shown until the clamp...

Страница 223: ...the finisher front door Clearing Booklet Staple Jams in the Office Finisher Caution Do not perform this procedure while the printer is printing 1 Open the booklet maker side cover 2 If the staple cart...

Страница 224: ...d staples carefully 5 Hold the tabs on both sides of the staple cartridge and insert the cartridge into the original position in the finisher Note If you have trouble inserting the cartridge ensure th...

Страница 225: ...The Xerox Total Satisfaction Guarantee is available in the United States and Canada Coverage could vary outside these areas Contact your local Xerox representative for details Note To ensure consisten...

Страница 226: ...with windows metal clasps side seams or adhesives with release strips Padded envelopes Plastic media Transparencies S So ollv viin ng g P Pr riin nt t Q Qu ua alliit ty y P Pr ro ob blle em ms s When...

Страница 227: ...For example change Plain to Lightweight Cardstock In the print driver Printing Options tab select Paper then change the Other Type setting Verify that the paper is the correct size type and weight If...

Страница 228: ...iver In the print driver Printing Options tab select Paper then change the Other Type setting Replace the Drum Cartridge Auger marks appear on the printed output To check the toner level check the con...

Страница 229: ...elope The top margin is incorrect Ensure that the paper is loaded properly Ensure that the margins are set correctly in the application you are using Adjust the paper registration For details see Adju...

Страница 230: ...you cannot send or receive faxes correctly refer to the following tables P Pr ro ob blle em ms s S Se en nd diin ng g F Fa ax xe es s Symptoms Causes Solutions The document is not scanned using the d...

Страница 231: ...Request that the sender resent the fax The sender loaded the pages incorrectly Contact the sender The printer answers the call but does not accept incoming data Not enough memory If the job contains s...

Страница 232: ...C Cu ur rr re en nt t E Er rr ro or rs s o on n t th he e C Co on nt tr ro oll P Pa an ne ell When an error condition occurs a message appears on the control panel to inform you of the problem Error...

Страница 233: ...r riig gh ht t 2022 Xerox Corporation All rights reserved Xerox VersaLink Xerox Extensible Interface Platform and Global Print Driver are trademarks of Xerox Corporation in the United States and or ot...

Страница 234: ...n for best results your screen resolution should be set to 1366 x 768 For Administrators From the printer you can log into the Administrator mode From the select Administrator mode you can do the foll...

Отзывы: